2 Comments

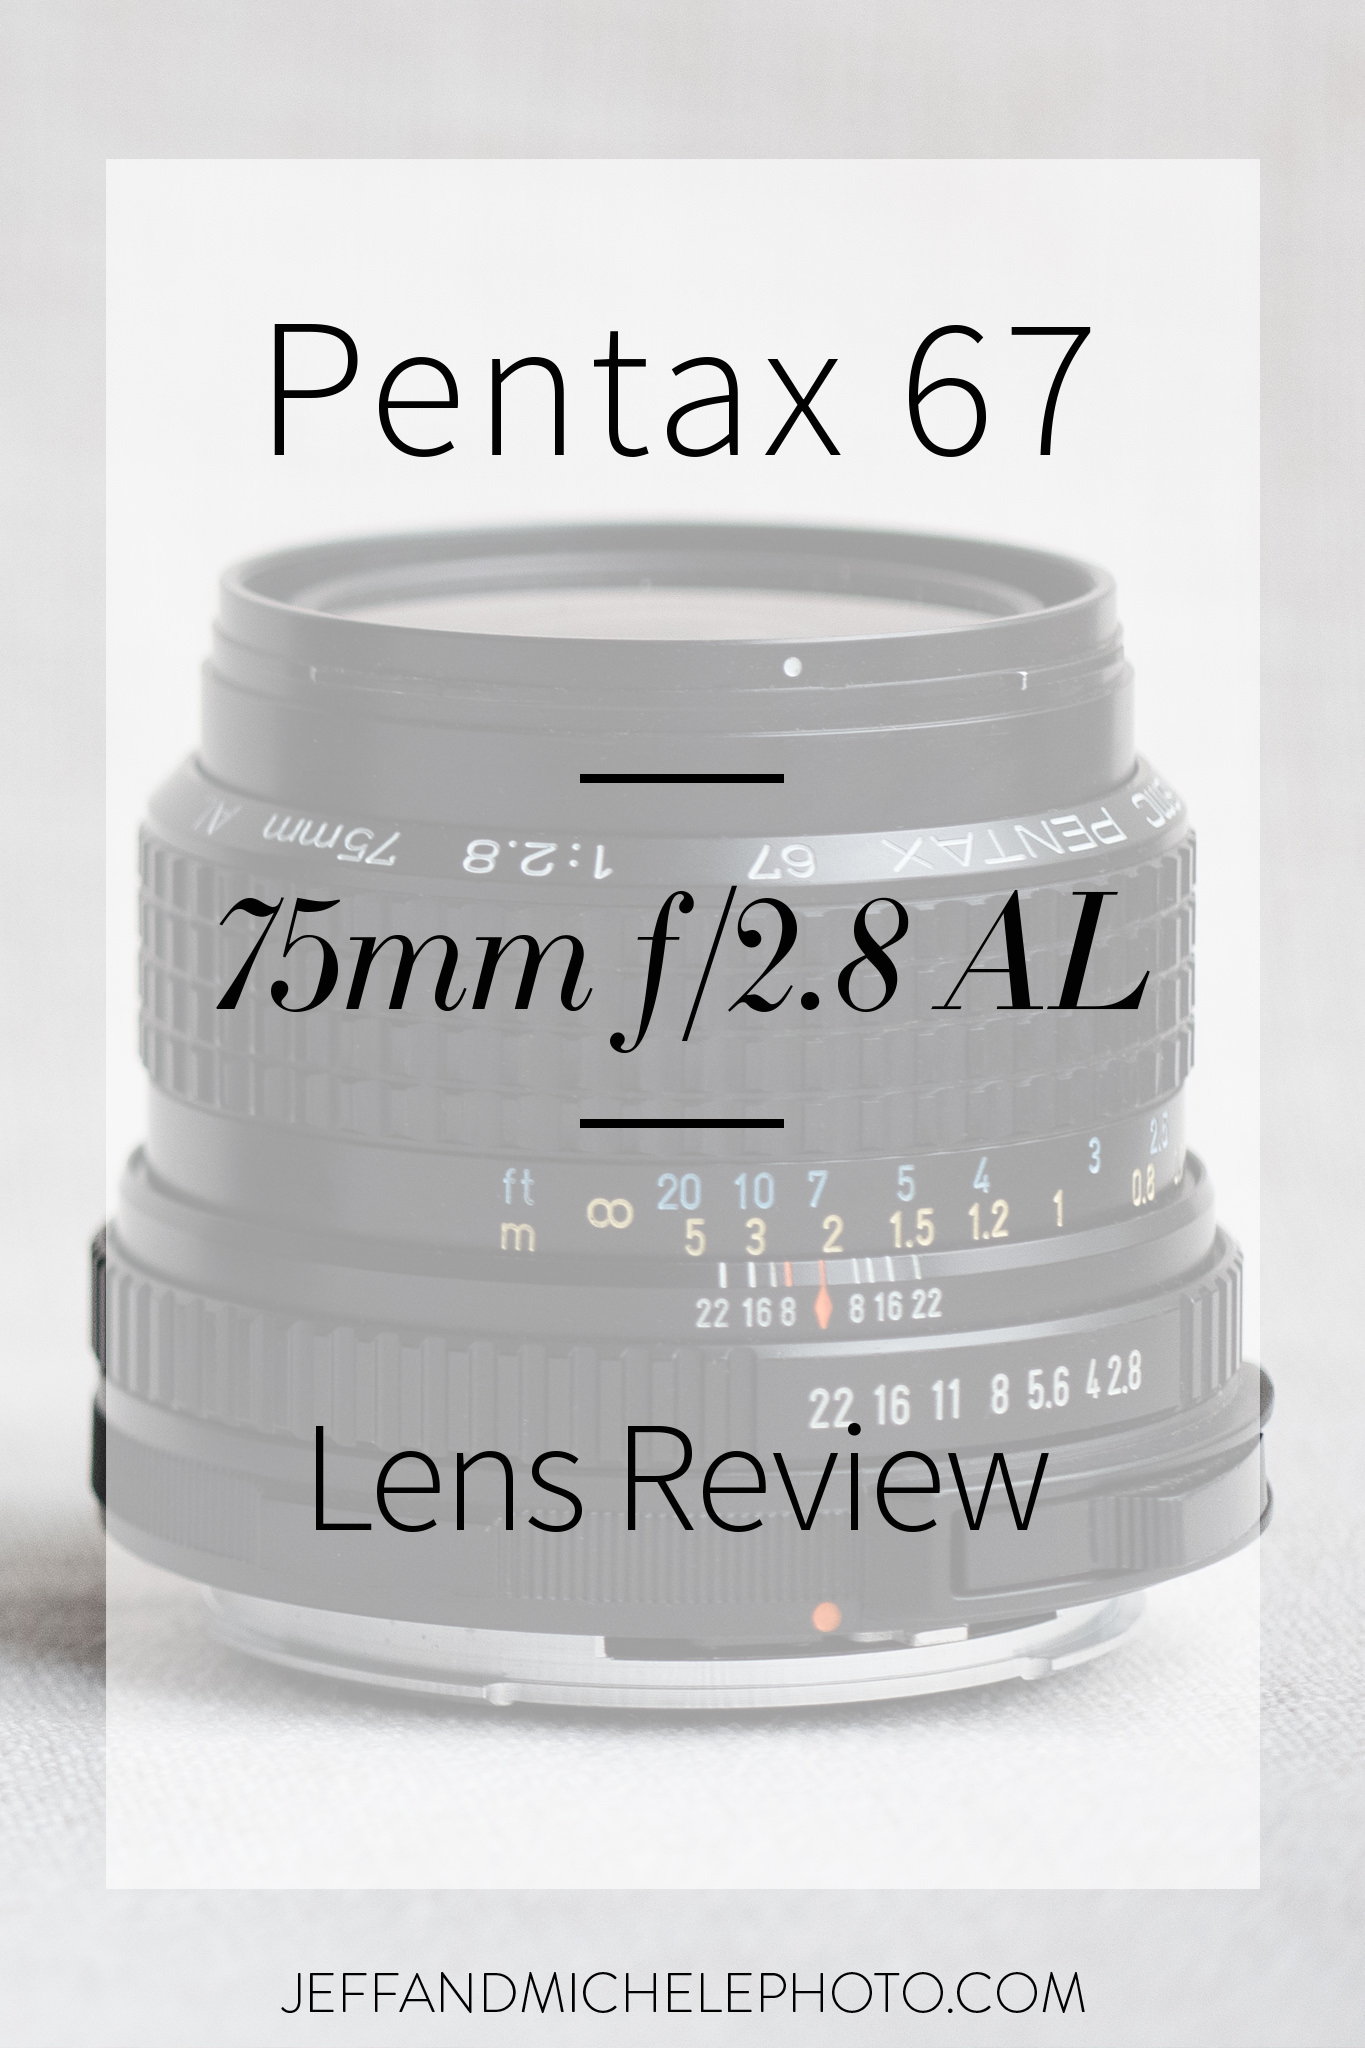
Pentax 67 SMC 75mm f/2.8 AL Lens Review

Photo of Overlay for Pentax 67 75mm f/2.8 AL Lens Review

Note: This post is part of our "Learn Blog" for photographers. For workshops, coaching, and other resources designed to help grow your skills as a photographer click here (after you read the article, of course)!  To be transparent, all links are paid advertising, as a portion of any purchase made while using these links is credited to us. Please, consider using our links to help support what we do! Thank you!


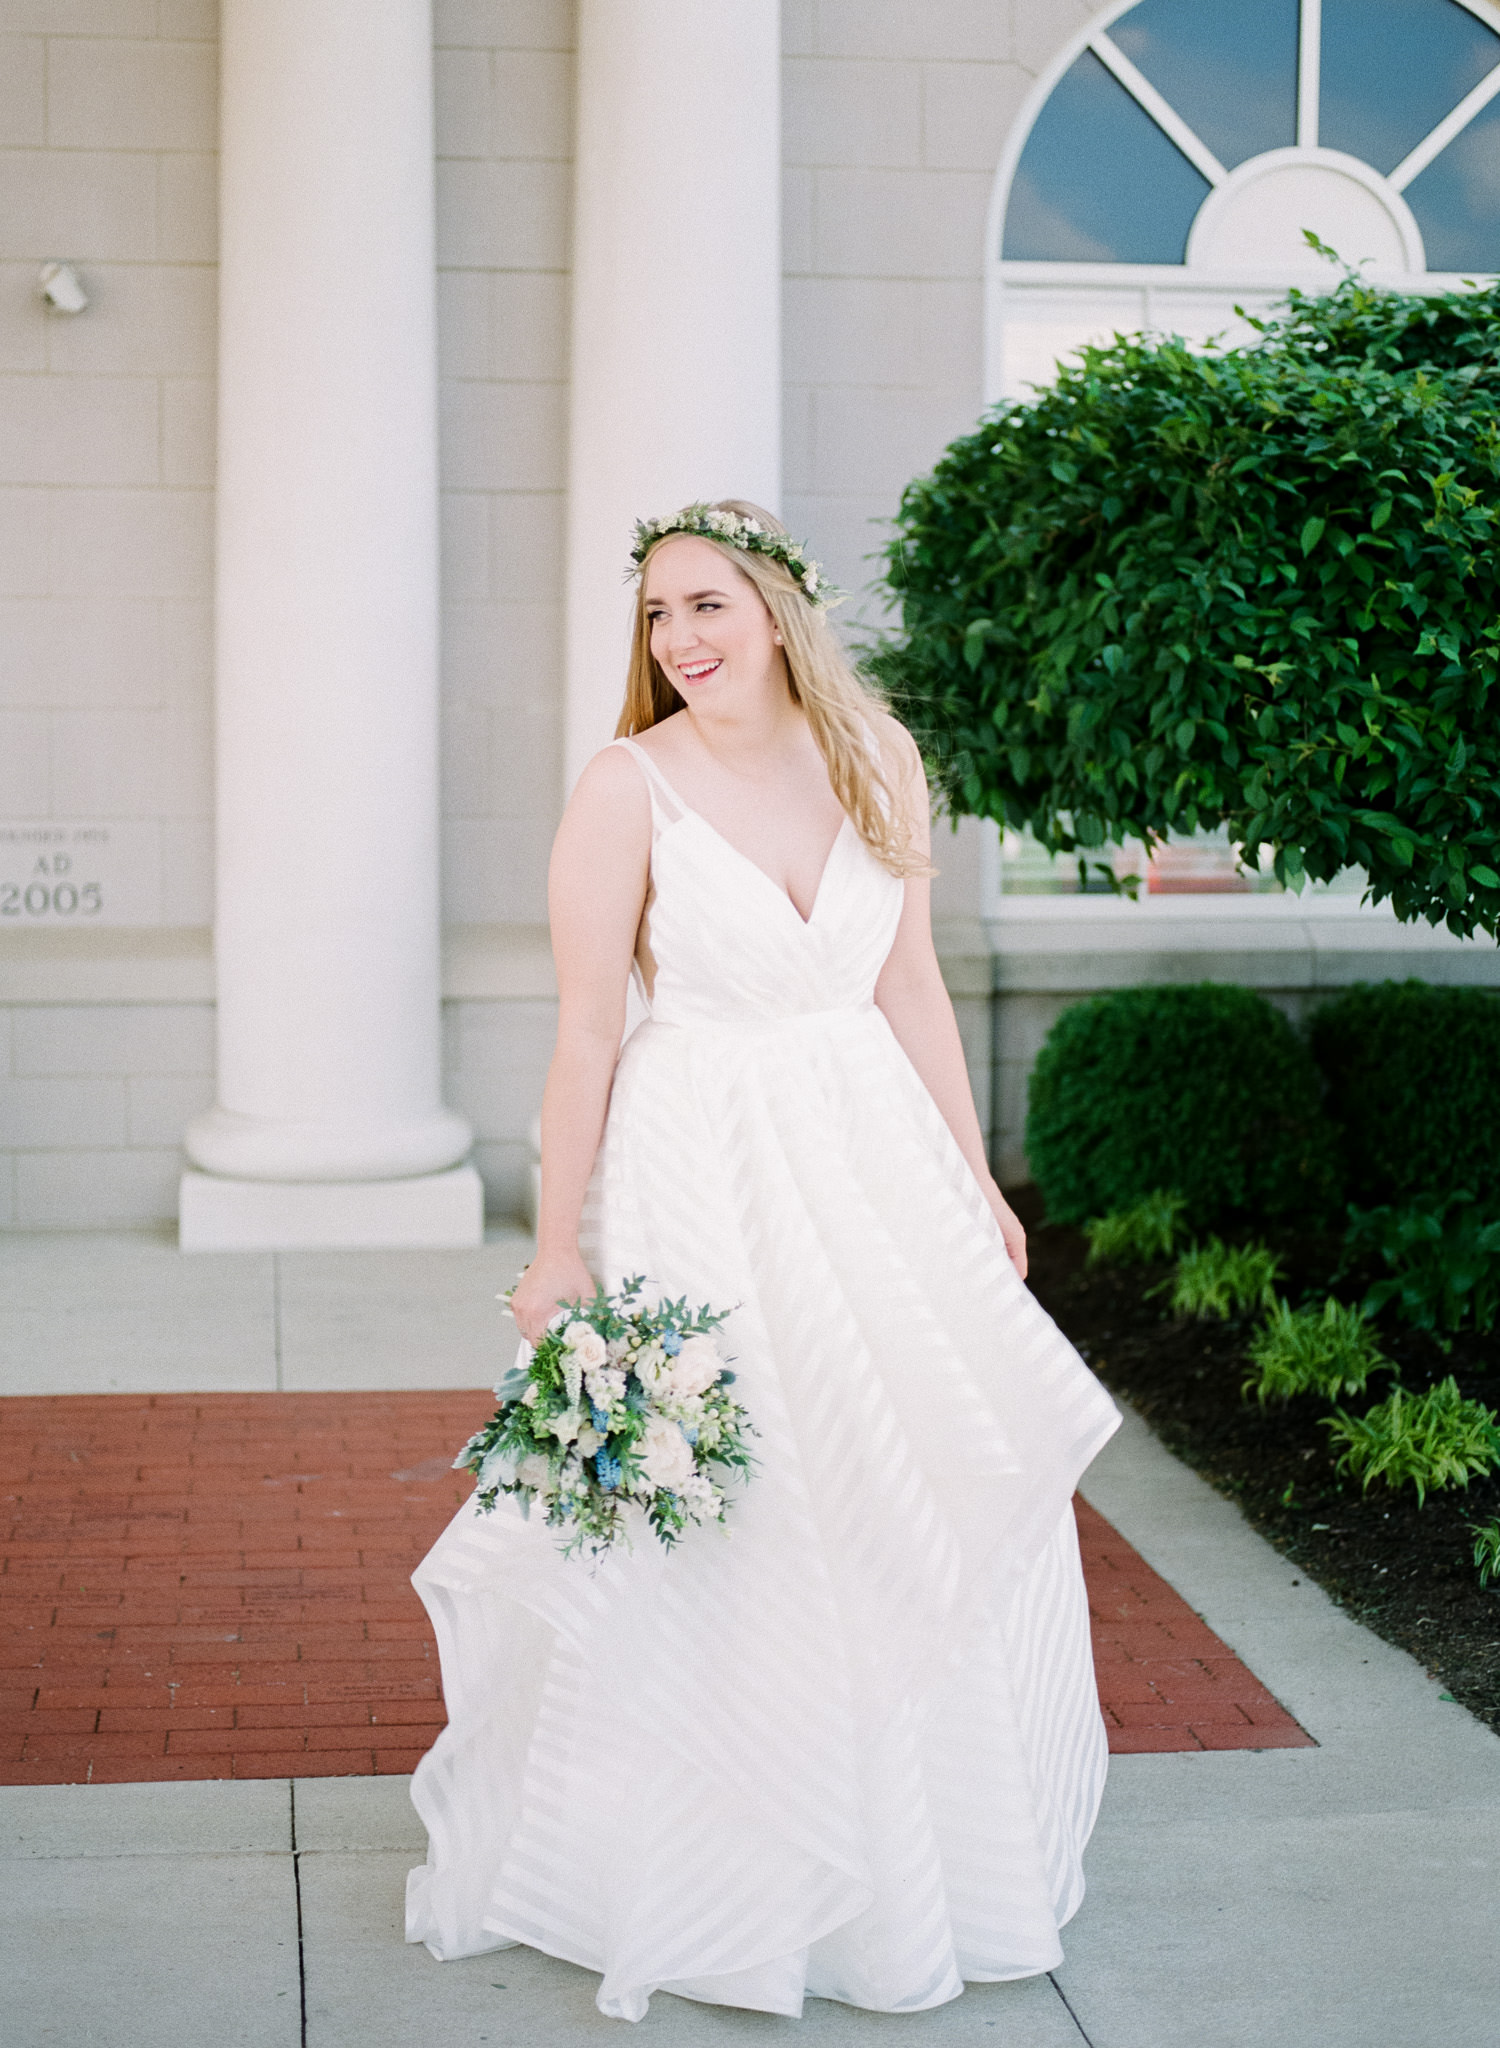
Image of boy taken with Pentax 67 75mm f/2.8 AL lens on Pentax 67

Image of boy taken with Pentax 67 75mm f/2.8 AL lens on Pentax 67

The infamous 75mm 2.8 AL; a lens whose magic and notoriety are only matched by it's price-tag. When lenses reach the price-point which the 75mm AL has (currently between $1300-1700 USD), they garner a bit of curiosity. "Is it worth it?" is probably the most oft-raised question.  

Well, I happened to stumble upon a particularly modest-priced sample which I could not pass up. So, now that I've had some time with this specimen, it's time for my Pentax 67 75mm AL f/2.8 review. 

History of the Pentax 75mm AL

Image of downtown Louisville Mercer Building taken with Pentax 67 75mm f/2.8 AL lens on Pentax 67

Image of downtown Louisville Mercer Building taken with Pentax 67 75mm f/2.8 AL lens on Pentax 67

The 75mm AL was released in 2001 as an improvement to the 3rd generation, 1989 released SMC 75mm f/4.5. AL stands for Aspheric Lens. Among the improvements introduced with the AL version were reduced distortion, smaller size, lighter weight, improved minimum focusing distance, and larger max aperture of f/2.8.

Build

Image of the SMC Pentax 67 75mm f/2.8 AL Lens

Image of the SMC Pentax 67 75mm f/2.8 AL Lens

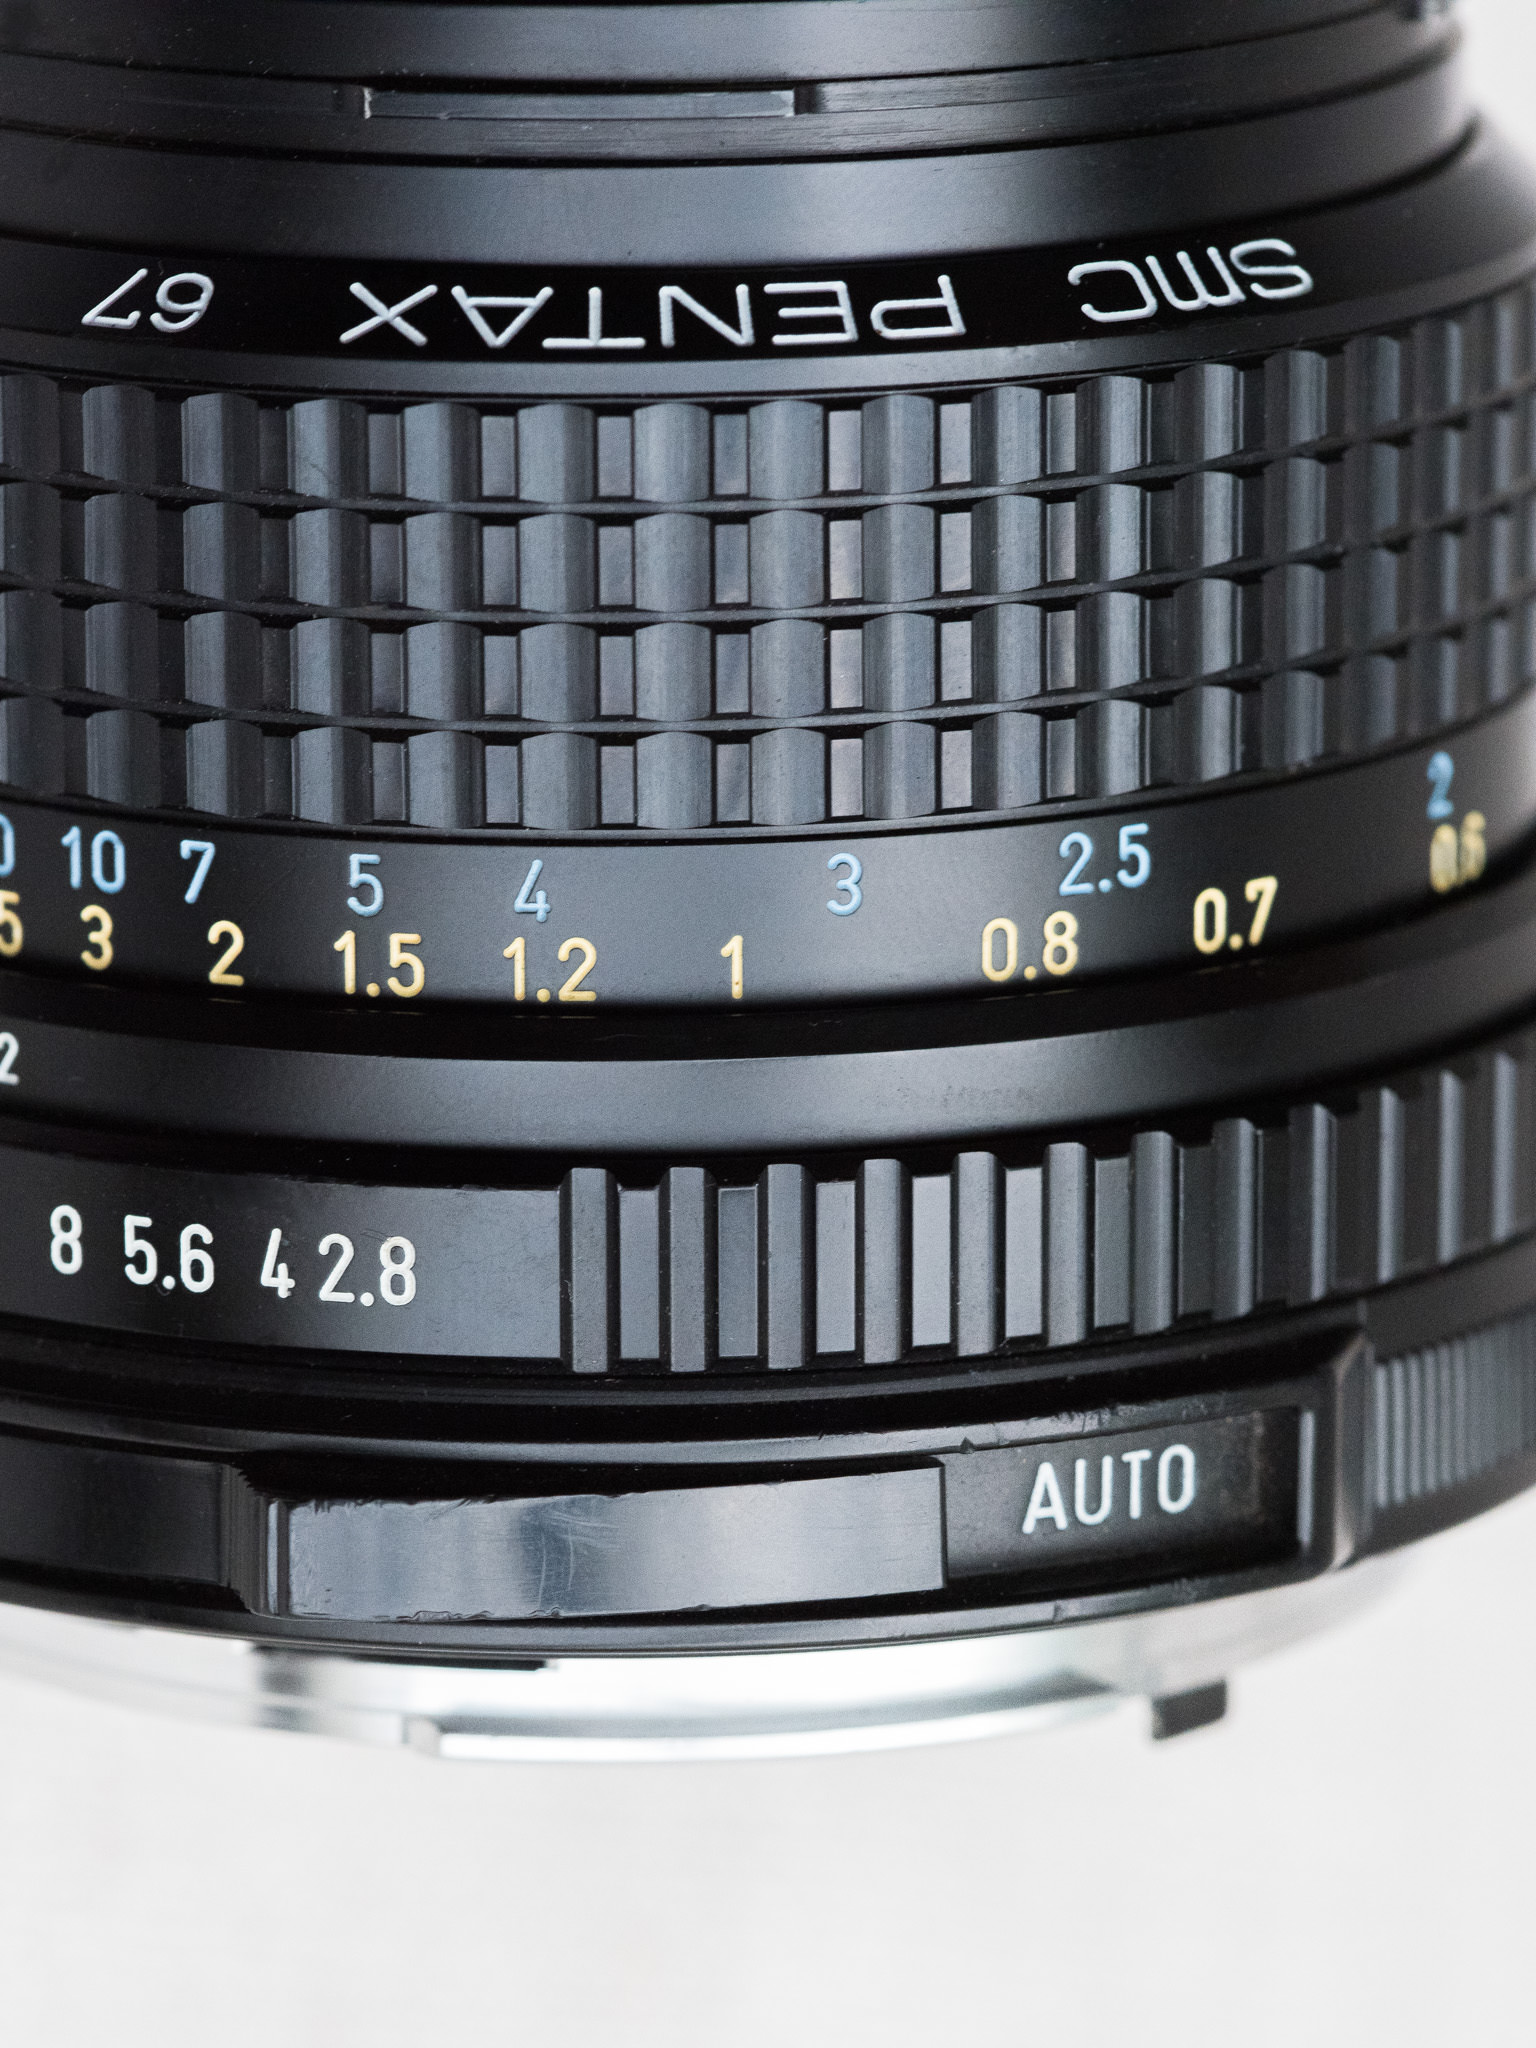
The 75mm AL is built very similar to the rest of the Pentax 67 lenses in terms of it’s style. It's solid, but doesn't feel "awfully" heavy at only 560g (19.8 oz). The focus ring is smooth and the aperture ring clicks nicely. It features the rubber grip ring, which I prefer vs the metal focusing ring of older model Pentax 6x7 lenses. It also features the same auto-switch that you’ll find on the 55mm f/4 and the 200mm f/4.

Closeup image of Pentax SMC 75mm f/2.8 AL Lens

Closeup image of Pentax SMC 75mm f/2.8 AL Lens

Sharpness

Image of man taken with Pentax 67 75mm f/2.8 AL lens on Pentax 67

Image of man taken with Pentax 67 75mm f/2.8 AL lens on Pentax 67

Now, I've heard some people say that their copy of the 75mm AL isn't sharp, but mine has been increadibly sharp. In fact, in the example above, the sharpness is so sharp that I would put it up against lenses like the Canon 85mm L Mark II on a 5DMkIV any day.

Color

Image of groomsmen taken with Pentax 67 75mm f/2.8 AL lens on Pentax 67

Image of groomsmen taken with Pentax 67 75mm f/2.8 AL lens on Pentax 67

The color rendition is similar to other Pentax lenses like the 105mm and 90mm. I especially like how the 75mm renders skin tones. I think it has a lot to do with its native contrast which I’ll discuss below.

Bokeh

75mm AL-19.jpg

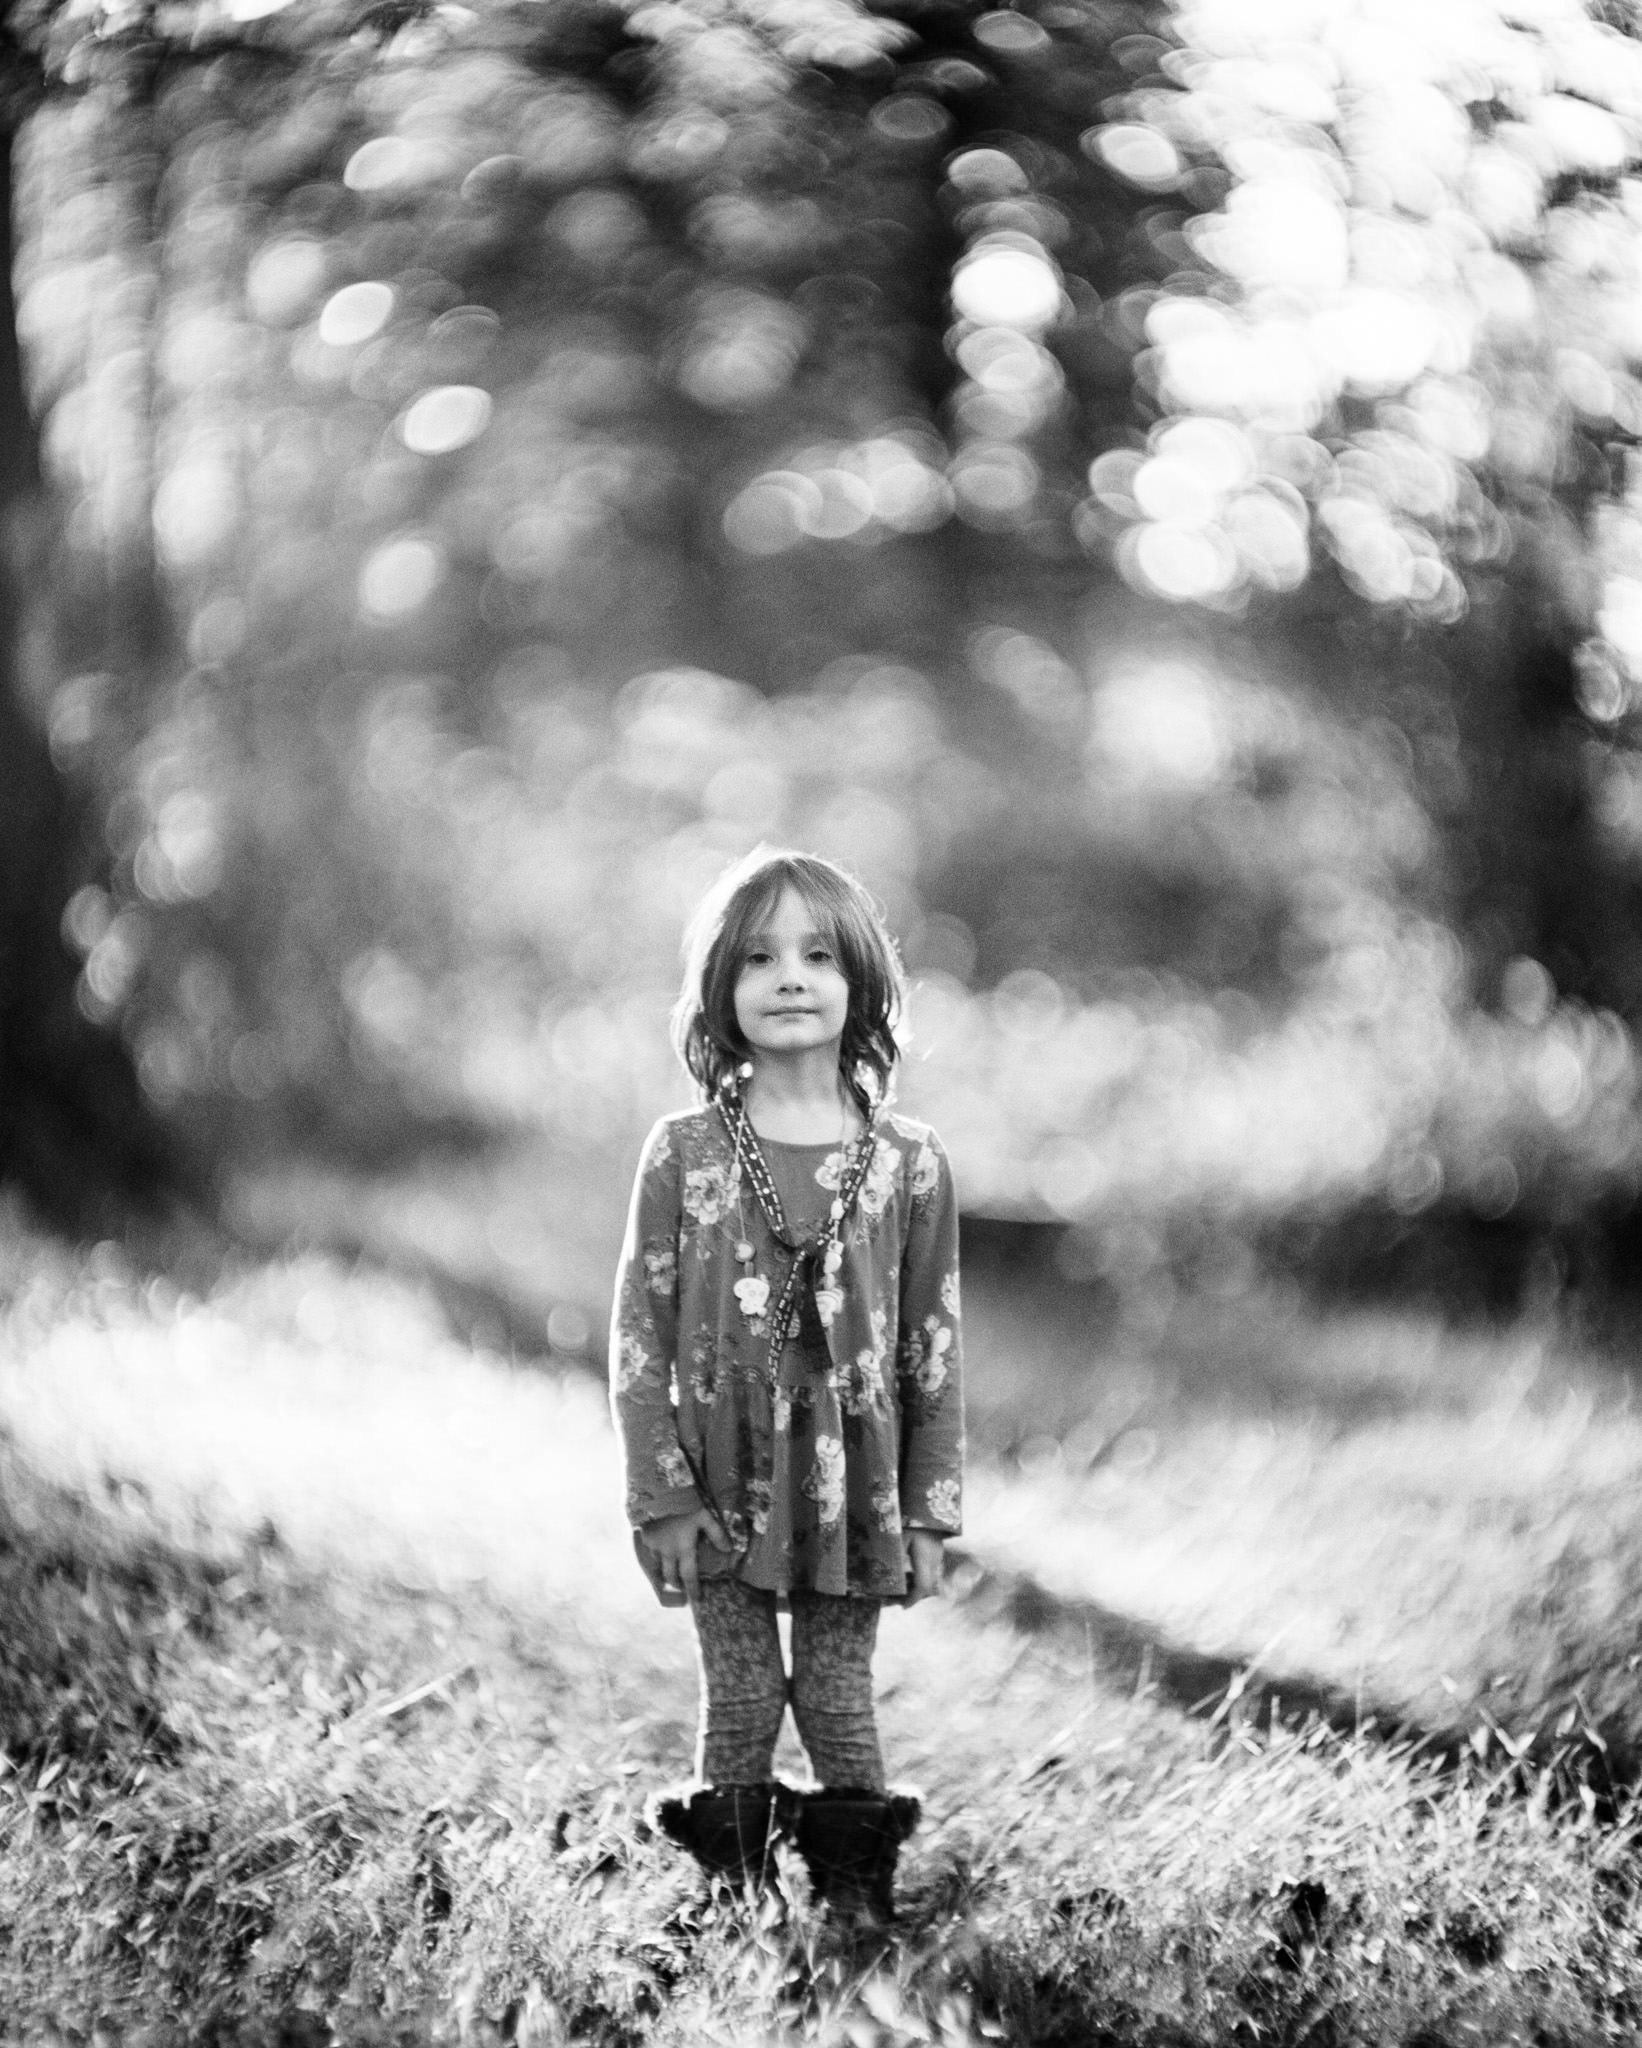
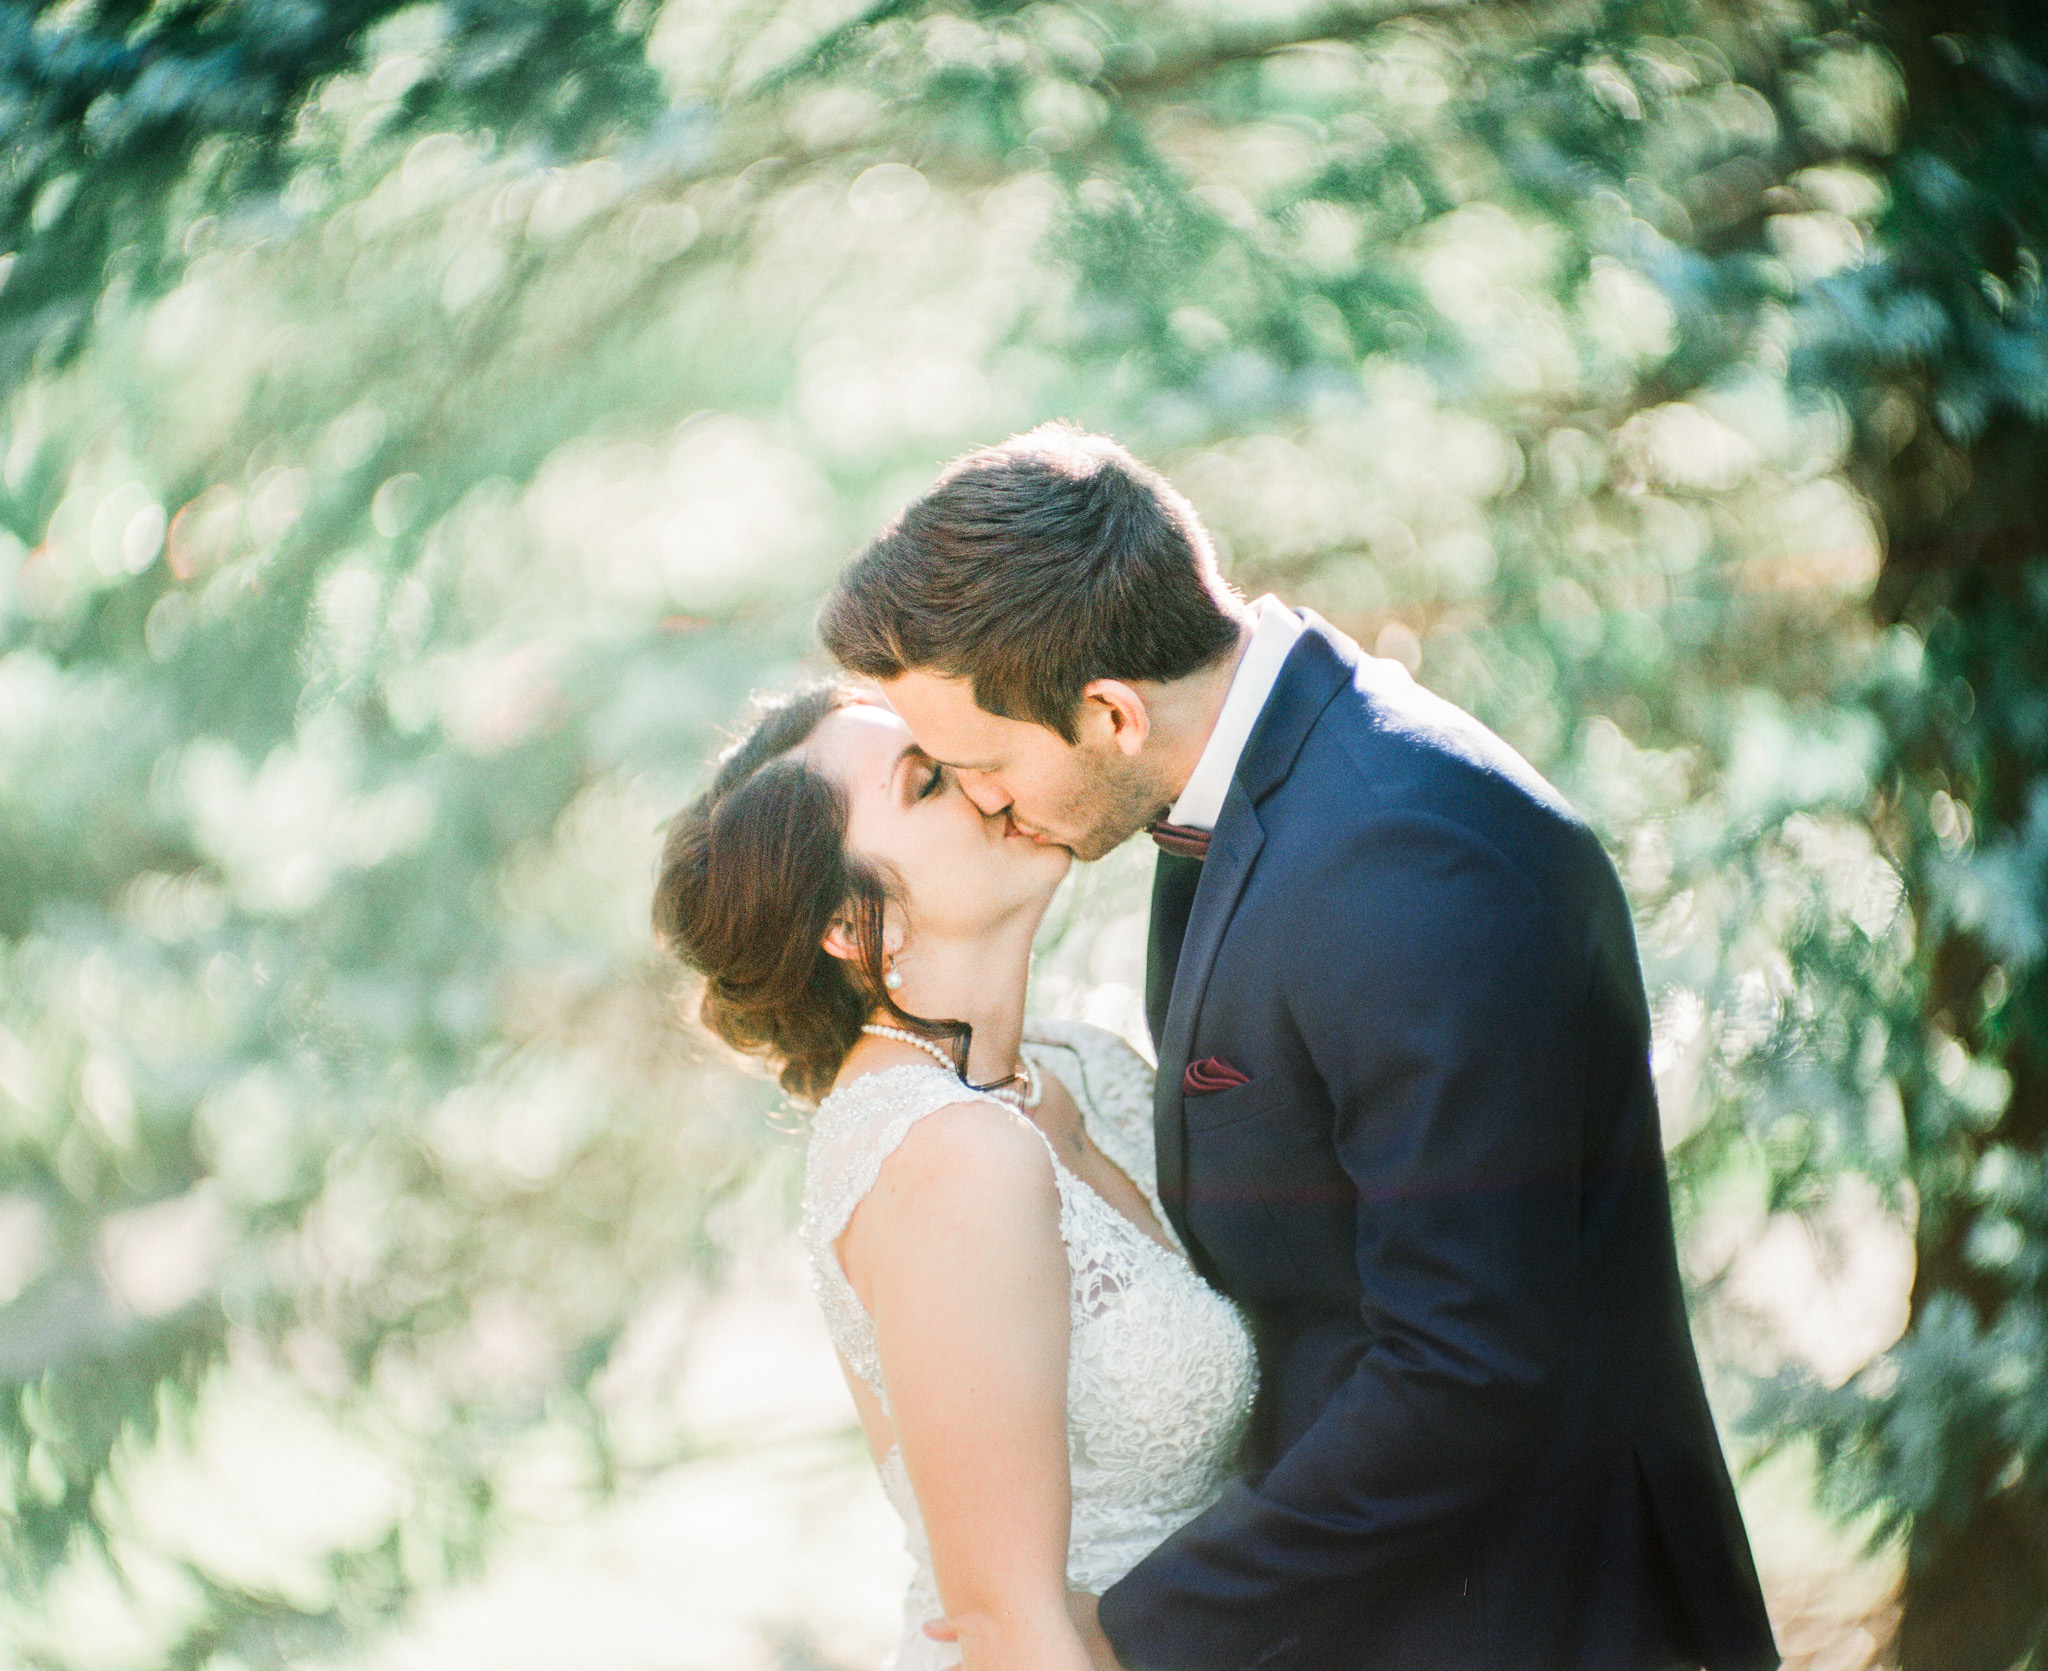
The bokeh is surprisingly good on the 75mm AL. It renders very smoothly, but still possesses loads of character.

Contrast

Image of girl with static hair taken with Pentax 67 75mm AL through a Pentax 67

Image of girl with static hair taken with Pentax 67 75mm AL through a Pentax 67

The contrast of this lens is fantastic. It has plenty of contrast which lends to it's overall sharp look. It really does have a “look”, and I believe that the contrast it posses is one of the big reasons why.

Distortion and Vignetting

kids -16.jpg

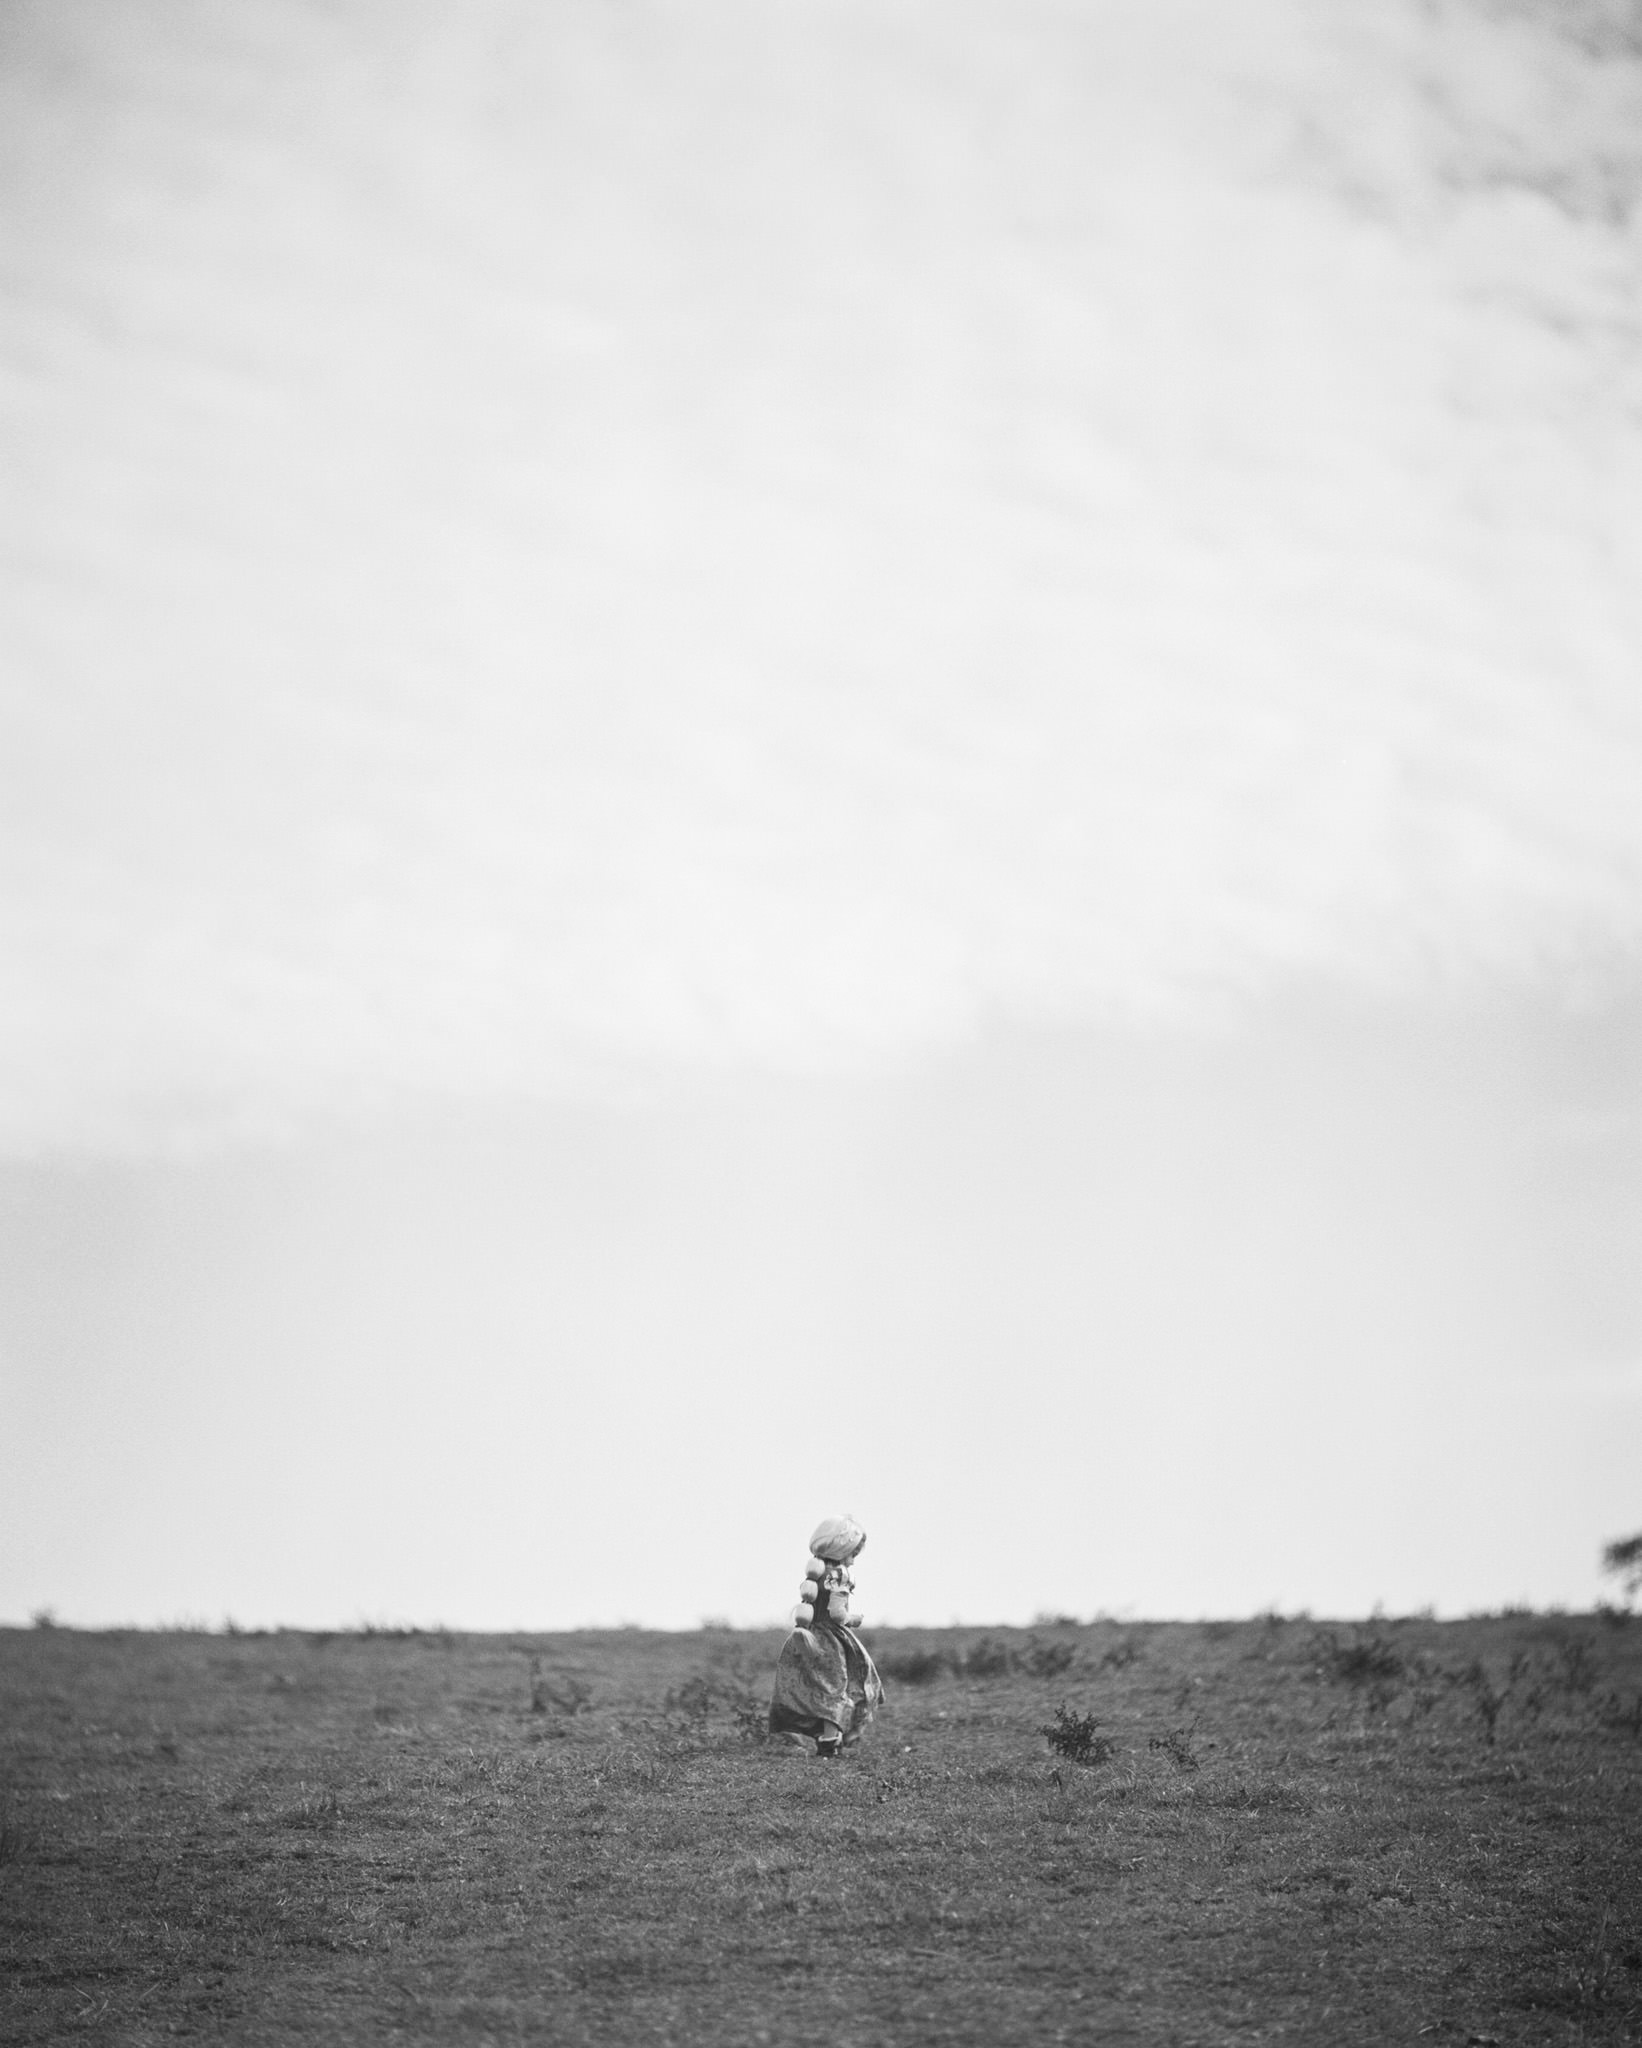
I notice very little distortion and vignetting, even at 2.8. The aspheric design employed by Pentax was designed to essentially reduce/eliminate distortion, so you’ll be hard pressed to find any. I think that I may see some vignetting at times, but if it is true vignetting it’s so light it that can either be embraced or easily corrected in Lightroom.

Flare Control

Image of exaple of flare control taken with Pentax 67 75mm f/2.8 AL lens on Pentax 67

Image of exaple of flare control taken with Pentax 67 75mm f/2.8 AL lens on Pentax 67

Flare control is pretty good. I don’t notice anything to out of the ordinary. You’ll obviously still get some decontrasting with direct sun, but it’s pretty manageable.

Minimum Focus Distance

kids -17.jpg

The 75mm AL has an impressive 0.41m (1.35') minimum focusing distance. There's almost no need for extension tubes or macro filters with this lens. 

Final Thoughts on My Pentax 67 75mm AL f/2.8 Review

 The overall rendering and character of the Pentax 67 75mm AL f/2.8 is about as stunning as it’s price tag. I regularly find myself producing images with it that I just don’t quite get out of other lenses. It’s a fantastic grab-and-go option that let’s me get up close, while also allowing me to get a fairly wide field of view in tight spots.

With all these pros, it’s lightweight, fairly small, and an all-around powerful tool in the right hands.

If you’ve found this article helpful and are considering to purchase the 75mm AL, please click our eBay link. A portion of the proceeds will go to help support us to keep producing articles like this for photographers like you!


More Articles of Interest


2 Comments

11 Comments

Digital Alternatives to Shooting Medium Format Film Cameras: Best Camera and Lens to Match Contax 645

Best Digital Alternative to Medium Format Film Graphic Overlay

Note: This post is part of our "Learn Blog" for photographers. For workshops, coaching, and other resources designed to help grow your skills as a photographer click here (after you read the article, of course)!  To be transparent, all links are paid advertising, as a portion of any purchase made while using these links is credited to us. Please, consider using our links to help support what we do! Thank you!


Digital Options/Alternatives to Medium Format Film

In this article, to provide you with digital options to medium format film, we'll discuss:

  • Our top medium format digital picks

  • Our top full-frame digital picks

  • Lens options for each

We Shoot Film For Good reason, But...

Film possesses a special look in the right lighting conditions. We're huge fans of shooting film and shoot it regularly. In fact, you can read more about that in our article about why we think brides and grooms should consider hiring a film wedding photographer.

However, we are very open to embracing other options besides film for a couple reasons:

* Wanting to have digital backups that match our film as close as possible
* Cost of film, developing, scanning, etc

With that said, we think that there's very few options that give us the depth, feel, and overlook of our medium format film cameras. But those that do are slowly convincing us that we’d be happy shooting without film in most if not all cases.

Why Use Digital Alternatives to Medium Format Film?

Maybe you're looking for a setup to match your medium format setup.

Or maybe you're wanting to get the look of the 80mm f/2 on Contax 645, but without spending thousands upon thousands on film costs per year.

If you shoot a lot of film, switching to digital could save tons in time. We calculated that, when shooting only 10 rolls per wedding at 30 weddings a year, we'd save about $7,500+ per year on film, developing/scanning, shipping, etc. by switching to digital.

And if that's you, you might be encouraged knowing, that you're investing in valuable goods--you can sell your gear at some point and still recover cost. With film, you shoot it and there's no object that you can sell/use to recover your initial investment.

The problem is, we love the look and overall experience of shooting film! And digital can sometimes, if not often, fall very short.

Sensor Size Matters

"The look" of the medium format perspective is unique and interesting, and there are but a few digital options which proivde that "look" or something pretty close to it.

BUT, keep in mind that film 645s shoot a negative that is 56 x 42mm. Many digital backs or "digital medium format" 645s are a different crop than film 645s.

The largest sensor size at the time of this writing for digital 645 is 53.9 x 40.4mm for a "CCD" sensor and 53.4 x 40.1mm for a "CMOS" sensor. Though slightly smaller than "true" 645, these are very close to their film counterparts.

Or, if you're not ready to spend a huge chunk of cash, there are some pretty convincing full-frame/a little bigger than full-frame options that offer very compelling results when paired with the right lens.

Don’t Just Take Our Word For It—Try Before You Buy!

If you’re wanting to find which digital alternative to use in order to match your digital to film, we highly recommend using Lensrentals to try before you buy. We even spoke with them about this article so we could get our readers like you 15% off to try out the gear in this article using our code JMPHOTO15!

234x60

Fuji GFX 50S or Fuji GFX 50R vs Contax 645

Our current top choice for matching your digital to medium format film is the FUJIFILM GFX 50S. You can also read our full FUJIFILM GFX 50S Review.

Pros: 

  • Large sensor helps add “atmosphere” to the look of images

  • Amazing detail and dynamic range

  • Great in low-light/High ISO capabilities

  • Can accommodate many lenses

  • Can use Speedbooster to achieve more shallow depth of field

  • Has focus peaking for simple and easy manual focusing

  • Clear viewfinder

Cons: 

  • Expensive up front cost

  • Not great for video

To check out this body and average cost to getting into the system, view the Fuji GFX 50S on Ebay and Amazon

Best Lenses for GFX to Match Contax 645 with 80mm

These are the lenses that we believe match the classic look of the Contax 80mm on the Contax 645, and are therefore the best digital alternatives for matching with medium format film. It should be noted that these lenses are manual focus only lenses.

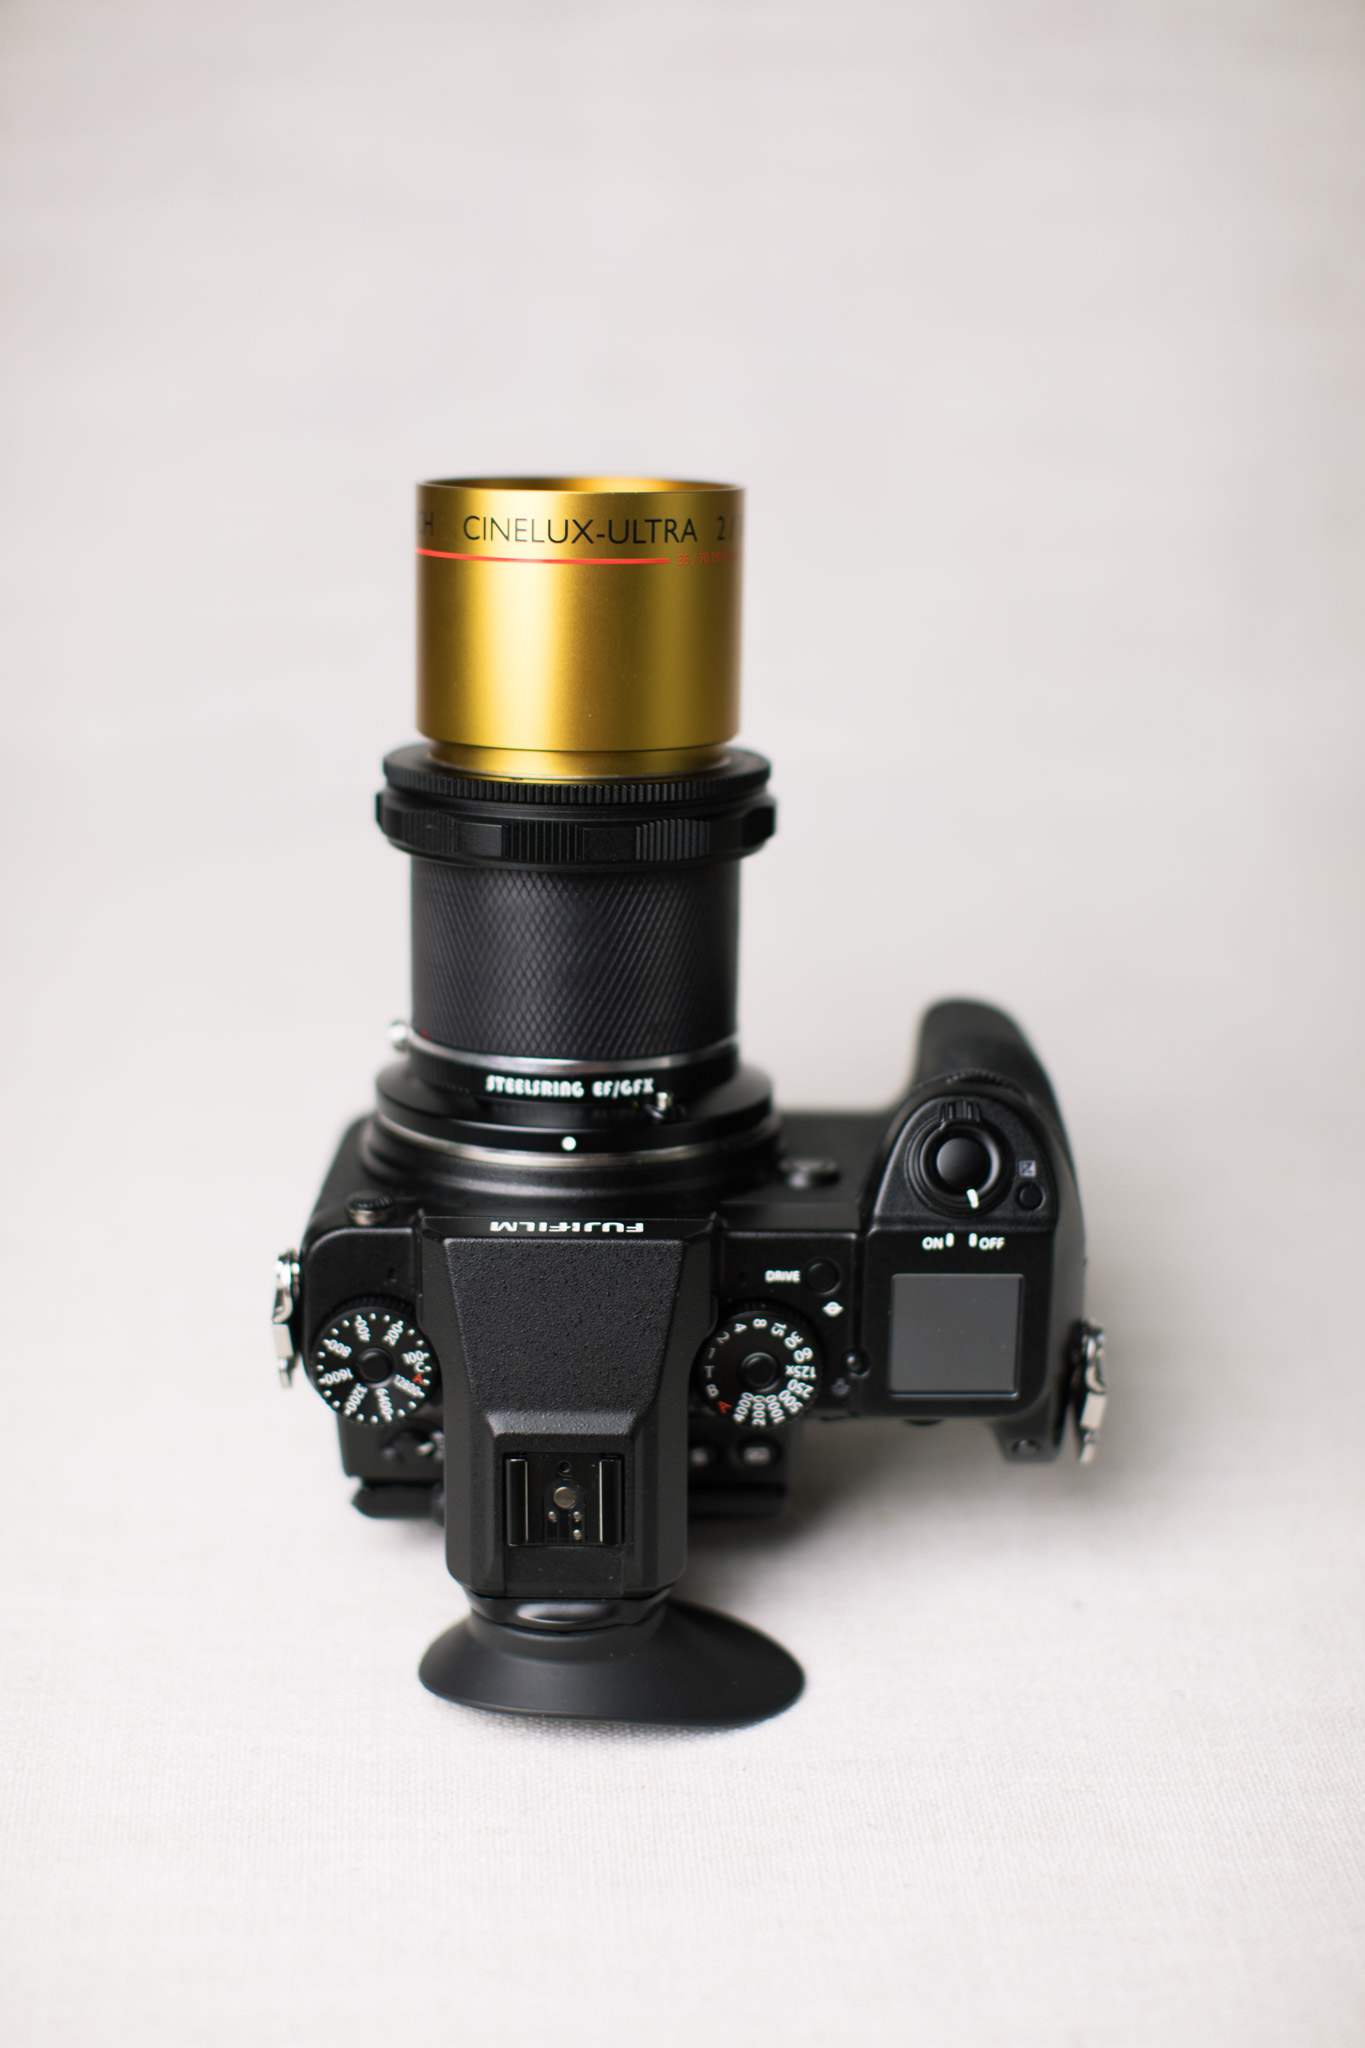
-with the Schneider Cinelux f/2 (various focal lengths)

We are absolutely in love with this combo. From the bokeh to the overall classic rendering, this lens + camera combo doesn’t disappoint.

You can purchase your Cinelux Lens from The Boutique Lens.

Pros:

  • Classic rendering with lots of character

  • Ver, very nice bokeh

  • Beautiful color rendition

  • f/2 aperture is the same as a f/1.58 lens on a full-frame/35mm camera

Cons:

  • Fixed aperture at f/2 (some at f/1.7, or some a little smaller at f/2.1, 2.3)

  • Will need to be custom made/modded to fit, either by your own mod, or by The Boutique Lens

-with the Voigtlander 58mm f/1.4 (Nikon Mount)


This is probably one our favorites for rendering a classic look similiar to the Zeiss 80mm f/2. If you’re going to mount the 58mm 1.4 on your GFX you’ll need an adapter such as the K&F Concepts Nikon F to GF mount.

When mounted on the GFX, this lens ends up up being about a 45mm f/1.1 in terms of 35mm equivalent. Personally, we find this perspective to be a bit wide for our taste when it comes to many facial features and body types in terms of portraits.

Pros:

  • Classic rendering very similar to Contax 80mm of Contax 645

Cons:

  • A little wide for some facial/body types in terms of portraits (personal opinion)

  • Bokeh can be a bit busy to some

-with the Mitakon 65mm f/1.4

The Mitakon 65mm is another great options for your GFX. It doesn’t have quite as classic of a rendering as some of the other options, but it is a true 50mm (about 51.35mm, technically), so it has that as a positive. Some have described the bokeh as being a bit more sterile/not quite as pronounced as the Zeiss 80mm f/2 on Contax 645.

Pros:

  • 50mm perspective (full-frame/35mm equivalent) making it a great all-around lens

  • f/1.4 for all your shallow depth of field and low-light needs

Cons:

  • Many people have reported issues with quality control. This will hopefully improve as time goes on.

  • Bokeh is very smooth and uninteresting to some

  • Some do not like the clickless aperture.

  • A little more “sterile” in terms of other options

To check out the Mitakon 65mm f/1.4 Lens view it on Ebay!

-with the Voigtlander 75mm f/1.8 Heliar

With an image quality very similar to the Voigtlander 58mm, the 75mm Heliar is a great option. It’s full-frame/35mm equivalent when mounted on your GFX is about 60mm, making it a little better in terms of portraits than the 58mm with it’s 45mm full-frame equivalence. To mount this lens, you will need a Leica M to GF adapter like this one from Kipon.

Pros:

  • Classic rendering, like the Voigt 58mm

  • Plenty shallow depth of field at f/1.8

Cons:

  • Bokeh can be a bit busy looking to some

Sony A7Riii vs Contax 645

The Sony A7Riv is quite the amazing little camera. It has great dynamic range, lightweight, good battery life, and the list goes on.

Pros:

  • Small

  • Lightweight

  • Great dynamics range

  • Good battery life

  • Can accommodate many lenses, including third party options

  • Fairly cheap, comparatively speaking

  • Has focus peaking

  • Great for video, as well as stills

Cons:

  • Doesn’t have built-in changeable ratios

  • Some people really complain about the menus

To check out this body and average cost to getting into the system, view the Sony A7riv on Ebay and Amazon

-with the Zeiss 80mm f/2 + Speedbooster

Pros: 

  • Smaller body and weight

  • Can use Kipon Baveyes C645 Speedbooster adapter effectively

  • Has a look very close to Contax 645/80mm when using Speedbooster

Cons:

  • Speedbooster may affect image quality to some degree; minor distortion may occur in certain parts of the image including some effect to the bokeh which might be described as some loss to "buttery-smoothness" and added "jittery-ness"

-with the Mitakon Zhongyi Speedmaster 50mm F/0.95 Lens for Sony E-mount

Pros: 

  • Classic rendering

  • Great bokeh

  • Very low-light capable

  • Very shallow depth of field

Cons:

  • Many people have reported issues with quality control. This will hopefully improve as time goes on.

  • Some do not like the clickless aperture

To check out the Mitakon Zhongyi Speedmaster 50mm F/0.95 Lens for Sony E-mount, view it on Ebay and Amazon

 More Expensive/Harder to Come-by Options for Digital alternatives to medium format film

The nice thing about the Sony and Fuji options mentioned above is that they are relatively “cheap” to get into, especially compared to how much you’d spend on film otherwise. With that said, there are some options that are quite amazing when it comes to image quality, but will cost a good amount more than the Sony and Fuji options, with drawbacks of their own.

One thing to note about these options is that, from our understanding, none have focus peaking. Since most of the lenses that resemble the look of the Contax 645/80mm combo are manual focus, the GFX and Sony options are nice because they do have focus peaking. With that said, they do have a bit larger sensors and should be similar to manual focusing on your Contax 645.

Contax 645 with p65+ Digital Back

Pros:

  • Perhaps slightly cheaper than some of the modern digital bodies

Cons:

  • p65+ for Contax 645 mount is VERY hard to come-by

Phase One XF or DF+ w/ IQ260 w/ Contax 80mm f/2, Cinelux, etc.

Pros:

  • Large 53.7 x 40.4 sensor size.

  • Since you're investing in valuable goods, you can sell your gear at some point and still recover cost. With film, you shoot it and there's no object that you can sell/use to recover your initial investment.

Cons: 

  • Expensive

  • Have heard images referred to as a bit "crunchy" compared to film

Phase One XF w/ IQ1 100mp Digital Back w/ Contax 80mm f/2, Cinelux, etc.

Pros: 

  • Large sensor size of 53.4 x 40.1 (which is about as big as you get at this time

  • 15 stops of dynamic range (wow!)

  • Since you're investing in valuable goods, you can sell your gear at some point and still recover cost. With film, you shoot it and there's no object that you can sell/use to recover your initial investment.

Cons:

  • Expensive

  • Difficult to find used

  • Have heard images referred to as a bit "crunchy" compared to film

Phase One XF + Leaf Credo 60 w/ Contax 80mm f/2, Cinelux, etc.

Pros: 

  • Large sensor size of 53.9 x 40.4

  • Handles light a lot like film, in my opinion.

  • Since you're investing in valuable goods, you can sell your gear at some point and still recover cost. With film, you shoot it and there's no object that you can sell/use to recover your initial investment.

Cons: 

  • Expensive upfront cost.

  • If your workflow is heavily dependent on your lab providing you with scans that look exactly how you want them, switching to digital may cause unwanted editing stress.

  • I still love film : )

Closing Remarks

While nothing may ever "completely" replace the look/feel of real film, these options are definitely cost effective ways to really bring your digital images to a place where they resemble film. For the shooter who's film costs approach $10k a year, switching largely to legitimate digital options could be a wise business option, if your clientele isn't built on a film-photography niche. 

If you’re wanting to learn more about how to match your digital to film, be sure to check out our article on our favorite Lightroom Presets to Match Digital to Film!

We'd love to hear from you!

What other cameras/lenses would you recommend? Comment below!


More Recent Articles from our “Learn” Blog


11 Comments

6 Comments

Portra 800 Film Review


Note: This post is part of our "Learn Blog" for photographers. For workshops, coaching, and other resources designed to help grow your skills as a photographer click here (after you read the article, of course)!  To be transparent, all links are paid advertising, as a portion of any purchase made while using these links is credited to us. Please, consider using our links to help support what we do! Thank you!


Portra 800 is one of those film stocks that is absolutely amazing. From the colors, to the grain, to the contrast—this film does not disappoint. So, it’s with excitement that I present my Portra 800 review!

When and Why We Use Portra 800

Portra 800 Example: Sunset image from Jon & Emily’s Polo Barn Wedding in Lexington Ky taken with Pentax 67 and Portra 800 rated at 640 ISO

Portra 800 Example: Sunset image from Jon & Emily’s Polo Barn Wedding in Lexington Ky taken with Pentax 67 and Portra 800 rated at 640 ISO

I’ll begin by saying that we exclusively use Portra 800 in its 120 format. If we’re wanting to shoot 35mm high speed film, we’ve gravitated towards Superia 1600 or the Japanese marketed Natura 1600.

We like to shoot our film about one to two stops over-exposed. That means that our Fuji 400H is metered in the shadows at 200 ISO. On overcast days, or as we near sunset, Fuji 400H is just not going to cut it. Enter, Portra 800.

Portra 800 Example taken with Portra 800 120 film

Portra 800 Example taken with Portra 800 120 film

I have no fear of shooting Portra 800 at 800. It looks rich, well-saturated, and all together great at box speed. Honestly, if Portra 800 were the same price as Fuji 400H, we would be tempted to use it ALOT more in places of Fuji 400H.

Portra 800 vs Fuji 400H for Low-Light

Notice in the images below how much better the Portra 800 example turned out compared to the Fuji 400H example in this scenario. We metered around ISO 400 or so, although the Fuji 400H ended up looking even worse than I expected, leading me to believe it was a bit underexposed out of necessity.

It becomes very obvious that the Portra 800 example retains contrast and color balance much better than our Fuji 400H could in this overcast, fairly dim lighting.

Be sure to pay attention to the deep shadows, the blues, and the greens. The Fuji 400H ended up looking very muddy, in my opinion, while the Portra 800 is very pleasant and better represents what my eye saw.

Image taken with Portra 800 120 film

Image taken with Portra 800 120 film

Image taken with Fuji 400H 120 film (slightly underexposed, probably)

Image taken with Fuji 400H 120 film (slightly underexposed, probably)

Contrast

We’ve found Portra 800 to be a bit more contrasty than Fuji 400H. To us, it’s contrast is similar to Portra 400.

Color and Saturation

Portra 800 will bring out your orange tones. We actually love using it at sunset for this reason. All your oranges, yellows, and correspondingly your browns tend to have a bit of a boost, from our experience. This is, of course, great for skin tones.

Sunset image from Jon & Emily’s Polo Barn Wedding in Lexington Ky taken with Pentax 67 and Portra 800 rated at 800 ISO

Sunset image from Jon & Emily’s Polo Barn Wedding in Lexington Ky taken with Pentax 67 and Portra 800 rated at 800 ISO

How to Rate Portra 800

As we discussed in the paragraph prior, we primarily use Portra 800 for scenarious where we need a faster speed film. With that said, we prefer to rate Portra 800 around 640, or even at 400.

It does great even at 800 ISO, so no worries in those dim moments where you need more speed. We’ve found this film to be so versatile that you’ve got plenty of room for error without harming your final product.

Eric & Gabrielle Wedding (Web Use Only)-12.jpg

Grain

Portra 800 grain is very fine. Very never had an instance where we’ve looked at an image from Portra 800 and said, “Ooo, that’s grainy.” Now, with that said, we typically don’t shoot it any faster than its box 800 speed.

So, we can’t say too much about what results you may find beyond 800.

Image taken with Portra 800 film

Image taken with Portra 800 film

Portra 800 vs Portra 400

For us, Portra 400 has never been a big contender with Portra 800. We primarily shoot with Fuji 400H and love how it renders, so we don’t tend to shoot Portra 400 during the day.

We have seen examples of Portra 400 pushed, even 3 stops. We tried some pushing and found that we just weren’t that big of fans for our type of work. However, Portra 800 filled that gap of needing something a bit faster to use when light starts escaping us.

If you look at the examples below you’ll see that both Portra 400 and Portra 800 appear pretty similar in daylight.

Image taken with Portra 800

Image taken with Portra 800

Image taken with Portra 400

Image taken with Portra 400

Best Places to Buy Portra 800 at the Best Price

Due to quality, consistency, shipping speed, and price Continental is one of our top suppliers for Portra 800.

You can find their listings on both Amazon and Ebay

Conclusion to Our Portra 800 Review

Overall, Portra 800 is a beautiful film stock whose biggest drawback is price at around $10 per roll. Photographers who want a more desaturated and less contrasty look may find it to be a bit much, but when the light starts escaping like it often does during wedding days, there’s no better medium-format film option than busting out a roll of Portra 800.

If you’ve enjoyed this article, please consider using our Amazon or Ebay links to purchase Portra 800. We receive a small portion of the sale price which aids us in publishing more helpful articles for our readers to enjoy and learn from.

If you’ve used Portra 800, please be sure to comment and share your thoughts in the comment section below!


Other Articles


6 Comments

Comment

Schneider Cinelux Ultra MC Review

Image taken using a Pentax 67 with the Schneider Cine-Xenon (updated Cinelux) 150mm f/2.3 from The Boutique Lens

Image taken using a Pentax 67 with the Schneider Cine-Xenon (updated Cinelux) 150mm f/2.3 from The Boutique Lens


Note: This post is part of our "Learn Blog" for photographers. For workshops, coaching, and other resources designed to help grow your skills as a photographer click here (after you read the article, of course)!


When you’re looking for something to mount on your Pentax 645, Mamiya 645, Pentax 67, or even your GFX or something like a Phase One that is “next level” compared to any native glass, you’ll inevitably arrive at the Schneider Cinelux Ultra MC.

With various focal lengths of Schenider Cineluxes that will work on 645 and 6x7 ranging from 90mm to 170mm, there are a plethora of options matched only by the difficulty encountered by trying to obtain one of these rare beauties.

Schneider Cinelux Lens Review Images-2.jpg

You’ll see that I compare the Cinelux vs the Zeiss 80mm f/2 quite a bit. This is because I have loved the Zeiss 80mm f/2 and it’s rendering so much. But, I find that I find myself loving and constantly comparing the Cinelux with the Zeiss 80mm, which, believe is saying a lot.

Image taken with Fujifilm GFX 50S using Schneider Super Cinelux 80mm f/2 from The Boutique Lens

Image taken with Fujifilm GFX 50S using Schneider Super Cinelux 80mm f/2 from The Boutique Lens

So without further ado, in my Schneider Cinelux lens review, I’ll cover:

Image taken using Pentax 67 with the Schneider 115mm Cine-Xenon (updated Cinelux) f/2 lens from The Boutique Lens

Image taken using Pentax 67 with the Schneider 115mm Cine-Xenon (updated Cinelux) f/2 lens from The Boutique Lens

If you’re mainly looking for some history and/or the differences between different Cineluxes such as Schneider vs ISCO or Ultra MC vs Cinelux discussion, be sure to take some time to view the Cinelux Guide from The Boutique Lens.

Image taken using the Schneider 115mm Cine-Xenon (updated Cinelux) f/2 lens from The Boutique Lens

Image taken using the Schneider 115mm Cine-Xenon (updated Cinelux) f/2 lens from The Boutique Lens

Bokeh

The Schneider Cinelux lens has very pleasant, smooth, yet full-of-character bokeh. The edges of the bokeh-circles it produces are not “too crisp” and do not distract from the subject.

Bride and Groom with Bouquet taken with Pentax 67 Schneider Cinelux Ultra MC 120mm f/2 from The Boutique Lens

Bride and Groom with Bouquet taken with Pentax 67 Schneider Cinelux Ultra MC 120mm f/2 from The Boutique Lens

Vignetting

With the Cinelux at f/2 (do note that some longer focal lengths have smaller maximum apertures of 2.1, 2.3, and 2.8) I notice almost no vignetting. This lens was designed to project IMAX movies onto a huge screen at f/2, so it makes sense that it would perform amazingly, even at that aperture.

Image from 115mm Cinelux from from The Boutique Lens using Pentax 67 and HP5 Film

Image from 115mm Cinelux from from The Boutique Lens using Pentax 67 and HP5 Film

Distortion

Since the Cinelux lens is going to be a telephoto portrait focal length, you will not notice much distortion of any sort.

Image taken with Pentax 67 using Schneider Cinelux Ultra MC 120mm f/2 lens from The Boutique Lens

Image taken with Pentax 67 using Schneider Cinelux Ultra MC 120mm f/2 lens from The Boutique Lens

Sharpness

The Schneider Cinelux Ultra MC line of lenses are very, very sharp. Again, they were designed for IMAX screens, and being primes, they are honed for sharpness. To compare it to the Zeiss 80mm f/2, I find that the Cinelux has better edge to edge sharpness.

Image taken with Pentax 67 and Cinelux 150mm f/2.3 from The Boutique Lens

Image taken with Pentax 67 and Cinelux 150mm f/2.3 from The Boutique Lens

Fall-Off/Depth of Field

The Cinelux Ultra has wonderfully smooth fall-off. The depth of field when used on a 645 is similar to a f/1.25 lens on 35mm/full-frame, and on a 6x7 it is equivalent to a f/1.

Farm table at wedding taken with Pentax 67 and Schneider Cinelux Ultra MC 120mm f/2 from The Boutique Lens on Fuji 400H Film

Farm table at wedding taken with Pentax 67 and Schneider Cinelux Ultra MC 120mm f/2 from The Boutique Lens on Fuji 400H Film

Microcontrast/Contrast

The Schneider Cinelux causes the subject to pop with incredibly pleasant clarity. I believe it has as much and probably a little better rendering than does the Zeiss 80mm f/2, which is a fantastic lens.

Image taken with Pentax 67 and Cinelux 120mm from The Boutique Lens

Image taken with Pentax 67 and Cinelux 120mm from The Boutique Lens

Color Rendition

I absolutely love the color tonality of the Schneider Cinelux Ultra. It is by far my favorite lens when it comes to producing rich and beautiful colors. It produces skin tones that are creamy and desirable, making this lens perhaps the biggest competitor to the Zeiss 80mm f/2 in terms of skin tone rendition.

Pentax 67 Schneider Cinelux Ultra MC 120mm f/2 from The Boutique Lens

Pentax 67 Schneider Cinelux Ultra MC 120mm f/2 from The Boutique Lens

Minimum Focusing Distance

Though it varies per the focal length, with my 120mm Cinelux I can achieve about .9 meters minimum focusing distance while still reaching infinity on my Pentax 67. This allows me to achieve a head and shoulders shot that I’m very pleased with.

Image taken with Pentax 67 and 120mm Cinelux from The Boutique Lens

Image taken with Pentax 67 and 120mm Cinelux from The Boutique Lens

Build Quality, Features, and Feel

These lenses feel incredibly nice. They are simple, solid, and gold. What’s not to love? To be serious, though, they are very lightweight for being a f/2 lens that covers even a 6x7 negative.

Image taken with Pentax 67 and 150mm f/2.3 Cinelux from The Boutique Lens

Image taken with Pentax 67 and 150mm f/2.3 Cinelux from The Boutique Lens

Where Can I Buy a Schneider Cinelux Lens Adapted for My Camera?

Now, you can scour eBay and find a Cinelux pop up every once and a while. More than likely, you’ll still have to go through the process of adapting it and all that good stuff.

Or, you can become the owner of one of these amazing lenses, and have it custom adapted to the camera of your choice by purchasing from a website such as The Boutique Lens which happens to sell Schneider Cinelux Ultra MCs.

Image of bride and groom kissing with bouquet taken with Pentax 67 using the Schneider Cinelux Ultra MC 120mm f/2 lens from The Boutique Lens

Image of bride and groom kissing with bouquet taken with Pentax 67 using the Schneider Cinelux Ultra MC 120mm f/2 lens from The Boutique Lens

Final Remarks on My Schneider Cinelux Ultra MC Review

The Cinelux is probably my favorite lens in overall terms of lightweight usability balanced with amazing image quality. I love the image quality that it produces and I love using to create images that have tons of pop and character.

It’s rendering reminds me of the Canon 85mm f/1.2 L Mark II, only with perhaps more pronounced bokeh. When it comes to digital lenses, the 85L is at on my top favorites, so I consider this a very good thing.

So, the fact that the Cinelux is lightweight, built well, can be adapted to medium format film, and creates a clean, crisp, full-of-character image means that these lenses stay mounted on my cameras almost always.


Other Posts You Might Find Interesting


Comment

4 Comments

Best Rechargeable Batteries for Professional Wedding Photographers

best-rechargeable-batteries-for-speedlights.jpg

Note: This post is part of our "Learn Blog" for photographers. For workshops, coaching, and other resources designed to help grow your skills as a photographer click here (after you read the article, of course)!  To be transparent, all links are paid advertising, as a portion of any purchase made while using these links is credited to us. Please, consider using our links to help support what we do! Thank you!


Early in my professional wedding photography career, I realized that rechargeable batteries are a must. I use flash often throughout the whole day, and buying AA's can quickly become a hole in the pocket. To bring reliable service to my brides, I needed the best rechargeable batteries for camera flash and flash triggers.

But, the question arises, "which rechargeable batteries should I invest in?" With a plethora of different options, some cheap with others seeming almost exorbitantly expensive, choosing the best rechargeable batteries for speedlights and other photography gear can be a trial and error task. 

I've set out to make it a little easier on you, the Reader. Here, you'll learn a little from my attempts to find the best rechargeable batteries for wedding photography--my failed attempts, my mediocre attempts, and the true cream of the crop when it's all said and done.

So, without further ado, let’s talk about the best rechargeable AA batteries for flash photography!

Batteries duke it out in the war for who truly is the “Best Rechargeable AA battery”

Batteries duke it out in the war for who truly is the “Best Rechargeable AA battery”

Pick the Best, Buy a Lot at a Time, and Buy It Over and Over Again (Don't Mix and Flash)

One of the "regrets" I have with trying out various AAs is that I now have a hodge-podge collection of various batteries. This has created a little bit of extra work for me now because I have to match batteries when I charge and when I put them into my speedlights. 

When I first began using rechargeable batteries, I didn't realize you couldn't mix batteries of differing mAh. I kid you not, I literally had a speedlight explode. It was amazing, terrifying, sad, and several other emotions when that happened. Lesson learned. Having all the same batteries prevents all such hassle and worry.  

Also, I now have batteries with varying degrees of life. Certain batteries will die before others and no longer charge. If I had (and believe me now, in the future I will) buy the maximum amount that I need at any time, then I could, in theory, replace my batches en toto, keeping everything more organized and consistent.

Solution: buy the best, buy all that you need at a time, buy those over and over.

Memory Drain: Hold-Charge vs Lose-Charge Rechargeable Batteries

One of the first things I noticed when testing rechargeable batteries was that some held a charge much longer than others. Some batteries were notoriously bad for losing charge, so much so that I would need to charge them the night before or they would already be somewhat run down by the day I needed them. 

Others, such as the Eneloop Pros would hold charge for long periods of time, even months, with no problem.

There is a scientific explanation (that I'm not going to get into) for this phenomenon. It's also one of the reasons why you'll pay more for a battery that holds its charge longer.

Battery Capacity: How Important Is It Really?

When I first got into buying rechargeable AA's it was all about the mAh--"this one is 2800 mAh, and it's cheaper than that 2000 mAh, so it must be a deal!". Right? Wrong.

I found that the most reliable rechargeable battery and ultimately the most useful one is one that is a decent mAh for my flashes. The batteries which have the Memory Drain reduction technology on average tend to have a little lower max capacity than some of the one's that do no have such technology. 

But, I find that some of the batteries that retain their charge also last longer in normal use. Again, max capacity mAh can be a bit deceptive. 

The Best AA Rechargeable Batteries for Wedding Photography

 So, in order of which rechargeble batteries I prefer, here's my list!

1 . Eneloop Pro Rechargeable High Capacity AAs

I originally was told to get Eneloop Pros because you'll go through all the rest, spend a bunch of money on "deals" and then eventually end up buying Eneloops. I rejected that suggestion and decided to stubbornly try out the other options. In the end, I found Eneloop Pros to be my favorite due to their ability to hold a charge and to provide cool, reliable power to my flashes.

2 . Duracell Rechargeable AAs

Coming in second, the Duracell's garnered my confidence due to holding their charge and providing power for a decent amount of time.

3 . Energizer Rechargeable AAs

I found these to be "ok". They hold their charge, but the won't last as long as the Eneloop Pros or even the Duracells.

4 . Amazon Basics High Capacity Rechargeable AAs

Coming in a tie with the Energizer Rechargeables are the Amazon Basics High Capacity Rechargeable AAs. Rumors are that these puppies are rebranded Eneloops, which I believe at best to be true in that they are regular (non-pro version) Eneloops, or at worst to be false due to their performance.

Rechargeable Batteries I Do Not Recommend

5 . EBL Rechargeable 2800 mAh AAs

I had really high hopes for these. They're high capacity and they're cheap. Well, they're also just not that great compared to the other options. They lose their charge quickly and they just do not last like other options I've listed above.

Other Batteries to Avoid

Although I can't even find the listing for Sunlabz on Amazon any longer, I'd recommend staying away. They are cheap and have "good capacity", but they're just not worth it. 

Final Remarks On the Best Rechargeable AA for Wedding Photographers

Though it's tempting to go cheap and grab "good deals" on rechargeable AA batteries for your speedlights, you may end up paying for it in the end. So, invest in some good batteries like the Eneloop Pros or one of the others that also perform pretty well. 

You just might thank yourself later!

If you found this article helpful, let us know! Leave us a comment and let us know if you've tested out some batteries and what you're thoughts are!

*Since writing this article, we’ve gotten asked, “which charger should I buy?”

As of now, we are recommending a smart charger like this BONAI 16+2 Smart Charger.


More From Our Blog


4 Comments

2 Comments

Zeiss 80mm f/2 Review

Image taken with Zeiss 80mm f/2

Image taken with Zeiss 80mm f/2


Note: This post is part of our "Learn Blog" for photographers. For workshops, coaching, and other resources designed to help grow your skills as a photographer click here (after you read the article, of course)!  To be transparent, all links are paid advertising, as a portion of any purchase made while using these links is credited to us. Please, consider using our links to help support what we do! Thank you!

When one thinks of the apex of lens design for medium format film cameras, it becomes difficult to avoid some level of contemplation about the Zeiss 80mm f/2 lens. It's a fantastic lens with an astonishing f/2 aperture that makes it a highly versatile lens in the medium format world. 

I'm going to keep this review short because I think the images do most of the talking. If you'd like to also learn a little more about the Contax 645 body, be sure to check out my Contax 645 Review. So, without further ado, here's my Carl Zeiss 80mm f/2 review.

Bokeh

Image create using Contax Zeiss 80mm f/2 camera lens

Image create using Contax Zeiss 80mm f/2 camera lens

I think it only appropriate to talk about bokeh first when it comes to the 80mm f/2. It has very nice bokeh. It's buttery smooth and almost seems painterly. Enough said?

Vignetting

At f/2 I see some minor vignetting, which is to be expected. By 2.8 and smaller, vignetting only because less and less noticeable. 

Sharpness

Sharpness of the 80mm f/2 is good. Even at f/2, images can come out rather sharp. 

At the far corners of the image, I tend to see some softness.

Image taken with Zeiss 80mm f/2

Image taken with Zeiss 80mm f/2

Fall-Off/Depth of Field

Fall-off with the 80mm f/2 is nice. Coupled with the sharpness and smooth bokeh of this lens, It's what helps give the subject a 3D look. At f/2 on a 645, the depth of field is similar to a 50mm 1.25 or so. 

Image of bride wearing her ring holding the groom's hand taken with Contax 645 and 80mm f/2

Image of bride wearing her ring holding the groom's hand taken with Contax 645 and 80mm f/2

Microcontrast/Contrast

Thanks to the T* coating that Zeiss has applied to this lens, the contrast is top notch and pleasant. Skin tones tend to render rather well with the 80mm f/2. They can appear contrasty, yet still smooth and buttery (in a good way). 

Color Rendition

Image of bride and groom embracing taken with Contax 645 and 80mm f/2

Image of bride and groom embracing taken with Contax 645 and 80mm f/2

Colors rendered by the Zeiss 80mm f/2 are good. There are no weird color casts that I've noticed.

Distortion

I've noticed some very minor barrel distortion with the Zeiss 80mm f/2. This typically presents itself at large apertures and is noticeable by a slight swirl most notably at the corners of the image. 

Minimum Focusing Distance

This is something that I feel can be very underappreciated. I love getting up close, to my subject for some close shots. At 70cm (about 2.3 feet) minimum focusing distance the Zeiss 80mm f/2 allows me to do just that. 

Image taken without macro filter using the Zeiss 80mm f/2 lens

Image taken without macro filter using the Zeiss 80mm f/2 lens

Build Quality, Features, and Feel

The Zeiss 80mm f/2 is built well. It's solid and feels "comfortably heavy". The aperture ring clicks very nicely and the focus ring is rather smooth, allowing for precise manual focusing. 

Worth noting, the aperture ring includes click stops for each stop, but (when using on the Contax 645 body) you can adjust the aperture halfway between each stop to achieve different f stops in between each stop.  

Final Remarks on the Zeiss 80mm f/2 Review

This lens is legendary, and for good reason. And for such reasons, it's not cheap. Current market value can be between $1,800 and $2,400 depending on the condition the seller. 

But, despite the price, it's a lens that people, including myself have found to be an investment. With wonderful bokeh, great contrast, good contrast and more, it's a lens that has earned it's reputation. 

If you've enjoyed or found this article helpful, please consider using our Ebay link to the Zeiss 80mm f/2 if you plan to purchase one. We've receive a portion of the total sale price, so it helps us out a lot!


2 Comments

Comment

Contax 645 Review


Note: This post is part of our "Learn Blog" for photographers. For workshops, coaching, and other resources designed to help grow your skills as a photographer click here (after you read the article, of course)!  To be transparent, all links are paid advertising, as a portion of any purchase made while using these links is credited to us. Please, consider using our links to help support what we do! Thank you!
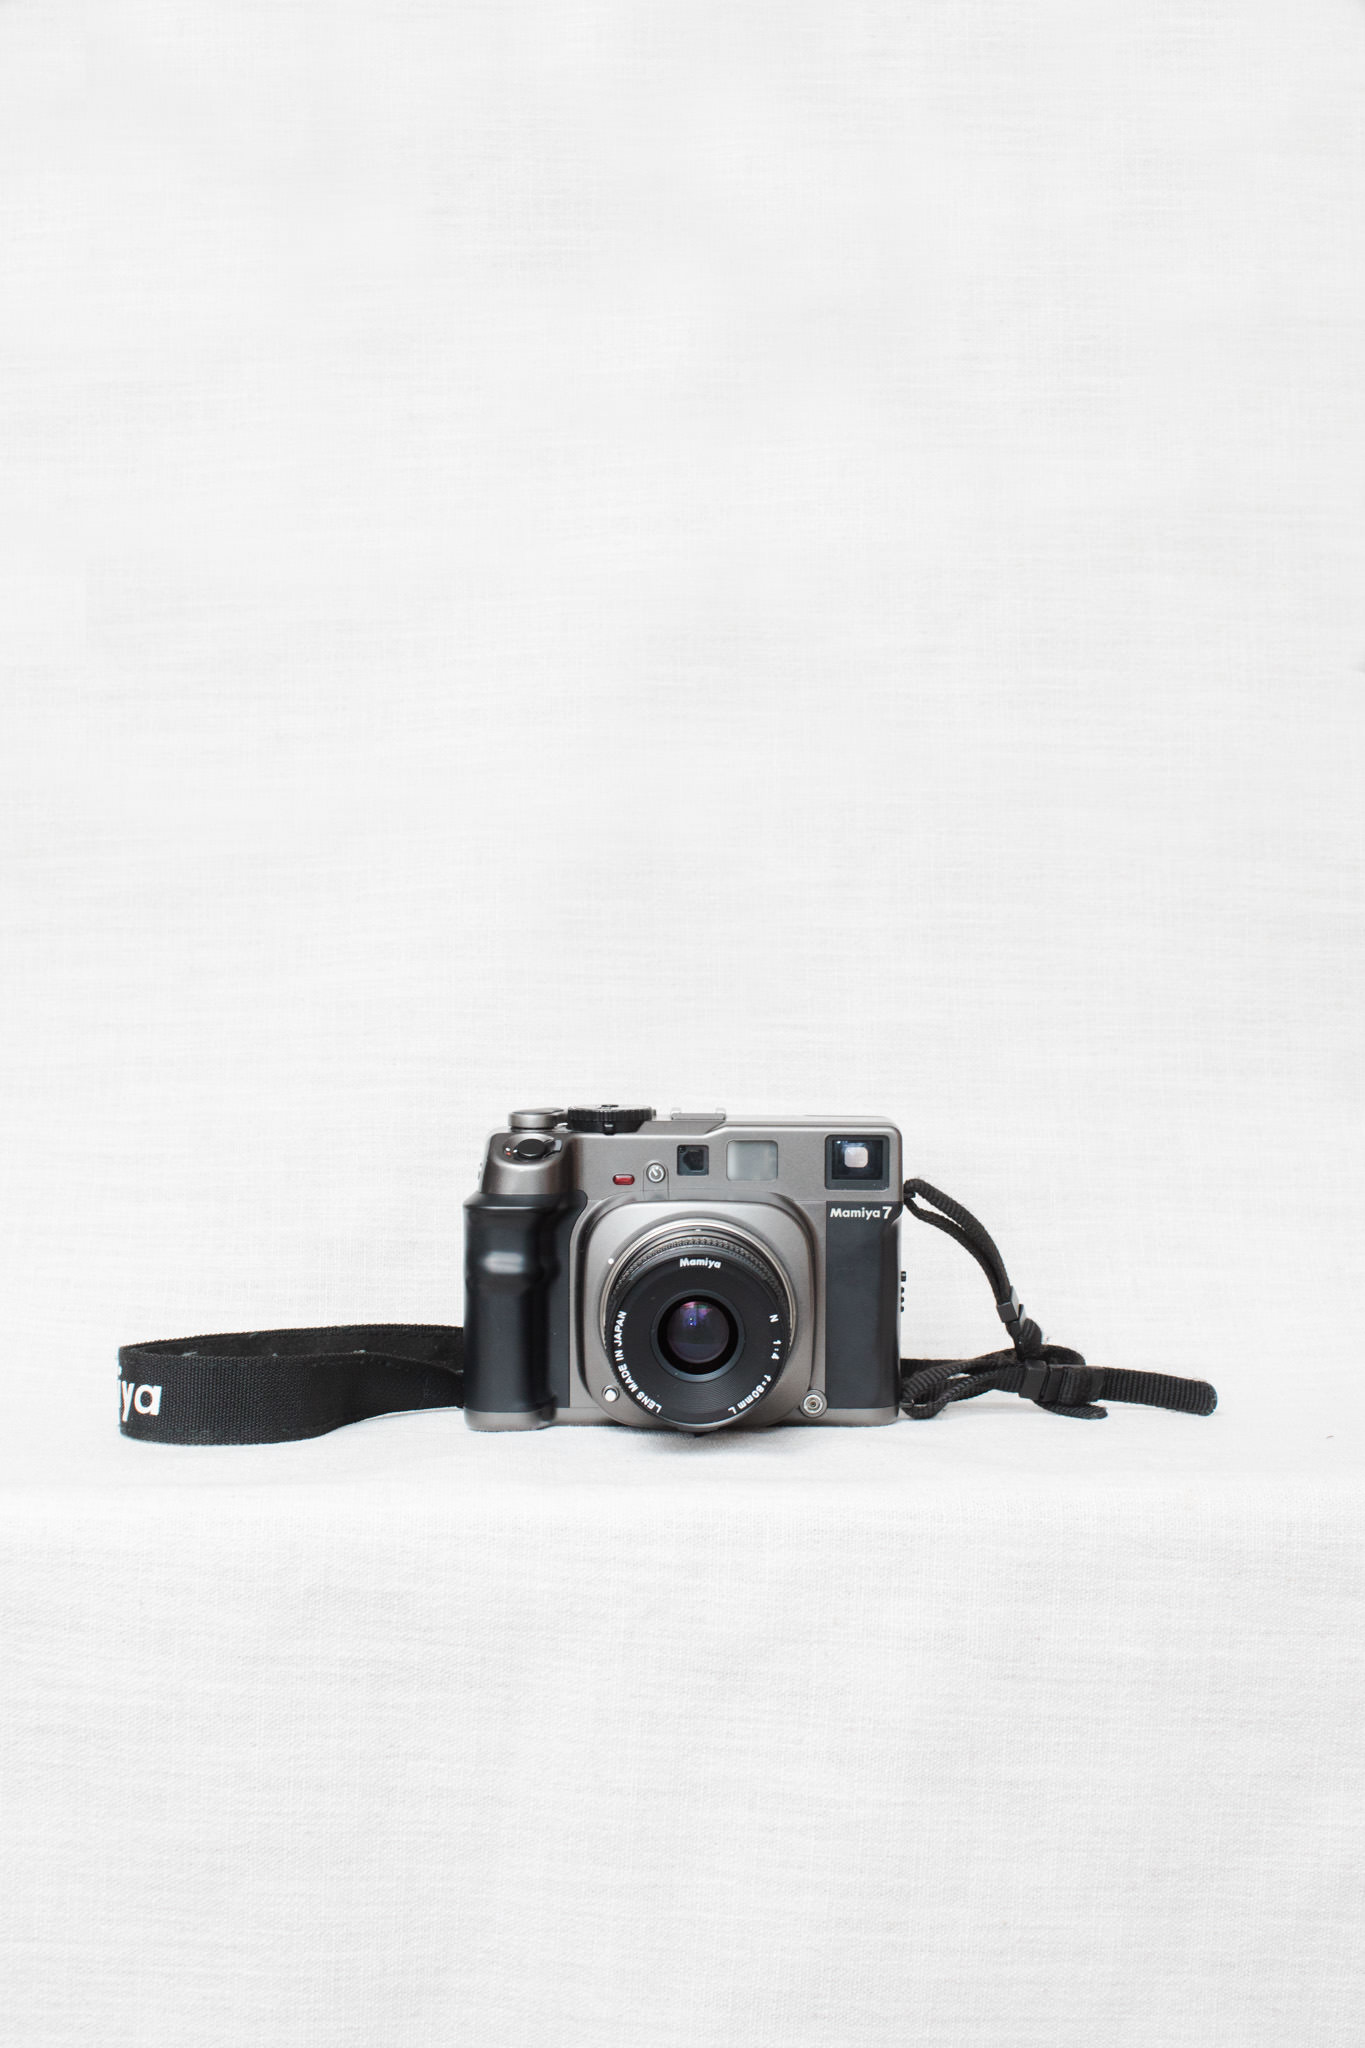

Image created using the Contax 645 and Zeiss 80mm f/2 Lens

Image created using the Contax 645 and Zeiss 80mm f/2 Lens

Excellent bokeh. Splendid sharpness. Great contrast. The Contax 645 medium format camera coupled with the Zeiss 80mm f/2 is known for producing "the look" when it comes to images. 

So, I've set out to write about it. In this particular review, I will focus on the Contax 645 body, and will only bring minor discussion in on the Zeiss 80mm f/2. If you'd like to read my review specifically on the lens, check out my Zeiss 80mm f/2 Review.

As many already know, the Contax 645 is not without its cons, and with that in mind, I now present to you my official Contax 645 review. 

Autofocus

In my experience, autofocus is going to be a hit or miss when it comes to a Contax 645. Some bodies tend to perform better, while others are lacking. My Contax 645 is fairly accurate, but it desperately struggles in backlit and side-backlit conditions, like the one you see below. 

Image created using the Contax 645 and Zeiss 80mm f/2 Lens

Image created using the Contax 645 and Zeiss 80mm f/2 Lens

Now, here is where manual focusing can come in very handy, which leads us to our next topic.

Viewfinder

The Contax 645's viewfinder is "alright". It's not incredibly bright and clear, but it's not too bad either. I don't find it to be quite as clear as my Pentax 645s or quite as clear as the Hasselblad H2. 

But, that doesn't make it unusable for manual focusing. I've had really good success with manually focusing the Contax 645. And, for those that may need a little extra clarity, there's the Maxwell Precision Optics Screens that you can have installed. To learn a little more about those, check out the comparison I did with the Maxwell Screen on a Pentax 67.

Contax 645 Ergonomics and Feel

The Contax 645 feels great in the hand. It's easy to hold. Its weight is similar to other options you'll find in the medium format camera world, so that's pretty average. 

One thing I love about using the Contax 645 is the sound of the shutter. It may sound like a silly thing to derive pleasure from, but it just sounds and feels nice. 

Functionality and Features

I know there's a lot of features that I'm not going to delve into here. That's because I probably don't need or use them. So, you'll have to excuse me for that. However, there are a few that I make use of, and those I will speak on.

Image created using the Contax 645 and Zeiss 80mm f/2 Lens

Image created using the Contax 645 and Zeiss 80mm f/2 Lens

Mirror-up

I love being able to have the mirror-up function on a camera. When I need lots of light, I go to a slow-shutter speed and mount the Contax 645 on a tripod. But, to retain that extra stability, I like to frame my shot, focus, and get that mirror up so it doesn't create any shake. 

The Contax 645's mirror-up option is conveniently accessible and just works. Enough said. 

Timer

Another option I employ when taking slow shutter speeds on a tripod is to use a self-timer. This also helps cut down on shake. 

Having a self-timer is also great for taking pictures that you'd like to be in as well!

Reliability

Here's where things get weird. The Contax 645 has developed a reputation for being finicky. Some report that it just stops working in high-humidity areas. Others tell horror stories of broken shutters, messed up auto-focus, so on and so forth. 

Yet, others will tell you that they've had their body for 10 years and never had a hiccup. My personal experience with mine is that it keeps on working, even in high-humidity environments. However, the first Contax 645 I purchased in "excellent condition" apparently had a broken autofocus. 

I talk a little more about the problems with reliability in my article on Contax 645 vs Pentax 67

Image created using the Contax 645 and Zeiss 80mm f/2 Lens

Image created using the Contax 645 and Zeiss 80mm f/2 Lens

Durability

The Contax 645 is sort of "the Porsche" among medium format film cameras. It's sexy, but it's not designed to be incredibly tough. If you're using for professional work like I do for weddings, you can expect that it'll get scratched/worn if you don't baby it. 

It's not designed to be taken in extreme situations like a Canon 1DX or something like that. These cameras, in my opinion, are meant to create beautifully sharp images with excellent bokeh while still being very portable and ergonomic, and that's about it. 

Lens Options

Though everyone seems to know the Zeiss 80mm f/2, there are indeed some other good lenses for your Contax 645. The other somewhat popular options seem to be the Sonnar T 140mm f/2.8, the Apo-Makro-Planar T 120mm f/4, and the Distagon T* 45mm f/2.8.

You can view a full list plus technical data sheet on Zeiss' website for Contax 645 lenses.

Image of bride wearing her ring holding the groom's hand taken with Contax 645 and 80mm f/2

Image of bride wearing her ring holding the groom's hand taken with Contax 645 and 80mm f/2

Battery Life

I'm very thankful my Contax came with the Contax MP-1 AA battery grip when I bought it. It seems to last for hours and hours on four Eneloop Pros (which were at the top of my Best Rechargeable AA Batteries for Wedding Photographers, by the way).

On the contrary, I've heard people say that they eat through the 2CR5 lithium batteries. So, although the grip does add some weight, it greatly reduces battery cost. Plus, it adds the ability to hold the camera comfortably in portrait orientation and even has the extra button on the grip to make it easy to click the shot.

Alternatives to the Contax 645

Since I've written about Contax 645 alternatives in another article, I'll only briefly touch on it here. 

The most common alternatives are the Pentax 645n (or nii), the Hasselblad H1 or H2, or the Mamiya Pro 645. These are all fair alternatives that each have their own set of pros and cons.

Among the alternatives, the particularly strong suit of the Contax 645 is the amazing quality of the native Zeiss 80mm f/2. In terms of reliability and cost, though, the Contax 645 tends to possess a few more cons when compared to the Pentax, Hasselblad, or Mamiya options.

Final Remarks on the Contax 645

Though not perfect, the Contax 645 does what it's designed to do--take great images. If you buy it for that reason, you'll be satisfied...unless you get a lemon!

So, do your due research and consider buying a Contax with a warranty and/or return policy of some sort. When I bought mine, it included a 30-day return policy on eBay, plus the coverage I have through eBay and Paypal's buyer protection.

This sort of protection was great, especially since I did have to return the first Contax 645 I purchased due to several issues. If I had bought it without any sort of buyer protection, I could have been out, at the very least, several hundred dollars in repairs.

So, let us know your thoughts! Have you owned a Contax 645 body? Ever had any issues, or has yours been an exception to "the rule"? Let us know in the comments below!

And if you've enjoyed or found this article helpful, please consider using our Ebay link to the Contax 645 if you plan to purchase one. We receive a portion of the total sale price, so it helps us out a lot!

Thanks in advance!

Other Posts You Might Be Interested In


Comment

Comment

Leica m2 Review


Note: This post is part of our "Learn Blog" for photographers. For workshops, coaching, and other resources designed to help grow your skills as a photographer click here (after you read the article, of course)!  To be transparent, all links are paid advertising, as a portion of any purchase made while using these links is credited to us. Please, consider using our links to help support what we do! Thank you!


Image of the Washington D.C. Smithsonian Air and Space Museum taken with Leica m2 and Voigtlander 35mm f/1.4 Nokton Classic

Image of the Washington D.C. Smithsonian Air and Space Museum taken with Leica m2 and Voigtlander 35mm f/1.4 Nokton Classic

With a legacy that requires no introduction, the Leica m2 is a legendary 35mm film rangefinder camera that's excellent design is only surpassed by the enjoyment its simplicit design and function precipitates. 

This camera made our Top 5 Film Cameras for Travel (under construction), and it's no wonder. It's a joy to use, fairly compact, reliable, completely mechanical, and has the potential to produce wonderful images. For this reason, I've been wanting to do a Leica m2 review for awhile now. 

Image taken with Leica m2 and Voigtlander 35mm Nokton Classic

Image taken with Leica m2 and Voigtlander 35mm Nokton Classic

Since there's a plethora of lenses with varying quality that you can use for this body, I don't intend this article to be an image quality discussion, but rather a user-experience expose. I also do not intend to give a technical/spec analysis or synopsis as there are a hoard of articles which already cover this. 

Image taken with Leica m2 and Voigtlander 35mm f/1.4 Nokton Classic

Image taken with Leica m2 and Voigtlander 35mm f/1.4 Nokton Classic

However, my experience is singular in that there is only one of me, and only one of my experiences. Well, unless we get into multi-verse theories. But all that aside, here we go! 

My Experience with the Leica M2

When I first held my m2, the metal build and weight were immediately noticeable. Upon first use, the fully mechanical operation was almost like meditation.

Still, to this day, the loading, winding, and operation of this camera gives me a sense of "zen"--like a purposeful and enjoyable slowing down. It's not a slowing down that creates rush , boredom, or malaise. It's a engaging with the camera that entertains the senses and stablizes the thoughts during the photographic experience. I dig this. 

Image taken with Leica m2 and Voigtlander 35mm f/1.4 Nokton Classic

Image taken with Leica m2 and Voigtlander 35mm f/1.4 Nokton Classic

I really enjoy the ability to use this camera for candids without attracting undue attention. When using my larger cameras, whether it's our Canon cameras or our medium format film cameras, heads turn. This isn't desirable because I want candids to stay just that...candids. 

To me, style isn't everything. But, with that said, it feels good to carry this camera. It's classy, attractive, and feels like a piece of art. It's just "feels good" to carry. When writing my Leica m2 review I wanted to mention this because I noticed over time that the m2 tends to go places with me, almost constantly. Although I didn't previously put a lot of emphasis on "feel", I think that's one subconsvious factor that the m2 always ends up in my hands.

Before I bought an m2, I heard people say things like "it just feels good to shoot a Leica". I considered this pure poppycock, as I was most concerned about flexing specs. And honestly, the Leica is not a spec monster (thought some of the lenses are pretty bad-A). 

Image taken with Leica m2 and Voigtlander 35mm f/1.4 Nokton Classic

Image taken with Leica m2 and Voigtlander 35mm f/1.4 Nokton Classic


Once I bought my Leica, I soon learned how inconsequential "specs" are when it comes to leisure shooting. Now, if I'm going out and want to bring a camera as a tag-along to take some great photographs, the m2 is at the top of my list. I owned a Fuji X-Pro 2 at one point, and loved it for the same reason. But, today, I no longer own the X-Pro 2, and still own (and shutter at the thought of selling) my m2. 

I'm currently using the Voigtlander 35mm f/1.4 Nokton Classic MC with my Leica. To see my full review on the Voigtlander 35mm 1.4 Nokton click here.

What It's Not That Great For

Shooting backlit

I noticed very quickly that the m2 was a not user friendly for shooting directly backlit. It becomes very difficult to focus because you can't make out the image in the rangefinder. Now, this isn't a deal breaker for me since I can, you know, just not shoot with direct sun. Side-backlit still gives me a nice hairlight while allowing me to focus. 

m2 voigt-1.jpg

Loading and unloading film quickly

Now, I don't have the m2-R, which inludes the rapid loading system of the m4. But, I can load and unload fast enough for the purposes for which I use my m2.

Landscape image of little girl in field taken with Leica m2 and Voigtlander 35mm f/1.4 Nokton Classic

Landscape image of little girl in field taken with Leica m2 and Voigtlander 35mm f/1.4 Nokton Classic

Word to the Wise

Watch out--if you leave this camera pointed at the sun for any amount of time, it will burn a hole in your curtain. I learned by experience. I'm actually not sure that I didn't receive m2 with this problem, which then possible got worse with use. For my ego's sake, I'd like to believe that's the case.

Anyhow, I fixed this pinhole light leak from the holes the sun had burned in the m2's curtain with some Liquid Tape by brushing over the holes. It's been fine for over a year now since the fix!

jarmstrong-4880-FUJI1600-09.JPG

Final Words on the Leica M2

The Leica m2 is not only a legendary, but a fun and enjoyable camera with loads of character. Though it's not a spec-monster, it's a joy to use and can create some amazing on-the-go imagery.


Other Articles You Might Be Interested in


Comment

3 Comments

Voigtlander 35mm f/1.4 Nokton Classic Leica Lens Review

Image taken with Leica m2 and Voigtlander 35mm f/1.4 Nokton Classic

Image taken with Leica m2 and Voigtlander 35mm f/1.4 Nokton Classic

The Nokton Classic is an infamous lens that, if anything, is known for it's interesting bokeh rendering. When I purchsaed my Leica m2, it came with this lens, so I was willing to give it a go! As you'll find out, I am not disappointed and have grown accustomed to the charm and character of its rendering.

As with most of my articles, I won't be sharing many "technical specs" regarding this lens. Rather, I'll be discussing it from a user experience and image-creating perspective. 

What I Love About This Lens

Image taken with Leica m2 and Voigtlander 35mm f/1.4 Nokton Classic

Image taken with Leica m2 and Voigtlander 35mm f/1.4 Nokton Classic


This lens has a lot of character. Something about it makes snapshot look like memories. Though it's not a "clean lens", it interesting rendering more than makes up for itself. It renders skin-tones pleasantly and has what I consider to be great, pronounced, yet not overdone bokeh. 

I like that this lens opens up to f/1.4. And at 1.4, it has "a look". But, that doesn't mean it's not great at smaller apertures. At f/4-5.6 it renders very pleasant and makes for great candids while still allowing some good fall-off. 

m2 voigt-1.jpg

What I'm Not a Fan Of

Now, on to some of the downsides to this lens. First off, it is not a technically sharp lens. I say that sort of tongue in cheek. Sharpness, for what I use this lens for, is not a big deal. If I wanted it for close up product shots that were going to be blow up for large, close viewing, the lack of resolution would be unacceptable. 

But, I will say this in the Nokton's favor: I've seen lenses that produce images that aren't sharp and things don't look in focus, and I've seen lenses that produce images that you'd never think they weren't that sharp, until you start pixel-peeping and you notice that the resolve isn't that great.

The Nokton Classic is the latter of those two. Unless you're a sharpness/resolultion Nazi, you wouldn't think much about sharpness unless you blew it up to 16 x 20 or were zooming in 100-200%. Again, here's where the Nokton's strong suit, it's character, outweighs it's technical downsides. 

Image taken with Leica m2 and Voigtlander 35mm f/1.4 Nokton Classic

Image taken with Leica m2 and Voigtlander 35mm f/1.4 Nokton Classic

User Experience

The focus ring is smooth. The aperture ring feels a bit thin, but has a pleasure click and works just fine. It's small and light-weight, so it makes for a great walk-around companion. Paired with the Leica m2, this is a fantastic lens in terms of making feel like you can take great images on the go. 

When I grab my m2, I know I can go out and make images that I'll cherish both from a "capturing moments" perspective, as well as an artistic perspective. It gives me the feeling that I have a broad range of capturing what my mind's eye sees on the go. 

A Word of the Different Nokton Classic Versions

There are two versions of this lens:

To learn a little more about which is best for you, be sure to read our article on the single-coated vs multi coated and how to tell the difference.

Image taken with Leica m2 and Voigtlander 35mm f/1.4 Nokton Classic

Image taken with Leica m2 and Voigtlander 35mm f/1.4 Nokton Classic

Conclusion

Though the Voigtlander Nokton Classic isn't quite as impressive of a lens in terms of sharpness compared to other M-mount options, it's a wonderful 35mm low-light lens that makes up for it's "lack of perfection" with it's depth of character and charm. 

3 Comments

1 Comment

Mamiya 7 Review: 6x7 Medium Format Film Camera

Image of Mamiya 7 with 80mm Lens

Image of Mamiya 7 with 80mm Lens


Note: This post is part of our "Learn Blog" for photographers. For workshops, coaching, and other resources designed to help grow your skills as a photographer click here (after you read the article, of course)!  To be transparent, all links are paid advertising, as a portion of any purchase made while using these links is credited to us. Please, consider using our links to help support what we do! Thank you!


Image of white bus with Hanging Gardens Nudist Colony written on side, taken with the Mamiya 7 and 80mm f/4 lens

Image of white bus with Hanging Gardens Nudist Colony written on side, taken with the Mamiya 7 and 80mm f/4 lens

The Mamiya 7 is a medium format 6x7 negative rangefinder camera with an excellent little lineup of lenses (43mm f/4.5, 50mm f/4.5, 65mm f/4, 80mm f/4, 150 f/4.5, and the 210mm f/8). It's known as a sort of legend for travel landscape photography and is unique in that it's medium format, lightweight, and a rangefinder.

I recently stumbled upon one for a good price in a local camera shop, so I decided to pull the trigger and give it a go! Now that I've had some time with it, I'll give my Mamiya 7 Review.

Mamiya 7 6x7 Camera Photos (13 of 13).jpg

In my Mamiya 7 Review I'll go over the following:

  • Basic features of the Mamiya 7

  • What I love about the Mamiya 7

  • Some things that might be an issue for using the Mamiya 7

  • A look at several other options such as the Mamiya 6 vs Mamiya 7, Plaubel Makina vs Mamiya 7, Pentax 67 vs Mamiya 7, and Mamiya 7ii vs Mamiya 7

Image taken with Mamiya 7 Film Camera

Image taken with Mamiya 7 Film Camera

Features of the Mamiya 7

A fantastic feature of the Mamiya 7 is that it's built as a leaf-shutter camera; there is no shutter in the body, but instead in the lenses. This means no loud mirror slap when you hit the shutter button and no shake from the mirror. So, shooting slower shutter speeds is going to be a bit easier compared to some other medium format SLR options. 

One of the other cool features of the Mamiya 7 is the meter in the viewfinder. Now, I am a handheld meter guy. I love my Sekonic L-358. With that said, I've enjoyed the ease of using the Mamiya 7's in-camera meter when on the go. And what's more, it seems to be pretty accurate!

The Mamiya 7's meter blinks the correct shutter speed to expose at EV 0, until you choose that speed. You can use exposure compensation to shift the meter higher or lower. I find that pointing the camera at the shadows, moving the shutter dial to the correct speed, and then snapping a shot of my subject is an easy way to grab a well-exposed shot on-the-fly. 

Image of Mamiya 7 Film Camera with 80mm lens

Image of Mamiya 7 Film Camera with 80mm lens

Another feature is the self-timer. To activate, you simply push the self-timer button at the top front of the camera and it'll give you a 10-second option until it fires. This is nice if you're using a tripod for self-portraits, or even shooting landscapes at long shutter speeds when you're wanting to completely avoid any shake created by pressing the shutter button. 

The viewfinder of the Mamiya 7 is fairly big and bright. The focus window is excellent is various lighting conditions, which was one of my complaints with the Leica m2. But, oddly enough, I don't consider it as bright as my m2's viewfinder. Still, it does a fine job of allowing for a good user experience. 

Image of baby blue antique car taken with the Mamiya 7 and 80mm f/4 lens

Image of baby blue antique car taken with the Mamiya 7 and 80mm f/4 lens

Feel in the Hand and User Experience of the Mamiya 7

The Mamiya 7 feels good in the hand. It's ergonomic, very lightweight for a 6x7, and doesn't feel too burdensome to bring along on a day-trip. In terms of a grab-and-go camera, I'd feel just as comfortable grabbing the Mamiya 7 as I would grabbing a Canon 5div with a 50mm 1.2L. 

Mamiya 7 6x7 Camera Photos (3 of 4).jpg

As far as a walk-about, this camera will get still get looks. I've noticed that when using my Leica m2, I can be in "stealth mode"...well, at least mostly. The m2 doesn't raise too many eyebrows when I pull it up. 

Not so with the Mamiya 7. I'm a person that is very sensitive to "feeling eyeballs" on me, and with the Mamiya 7, I "feel eyeballs". Now, this is not a big deal except perhaps when it comes to candids. But, I don’t want to overplay this issue.

Overall, the Mamiya 7 is one of those cameras that just feels good to use, though large.  

Image of a boy on the beach of Barren River Lake taken with the Mamiya 7 and 80mm f/4 lens

Image of a boy on the beach of Barren River Lake taken with the Mamiya 7 and 80mm f/4 lens


The [Could Be] Bad and the Ugly [For You]

The biggest drawback to this system is in relation to its usage for low-light portraits. At its largest for any lens, you'll be getting an aperture of f/4. In my experience, I found that this makes it tough to get well-exposed portraits in dimly lit areas involving moving subject.

Also, this means that you don't have the power to create intense bokeh like you can with some of the other medium format camera/lens combos like the Contax 80mm f/2 or Pentax 67 105mm f/2.4.

Mamiya 7 6x7 Camera Photos (1 of 4).jpg

But, that doesn't mean that you can't create awesome portraits with the Mamiya 7! It's great for well-lit situations, and you'll still be getting some good fall-off, especially with the 150mm. Plus, the Mamiya 7 lenses are quite sharp and have plenty of contrast to pop!

Compared to my m2, the Mamiya 7 is large, but so is it's negative. And, compared to many other medium format film options, the Mamiya 7 is highly ergonomic and transportable.

Another big drawback to getting into a Mamiya 7 setup is its price. As of this month (7/2018), you're looking to invest anywhere from $1,600-$2,500 for a body with a lens. 

Image of Kentucky Firemen taken with the Mamiya 7 and 80mm f/4 lens

Image of Kentucky Firemen taken with the Mamiya 7 and 80mm f/4 lens

Mamiya 7 vs Plaubel Makina vs Mamiya 6 vs the Pentax 67

The most similar options to the Mamiya 7 would be the Mamiya 6 or the Plaubel Makina, while I'll also mention the Pentax 67 since it's a very popular option with many.

The Plaubel Makina is a fixed-lens, 6x7 camera that features a Nikon 80mm f/2.8. It is a double-stroke camera requiring two strokes on the film advance lever before you can fire the next frame.

This camera does have the advantage of getting a full stop more of light, as well as the reduced depth of field that's typically desirable for portraits. So, if portraits on-the-go is your main concern, then I'd recommend the Plaubel Makina 67 over the Mamiya 7.

If you're less concerned with low-light and shallow depth of field, the Mamiya 7 has a lot more to offer with its interchangeable lenses and single-stroke design. Both cameras offer wonderful sharpness and contrast, so the biggest thing to consider is your low-light needs and depth of field desires.

Mamiya 7 6x7 Camera Photos (4 of 4).jpg

The Mamiya 6 is very similar in terms of it being a medium format, leaf-shutter camera, with a few differences worthy of mention 1) It's 6x6 instead of 6x7 and 2) it doesn't have as wide angle options as the Mamiya 7, and 3) it has the ability to retract the lenses into the body.

In terms of choosing between the Mamiya 6 vs the Mamiya 7, you might want to consider if you like/want square photos, want/need wider options, and lastly, if you want something that's perhaps a little more manageable in terms of size. If you're fine with square photos, don't need anything wider than a 50mm on 6x6, and prefer something lighter/more compact, then the Mamiya 6 may be the best option for you.

The Pentax 67 and the various versions of this camera has a lineup of amazing lenses at various focal lengths, including the legendary 105mm f/2.4. In terms of a travel-friendly camera, the bulky and heavy Pentax 67 is definitely overshadowed by the other options mentioned here, including the Mamiya 7.

The Mamiya 7 cannot touch the versatility of lens options offered with the Pentax 67. The Pentax 67 does have leaf shutter options, though it is a SLR and not a rangefinder.  If you're not concerned with traveling very light, then the Pentax 67 is going to win against all the other options in terms of low-light, shallow depth of field, and lens variety. 

Image of Paradise Point Marketplace taken with the Mamiya 7 and 80mm f/4 lens

Image of Paradise Point Marketplace taken with the Mamiya 7 and 80mm f/4 lens

Mamiya 7 vs Mamiya 7ii

At the time of writing, the Mamiya 7ii costs around $1,000 more than the early version Mamiya 7. The most notable upgrades of the Mamiya 7ii include a double-exposure feature and a polarized rangefinder offering slight contrast improvement. Other than these upgrades, the Mamiya 7 and Mamiya 7ii cameras are essentially the same. 

Mamiya 7 6x7 Camera Photos (2 of 4).jpg

Final Thoughts on the Mamiya 7

This camera does not disappoint. It's a true classic and produces images of great quality. Thought a little pricey, it's a camera that holds its value well in terms of features, image quality, and, since it's likely to continue going up in price, resell value.  

Thanks again for taking the time to read my Mamiya 7 review!

If you're interested in purchasing a Mamiya 7 or Mamiya 7ii, please consider clicking here to use our link, as we get a portion of the total purchase price. This helps fund us to do more of these articles! Thank you!


 Other Articles of Interest


1 Comment

Comment

Sekonic L-358 Light Meter Review


Note: This post is part of our "Learn Blog" for photographers. For workshops, coaching, and other resources designed to help grow your skills as a photographer click here (after you read the article, of course)!  To be transparent, all links are paid advertising, as a portion of any purchase made while using these links is credited to us. Please, consider using our links to help support what we do! Thank you!


When I first started in film photography, I was at a bit of a loss to find a really good light meter. I tried a few different options until I finally stumbled upon the Sekonic L-358. From then on, it was love. Because of it's simplicity of design, usability, and pricepoint,  I consider this the best light meter for film wedding photographers. 

Since there's plenty of technical/spec articles and info out there on the L-358, I won't go too much into detail on all the features/uses of the L-358. Instead, I'd like to focus on my user experience and what I think the L-358 is great for. 

How I Use the Sekonic L-358

My primary use with the L-358 is for wedding and engagement photography, which means that I'm using it for portraits, candids, landscapes, details, and all the rest. I simply set the ISO by pressing one of the two ISO buttons and turning the dial, then proceed to meter for the shadows by placing the bulb out away from the light, in the shadows. 

I have found it to be highly accurate in terms of obtaining correct exposure. I've tested two L-358s in the same lighting and have received consistent results between the two units.

Since I'm often carrying multiple camera bodies with different types of film loaded in each, I make use of the two ISO buttons very often. Each button can be set to different a different ISO. "ISO 1" will be the default display on the L-358's screen, but when the ISO 2 button is pressed, it will show the appropriate settings for the ISO that you've set.

Build Quality

I currently own two Sekonic L-358s and have found them to be pretty sturdy (for a light meter). Now, with that said, you don't want to drop these things. They are plastic and feel like you could snap them in half without too much effort. 

The most common issues with build quality seem to be the rubber jack covers and the battery door latch. The rubber jack covers tend to rip and the battery door latch can break off. 

Some Things Lacking

The Sekonic L-358 does not have a color temperature meter. Now, this really isn't a big deal if you're shooting portraits or landscapes in natural light. But, for some uses, for example, which require flash and adjusting/gelling lights, it would be nice to have.

Replacement part availability is another thing I wish we saw more of for the L-358. I have an L-358 with a broken battery door latch that I have secured with a rubber band and/or tape for probably around a year. It would be great if parts were readily available for issues like that.

The L-358 is not weatherproof. This is worth mentioning because there are other models which are, such as the Sekonic 758.

Of little importance to me, the L-358 is pretty basic. It doesn't not have options for video, which is of little importance to me since I'm using it almost exclusively for incident metering scenes for stills.

Where to Buy Sekonic L-358 Light Meter

We bought both of our Sekonic L-358 Light Meters off of eBay. We recommend using a seller that has good reviews and a good return policy.

To check out the available Sekonic L-358 on eBay, click here!

Final Thoughts on the Sekonic L-358 Light Meter

Though it isn't the most illustrious, the Sekonic L-358 has plenty of options for photographers looking for consistent, reliable exposure readings. As of the writing of this article prices for the L-358 can vary between $160 and $250.


Comment

Comment

Top 5 Digital Cameras for Beginners and Amateurs (Under $1200)

graphic for best digital cameras for beginners and amateurs

Note: This post is part of our "Learn Blog" for photographers. For workshops, coaching, and other resources designed to help grow your skills as a photographer click here (after you read the article, of course)!  To be transparent, all links are paid advertising, as a portion of any purchase made while using these links is credited to us. Please, consider using our links to help support what we do! Thank you!


So, you've decided that it's time to get yourself or perhaps a loved one a nice, entry-level-or-a-little-better digital camera? As wedding photographers, we regularly get asked for our recommendation on good digital cameras for beginners and/or amateurs.

If your desire is to become a better photographer, our advice is to always consider what camera you already have and to be sure you're getting your full use out of that. It's easy to overlook all that your camera can accomplish; learning how to use a camera both in technical terms and with artistic skill can vastly improve photos more than getting a more expensive camera. 

However, sometimes our camera gear (or lack thereof) may prevent us from being able to photograph in the manner we want. Maybe you have a camera that just won't take photos well in low-light, or maybe you'd really like to find a small and fun-to-use camera that you can take for travel.

Whatever your case may be, in this article we'll take a look at a few of the top digital cameras under $1,200 that we'd recommend!

 Things to Consider Before Purchasing an Entry Level Camera

When your specialty isn't cameras, all the technical details and differences between the various cameras can seem overwhelming. But, if you're armed with a few details, it'll go a long way in helping yourself or your loved one capture great images. 

One thing to note is that entry level cameras often come with a "kit lens". This is usually a zoom lens that has an variable "aperture", meaning that the aperture gets "smaller" the more you zoom in. 

Now, you may be wondering why that matters. In short, an aperture controls 1) how much light can get into your camera's sensor and 2) how much is in focus in your image. With a variable aperture, the more you zoom in, the less light you have available to take your photo. This means that taking photos in low-light may get more difficult the more you zoom in. To learn more about aperture, be sure to check out this article on f stops and aperture!

So, kit lenses typically are 1) not as effective in low light compared to non-variable lenses, and 2) they are not great for creating background blur that is typically desirable for portraits. 

So, why do we mention all this?

Well, there's a trade-off that you should be aware of. If you or your loved one just wants a good all-around lens to take to trips to the zoo where you'll need to take really close pictures and pictures further away, you may want to go with the kit lens. 

But, if you or your loved one wants a lens that's better for portraits and for low-light scenarios such as indoor events (think birthday parties, family get-togethers, trips to art museums, etc.), then choosing a fixed focal length and constant aperture lens is the way to go. 

To make this convenient for you, when we mention a camera that comes with a kit lens, we'll also recommend a fixed focal length lens that might be a better fit if you're on the look-out for something that's better in the low-light portrait realm of photography. 


List of the Top 5 Digital Cameras for Beginners and Amateurs

$1000-1200

If you're looking for a lightweight, travel-friendly, and sharp-looking camera, the X-T20 if a great choice. With 4K video capabilities, a touch screen, and excellent in-camera jpeg rendering, this little camera is an excellent choice for a walk-around camera to meet all the little moments family get-togethers, trips to new-to-you places, or whatever else comes your way. 

Cons:

•The lens that comes with this camera won't create a lot of "background blur" in most instances. If you're looking for a camera that's a little better for artistic portraits, you might want to consider another option below, or upgrading to another lens like the Fuji 56mm 1.2 later down the road. This lens is fairly expensive and has been holding it's value really well, so it is a bit of an "investment". In contrast, Sony and Canon have fairly cheap options for portrait lenses that still have amazing quality.

Canon 6D with 50mm 1.8 Lens

The Canon 6D is a fantastic option for photographers that are wanting to do artistic portraits, and maybe step up into some more professional level work. It has fantastic focusing and low-light capabilities, and with the 50mm 1.2 STM lens from Canon you've got a set up that will be great for just about any walk-around situation.

The 6D also features a "full-frame" sensor, as compared to a crop frame sensor that is used in many of the other options $1000 and under. The benefits of a full-frame sensor include more ability to blur your background when desired and typically a more "3D" look to your images.

Cons:

•This lens is not a zoom, so getting wider and/or tighter shots than 50mm will require another lens.

•It's also not as "trendy-looking" compared to an option like the Fuji X-T20 (if that matters to you.

•Not as travel-friendly as some of the other options, though it isn't a large camera by any means.

•Jpegs don't shine quite as much out of camera as Fuji X-Series cameras like the X-T20.

•No 4K video

•No autofocus for video


$600-900

Canon SL2 EF-S 18-55mm STM Lens - WiFi Enabled

The SL2 is a small, lightweight entry level digital camera that packs several great features for beginners. For one, it features an articulating screen that makes it easy to get a cariety of angles without having to twist and turn your body.

It also features built in WiFi, allowing you to take photos and then download directly to your phone.

The SL2 is a nice choice for a travel-size, inexpensive camera set-up for beginners.

Coupled with the 50mm 1.2 STM lens from Canon for just over $100, this combo would be great for walk-around and travel!

Cons:

•Not a super attractive camera, aethetically speaking

•Some say it feels a bit "toyish" due to size and build

•Can't take pictures as fast as some of the more expensive models

•Some report that the menus are a little more difficult to navigate since some options that are more easily accessed on larger models are tucked within the navigation to accomodate the smaller camera body size

•Video capabilities are limited when compared to some other options such as the Sony a6000

Sony Alpha a6000 Digital Camera with 16-50mm Kit Lens

This camera is small, lightweight, has good autofocus, good image quality, an articulating screen, and WiFi capability.

It also can shoot 11 frames per second, which is nice if you'll be photographing action such as kids, sports, etc.

Worth noting, this camera came out in 2014 and seems to still be holding is value well.

The a6000 has great video advantages when compared to entry level Canon cameras such as the Rebel models.

If you wanted a great low-light portrait lens, you could give the new Kamlan 50mm f/1.1 a go! It's been getting great reviews and seems to be a fantastic, low-cost option for turning your Sony a6000 into a portrait machine!

Though not as cheap as Canon 50mm lens options, Sony does make a 50mm 1.8 lens that would also make this set up low-light friendly.

Cons:

•Sony is not known for producing as pretty colors as Canon

$300-500

Canon EOS Rebel T6 Digital SLR Camera Kit with EF-S 18-55mm and EF 75-300mm Zoom Lenses

This set up is nice because it does come with two lenses. It also comes with built in WiFi.

Now, you might ask, "well, why is it cheaper if it comes with so much?"

Though it does have a lot to offer in terms of zoom lenses to get both up close, far away, and basically anything in between, the your going to compromise a little on image quality and performance.

Again, you can pair it with a Canon 50mm 1.2 STM lens and have a great upgrade lens-wise in terms of image quality and low-light ability, albeit without zoom.

Cons:

•No autofocus for video

•Not great for low-light

Final Remarks

So, regardless of your budget, you can get started making great photos with whatever camera you have. But, now you've at least got a few good options in mind!

Tell us below in the comments what other cameras you've been considering that we didn't list!


Comment

5 Comments

Pentax 67 Focusing Screen Comparison

If there's one weakness to shooting with the Pentax 67 cameras, well, besides the weight and film loading that takes some practice, it's the poor viewing screen.

Yes, it is sort of dim. But it's also dull. The contrast isn't great and the only reason it's fairly easy to focus with is because of the sheer size of the image.  

So, I began a search to find a way to improve the focusing screen in my Pentax 67s. 

Testing the Screens (Methodology)

I tested three bodies in a dark room using only a ring light lighting the subject at a fixed distance, all with the same lens (105mm 2.4, wide open), and all images were taken with the same camera and settings (1/160th at f/2.8, ISO 1600):

  1. A Pentax 67 with a microprism screen
  2. A Pentax 67 with a gridded matte screen
  3. A Pentax 67 with a Maxwell Hi-LUX Brilliant Matte screen

As a note, there are other Pentax 67 screens. Also, the Pentax 67ii has an improved screen over the 67, though I don't yet have the 67ii examples up. I have tested the 67ii microprism screen and have found that it is nearly as good as the Hi-LUX, with a slight edge the the Hi-LUX. As I find time, I'll also upload those photos of the 67ii screen.

The images you will see below are all RAW exported JPEG's. I did not do post-processing to any of them besides cropping. If in any image the subject appears closer, it is only due to cropping in post and not due to a change in the location of the Pentax 67's or the subject.   

My Pentax 67 Focusing Journey

I was originally very attracted to the microprism screen because I thought using that and then recomposing would work well. 

Two problems:

1. Recomposing at a shallow depth of field can cause the focus plan to move, leaving you with out of focus images. 

2. It is near impossible to use recompose method on moving subjects. 

So, I started focusing without the micropism. At this point, the microprism started becoming an annoyance. 

I decided to try out my plain gridded matte screen, and to my surprise noticed that it was slightly brighter and provided a much more crisp image. Compared to the microprism screen, it makes it look very muddy.

Lastly, I decided to try the Maxwell Hi-LUX Matte screen. While Mr. Maxwell claims that the benefit of his screen is the contrast and optical clarity and NOT the brightness, I found both the latter and the former to be fantastic. 

Maxwell Hi-LUX Screen Really Shines

In bright light, the Maxwell screen has a bit of an edge over the gridded matte, while completely demolishing the microprism screen. 

But, in low light/shadows is where the Maxwell really shines. The microprism is a dark screen, and the gridded matte screen barely better. But the Maxwell is probably close to 2/3rds to a stop brighter than the others. That, coupled with its superb clarity makes it much easier to spot focus as the subject pops into focus. 

Maxwell Hi-LUX Brilliant Matte Focusing Screen for Pentax 67

Maxwell Hi-LUX Brilliant Matte Focusing Screen for Pentax 67

If you don't know much about Bill Maxwell or his screens, you might be missing out. He's a very friendly chap (and his screens are pretty accommodating as well). Out of all his screens for the Pentax 67, he'll heartily recommend the Hi-LUX Brilliant Matte screen for those that use "shallow depth of field and strong off-center composition".

My Only Complaint

The Hi-LUX Brilliant Matte screen is VERY clear. Almost so clear that it is sometimes a little tricky to tell exactly what's in focus when in very bright, harsh-light conditions like outdoors on a sunny day. Now, this is in comparison to the gridded matte screen. The gridded matte is a dull screen, but when something is in focus, it's obviously not near as dull as everything else around it. But, when it gets dark, the gridded matte gets pretty tough to really tell what's going on. 

So, this isn't really so much of a complaint, as something that may need some getting-used-to if your more familiar with the Pentax 67's darker screens. My experience is just that, in bright light, the gridded matte popped just a tad bit more for me when compared to the Hi-LUX.  

A Word On the Gridded Matte vs the Microprism

The gridded matte screen performs so much better than the microprism. Unless you're doing mainly still life and almost always center compose, I highly recommend the matte over the microprism. If you're not wanting to invest in something like a Maxwell screen due to various reasons, then the gridded matte is worlds better than the microprism. 

Microprism Focusing Screen

Microprism Focusing Screen

Gridded Matte Focusing Screen

But Of Course, The Winner Is...

So, in conclusion, the Maxwell Hi-LUX is the best out of these three screens. I have also now tested the 67ii screen and can confirm that it is ALMOST as good/clear/contrasty as the Hi-LUX, with a slight and sublte clarity/brightness advantage to the Hi-LUX. 

If you'd like to know more about Maxwell Precision Optics and their focusing screens for various cameras including the Pentax 67, visit the Maxwell Precision Facebook page, email at maxwellprecisionoptics@yahoo.com, or call them at (770) 939-6644. 

Other Pentax 67 Articles You Might Be Interested In

5 Comments

16 Comments

Contax 645 vs Pentax 67 vs Pentax 645 vs Hasselblad H2 vs Mamiya 645 | Contax 645 Alternatives

Image taken with Pentax 67 using Schneider Cinelux (Cine-Xenon) 150mm f/2.3 from The Boutique Lens

Note: This post is part of our "Learn Blog" for photographers. For workshops, coaching, and other resources designed to help grow your skills as a photographer click here (after you read the article, of course)!  To be transparent, all links are paid advertising, as a portion of any purchase made while using these links is credited to us. Please, consider using our links to help support what we do! Thank you!


This article explores a future-forward perspective on using the Contax 645 system (or not) for professional work, and what other alternatives are out there that offer a similar "look" to the legendary Contax 645 combo.

For those who don't want the TL:DR version/that want the answers quick:

  • Contax 645 bodies are great, but they can be very skiddish (Read more below and/or in my Contax 645 Review)

  • I like Contax 645 and I like the Pentax 67 with 105mm, and highly favor the Pentax 67 w/ Cinelux lenses (p.s. you can see a review of one of my Cineluxes here.)

  • Contax 645 is expensive up front

  • Pentax 67 is cheaper up front, but you'll pay for only having 10 frames

  • There are some great digital alternatives to either replace or pair with your medium format option(s)

  • There's a lot more to this article and you may be cheating yourself if you only read this part

Bridesmaids lined up during ceremony. Image taken using Pentax 67 and Pentax SMC 105mm f/2.4

Bridesmaids lined up during ceremony. Image taken using Pentax 67 and Pentax SMC 105mm f/2.4

Up front, let's get this out: GAS (Gear Acquisition Syndrome) is real; amazing images have been created with less than amazing cameras. However, many professional photographers own very nice cameras and there's nothing wrong with noticing and embracing excellent optics and camera bodies. 

With that said, I think the Contax 645 80mm combo possesses some of the most sought-after characteristics within the realm of highly ergonomic medium format film photography.

Image of bride and groom embracing in front of castle. Taken using Pentax 67 and Schneider Cinelux Ultra MC 120mm f/2

Image of bride and groom embracing in front of castle. Taken using Pentax 67 and Schneider Cinelux Ultra MC 120mm f/2

So you know that reading this article is worth it, we'll cover:

  • My experience with Contax 645s

  • Future outlook on the Contax 645 system for professional work

  • What's so great about the Contax 645 Zeiss 80mm f/2 combo

  • Other film alternatives to the Contax 645

    • Contax 645 vs Pentax 67

    • Contax 645 vs Hasselblad H1/H2

    • Contax 645 vs Mamiya 645

  • Digital alternatives to Contax 645/Medium format film cameras

  • A "Contax 645 vs Pentax 67" discussion from a wedding photographer's perspective

  • I've also included some links to other great articles on the topic that I think provide a good/slightly different perspective and information

Image taken with Contax 645 using Zeiss Planar T* 80mm f/2 lens

Image taken with Contax 645 using Zeiss Planar T* 80mm f/2 lens

This article was mainly written for:

  • Professional photographers looking to make the wisest, long-term decision in investing in their film camera kit workhorse

  • Professional photographers (especially wedding photographers) considering the purchase of a Contax 645

  • Photographers looking for alternatives to what the Contax 645 kit has to offer

  • Photographers looking for further discussion on the characteristics of lenses such as the Zeiss 80mm f/2, Pentax 105mm, and others

  • Those looking to find the best camera/lens combo in medium format film

A Bit of Background

Pentax 67 w/ ISCO Ultra MC 110 f2

My Contax 645 Experience (So Far)

My Contax 645 experience so far has been a both good and bad. Having seen the pop of the subject and super-pleasant, non-boring-yet-undistracting bokeh, I figured I'd give it a try. So, I sought out to find a kit.

After weeks of watching eBay, scouring Facebook groups, etc., I finally found a lens and body separately that were described as excellent and in fully working conditions. Once I received them, I found quite the opposite. The lens was full of fungus and the body's autofocus wasn't working at all. 

After that, I waited some time, and then decided to buy another kit, which has turned out to work just fine so far!

Now, I'll say that some don't have hardly any trouble, but that's the thing: it's a mixed bag that will only get worse, bar a miracle. This leads me to a few big reasons why I decided to not rely heavily on a Contax 645 kit:

Image of bride under veil taken with Contax 645 and Zeiss 80mm f/2

Image of bride under veil taken with Contax 645 and Zeiss 80mm f/2

After an hour-long conversation with one of the only people in the world who work/repair Contax 645s, I became aware of a few things:

  1. Contax 645s are breaking at an increasing rate

  2. There are only a certain number of them

  3. The number of available shutters to replace broken shutters is rapidly decreasing

  4. Although the Zeiss 80mm lens is arguably one of the best medium format lenses ever made, the Contax 645 is known to be skittish

  5. The price for Contax 645s will continue to go up as bodies are parted out for repairs; the cameras will become rarer and more expensive to the point that few people will probably hoard the majority of the bodies, further exacerbating the price

Image of dog licking owner's face taken with Pentax 67 and SMC 105mm 2.4

Image of dog licking owner's face taken with Pentax 67 and SMC 105mm 2.4

At this point I will reiterate that this article is not to bash the Contax 645--I love my Contax 645 setup. I just don't think it's smart to rely on it always being there for me.

Now, to be fair and balanced in light of that semi-bad news, I will also mention that Bill at ProCamera in Virginia has told me that they have 6-10 years worth of parts for the Contax 645. He does not at the time of the writing of this article believe that the Contax 645 is a system that will go out of style anytime soon. 

The common denominator here seems to be the "10 years" that we're "good" on Contax parts and bodies. So, as a summary, it sounds like Contaxs, though increasing in price, will probably be a fairly safe bet, bar their day to day hiccups, for the next 10 years, after which, we really don't know.

Why Buy a Contax 645 In the First Place?

Image taken with Contax 645 using the Zeiss Planar 80mm f/2 lens

Image taken with Contax 645 using the Zeiss Planar 80mm f/2 lens

So what's all the hype with the Contax 645? With rumors of unreliable autofocus, bodies that won't work in high humidity, and other quirks, there must be something particular that people like about this system. When it comes to the Contax 645s fancy in the eye of photographers, we're really talking about image quality, which comes from the glass-- the Zeiss 80mm f/2.

The properties that stand out so well with this lens are: 

  • Amazingly smooth, yet delightfully pronounced bokeh

  • Smooth transition from out of focus to in focus areas

  • Good contrast

  • Fast f/2 aperture for medium format

People use different words to describe the "pop" that a particular lens renders regarding the subject. Words like "plasticity, "roundness" micro-contrast, or "the 3D effect" have all been given various definitions, often with one person disagreeing with another on which word means what.

Flatlay of bride’s details taken with Contax 645 and 80mm f/2 lens

Flatlay of bride’s details taken with Contax 645 and 80mm f/2 lens

Still, others say all the terms ultimately refer to the same thing. Regardless of the semantics, the pop-effect and what all actually creates it is hard to describe, though undeniable. 

When we look at Zeiss glass, we see the pinnacle of this effect as far as popular modern film photography is concerned. The subject "pops", and it's not merely just because of the bokeh, or shallow depth of field. In fact, a lens can have shallower depth of field, and yet have less pop than one with a wider depth of field. 

This effect is a combination of the medium format perspective, quality of bokeh, transition of in focus to out of focus areas, sharpness of focal point, and over-all micro-contrast.  Many describe the bokeh as "painterly". It's extremely pleasant in terms of buttery smoothness but isn't boring or flat as some lenses. It is also interesting bokeh, but not too choppy or distracting. 

If you'd like to some of my further thoughts on the Zeiss 80mm, be sure to check out my Contax Carl Zeiss 80mm f/2 Review.

Since we’re on the topic of lens importance, it’s a good time to skim through some of “the best” lenses that compare to the Zeiss 80mm f/2. After this little list, I’ll discuss my thoughts about body/lens combos compared, but just to give you a good idea of the other lenses we’ll be looking at and their image quality:

  • Pentax 67 105mm f/2.4

    • Great lens, but perhaps not quite as “smooth” of a rendering

  • Schneider Cineluxes/ISCO Ultra MCs

    • Equal to if not better image quality than the Zeiss 80mm f/2

  • Hassleblad 110mm f/2

    • Another great lens comparable to the Zeiss 80mm

  • Hassleblad 100mm f/2.2

    • Beautiful lens with a “smooth” rendering similar to the Zeiss 80mm. Bokeh seems less pronounced.

  • Pentax 75mm FA f/2.8

    • Good lens, but doesn’t have the same “pop” as the Zeiss 80mm"

  • Leica Summicron 90mm f/2

    • Good lens, but seems a litte more sterile to me

  • Mamiya 80mm f/2.8

    • Good lens, but doesn’t have as much “pop” or character as the Zeiss 80mm

  • Mamiya 80mm f/1.9

    • Good lens. I have heard others say that it’s bokeh is “busy” and/or “more distracting”. I have yet to see any images that convince of this.

Image of bride and groom taken using a Pentax 67 and SMC 105mm f/2.4

Image of bride and groom taken using a Pentax 67 and SMC 105mm f/2.4

Contax 645 Zeiss 80mm f/2 vs Pentax 67 105mm f/2.4 and Other Popular Choices

Let's recap the pros and cons of the Contax 645 combo compared to other medium format options:

Contax 645 w/ Zeiss 80mm f/2

Pros:

  • Amazing image quality

  • Autofocus

  • Ergonomics are pretty good/feels good in the hand

Cons:

  • Various reports on autofocus being good/decent/bad

  • Lack of reliability/finicky (randomly not working in certain conditions, lack of parts/serviceability, longevity, price, lack of supply/availability)

  • Also, in terms of practicality, this system is rumored to be finished in 10-15 years according to my conversation with one of the few people in the world that performs repairs on Contax 645. "We're already rebuilding shutters; there's just not enough bodies around to keep junking bodies."

  • This system is possibly not a foreseeable long-term solution beyond the next 10 years, for most shooters.

  • Film flatness problems

Image of couple photographed using Contax 645 and Zeiss 80mm f/2

Image of couple photographed using Contax 645 and Zeiss 80mm f/2

Pentax 67 w/ 105mm f/2.4

Pros:

  • Amazing image quality

  • Comparable or perhaps slightly shallower depth of field compared to 80mm f/2 on Contax 645

  • 6x7 negatives provide for a very interesting perspective

  • High resolution, sharp, very pleasant bokeh

  • Excellent "pop" that rivals the Zeiss 80mm f/2

Cons:

  • Heavy

  • I personally don’t think that the 105mm 2.4 possess the level of "creaminess” that is seen in photos taken with the Zeiss 80mm or the Cinelux lenses. It’s close, but I tend to find the images taken with the 105mm to generally appear a bit more “crispy” when compared

  • No film back/insert

  • A little difficult to load quickly

  • No autofocus

  • Not quite as low light capable at f/2.4 compared to 80mm f/2

  • Ergonomics not quite as advanced as other options

  • 10 exposures (w/ 120) vs 16 on 645

*Note: After having a lot of practice with a 67, I would argue that someone who uses one all the time can change film almost as quickly if not more quickly than someone reloading their Contax.

To check out Pentax 67 prices and average cost to getting into the system, view Pentax 67s on Ebay by clicking here.

Read our full Pentax 67 Review.

Image taken with Pentax 67 and Pentax 67 SMC 105mm f/2.4

Image taken with Pentax 67 and Pentax 67 SMC 105mm f/2.4

Image taken with Pentax 67 and 105mm f/2.4

Image taken with Pentax 67 and 105mm f/2.4

Image taken with Pentax 67

Image taken with Pentax 67

Pentax 67 w/ Hassleblad 110mm f/2

Pros:  

  • More shallow depth of field than the Zeiss 80mm f/2.

Cons: 

  • Quite a feat to find a 110mm f/2, afford one, and then to mount it on a Pentax 67 while achieving focus to infinity.

  • No autofocus and all the other weaknesses of a Pentax 67 kit.

To check on prices and availability of theHasselblad 110mm f/2, click here to view it on Ebay.

Pentax 67 w/  various projection lenses

Pros: 

Cons: 

  • Generally speaking, these are always going to be fixed aperture lenses that you will have to mount with specific hardware.

  • A lot of these older lenses do not have great coating and may flare quite a bit. These large aperture lenses are typically quite heavy.

  • Also, they may have a very limited focal range, say up to 15 meters or less.

An image photographed using a Bausch & Lomb Super Cinephor 178mm f/1.9 on a Pentax 67.

An image photographed using a Bausch & Lomb Super Cinephor 178mm f/1.9 on a Pentax 67.

Note: In my current opinion, the best solid exceptions to these flaws are going to be modded Cinelux lenses. I am currently experimenting with modding a f/2 Cinelux that can focus to infinity, and which has an aperture. I will probably update this article as I experience those results. 

Pentax 67 w/  Cinelux or ISCO Ultra MC Lenses (see this guide to Cineluxes to understand the differences between Schneider and ISCO)

Pros:

  • Fast (many are f/2)

  • Cineluxes are fairly lightweight

  • As good or better bokeh and “pop/3d effect” as the Zeiss 80mm f/2

  • Very smooth “creamy” rendering, as good or better than Zeiss 80mm f/2

Cons:

  • Rare

  • Manual focus (if that’s a deal-breaker for you)

  • Can be a bit of a costly investment (sometimes around the price of a Zeiss 80mm f/2)

  • No native aperture, though you can purchase a Schneider Cinelux with an aperture installed

Image of bride and groom embracing with bouquet taken using Pentax 67 and Schneider Cinelux Ultra MC 120mm f/2

Image of bride and groom embracing with bouquet taken using Pentax 67 and Schneider Cinelux Ultra MC 120mm f/2

ISCO Ultra MC 110mm f/2 on Pentax 67

Contax 645 vs Hasselblad H1 or H2

Hasselblad H1 or H2 w/ 100mm f2.2

Pros:

  • Still serviced

  • Similar look to 80mm f/2, including very smooth/”creamy” skintones

  • Often reported as better autofocus than Contax

  • If bought used, one can spend about the same or less than current Contax 645 market prices

  • More durable/reliable

  • 100mm is arguably a better portrait focal length than the Zeiss 80mm on 645

Cons:

  • I personally have trouble accidentally hitting the shutter button. I think the button is more exposed than the shutter button on the Contax, so when carrying it during a wedding day, it’s common to bump it and expose a few random frames

  • f/2.2 not quite as low light capable as the Zeiss 80mm f/2

  • Somewhat expensive

  • The 100mm 2.2 can sometimes be difficult to find

  • Bokeh is very similar to the Zeiss 80mm f/2, PERHAPS a little less pronounced

Image of bride taken with the Hasselblad H2 and HC 100mm f/2.2 lens on Fuji 400H

Image of bride taken with the Hasselblad H2 and HC 100mm f/2.2 lens on Fuji 400H

Image of bride and bridesmaids holding bouquets during wedding taken with Hasselblad H2 and 100mm 2.2 lens

Image of bride and bridesmaids holding bouquets during wedding taken with Hasselblad H2 and 100mm 2.2 lens

Image taken with Hasselblad H2 100mm f/2.2

Image taken with Hasselblad H2 100mm f/2.2

Hasselblad H2 w/ 100mm 2.2

Hasselblad H2 w/ 100mm 2.2

H2 with HC 100mm f/2.2 @ 2.2

H2 with HC 100mm f/2.2 @ 2.2

To check on prices and availability ofH2 bodies, prisms, click here. To check on the appropriate film backs/inserts for H2 cameras,view the Hasselblad HM 16-32 film backs on Ebay. To check on the 100mm f/2.2, click here for ebay or here to view it on Amazon.

H2 w/ 110mm f/2 + V to H Series Adapter

Pros:

  • Great portrait setup

  • Great for low-light

  • Shallow depth of field

  • Rendering very similar to 80mm f/2

Cons:

  • Manual focus only

  • Somewhat expensive

To check out pricing and more info on this adapter to mount V series lenses to H series bodies, check it out on Amazon and Ebay

Image of flower girls taken with Pentax 645nii using a 75mm FA f/2.8 lens

Image of flower girls taken with Pentax 645nii using a 75mm FA f/2.8 lens

Contax 645 vs Pentax 645

Pentax 645 Nii with 75mm FA

Pros:

  • Cheaper

  • More reliable

  • Plenty of parts

  • Better autofocus

  • Good image quality

Cons:

  • Not quite the level of plasticity/microcontrast we see in the Zeiss 80mm f2

  • Not quite as capable in low light at 2.8

  • Less shallow depth of field

  • No interchangeable film backs/inserts must be changed after roll is finished. (I personally don't mind this "shortcoming")

  • I think this combo can tend to look a little "sterile". It's not bad at all; it just doesn't have "the look" for me like some of the alternate options.

  • My experience with Pentax 645 bodies has been mixed. I have owned both all three version of the Pentax 645, and have had bad experiences with the two earlier ones. Now, this may have been from a defective insert. But strangely, I have spoken to quite a few that have reported the same issues. Other problems such as film flatness issues and/or the mirror not resting all the way down can also result in focusing issues.

Read our full Pentax 645 Review!

To check on prices and availability of thePentax 645, click here to view it on Ebay.

Image taken with Pentax 75mm f/2.8 FA

Image taken with Pentax 75mm f/2.8 FA

Pentax 645 with FA 75mm 2.8

Pentax 645 with FA 75mm 2.8

Pentax 645 w/ 105mm (via adapter)

Pros: 

  • Images with the 105mm look great

  • Using this on the Pentax 645 allows images to take on the amazing character of that lens

Cons: 

  • No autofocus

  • Images don't look as good as the Pentax 67 or the Contax/Zeiss 80mm combo

  • Somewhat heavy

  • Same potential film flatness issues as Pentax 645 w/ 75mm FA

Image shot using Pentax 645 Medium Format Camera w/ adapter Pentax 105mm f/2.4

Image shot using Pentax 645 Medium Format Camera w/ adapter Pentax 105mm f/2.4

Pentax 645 with Bokeh Factory Zeiss 80mm f/2

Pros:

  • Zeiss look

  • Mechanical reliability of Pentax 645

Cons:

  • My experience with Pentax 645 bodies has been mixed. I have owned both all three version of the Pentax 645, and have had bad experiences with the two earlier ones. Now, this may have been from a defective insert. But strangely, I have spoken to quite a few that have reported the same issues.

  • Other cons can include the following: expensive, cannot change aperture from f/2, no autofocus, wait time/availability.

  • Cannot adjust aperture from f/2

Pentax 645nii w/ projection lenses

Pros:

  • Cinelux lenses 105mm and up can be modded pretty effectively, from reports that I've heard. These lenses are f/2, which is fantastic. A 100mm Cine Xenon lens on my 645nii is my current project. I think this is a fantastic option. A 100mm f/2 is about a 62mm f/1.25 when compared with a 35mm/full-frame perspective. I think this makes for a great all-around portrait/details combo. There also exists several other lenses I'm working to test. Some of these have as low as f/1.6 minimum aperture.

  • I have had much better luck at hitting focus with my Nii than with the original or N versions of the Pentax 645. This, of course, doesn’t prove that the Nii is better. But, it also raises the question!

  • Bright focusing screen for good manual focus control

Cons: 

  • Lenses are difficult to find. They take time to mod. Manual focus only.

Image taken with Pentax 645nii using Schneider Cine-Xenon 100mm f/2

Image taken with Pentax 645nii using Schneider Cine-Xenon 100mm f/2

Image taken with Pentax 645nii and ISCO Cinelux Xenon MC 115mm f/1.7

Image taken with Pentax 645nii and ISCO Cinelux Xenon MC 115mm f/1.7

Pentax 645 w/ Summicron 90mm f/2

Pros: 

  • I have not used this combo, but am aware that it produces pretty desirable results. I don't like the rendering as much as I do that of the Cinelux lenses, though. That's just me!

  • A huge benefit is its ability to focus close (I've heard 60mm when modded by The Bokeh Factory) to infinity.

  • Also, it can retain the changeable aperture, so you can shoot at f/2 and more!

Cons: 

  • No autofocus.

Contax 645 vs Mamiya 645 

Mamiya AFD with 80mm 2.8

Pros:

  • Autofocus

  • Very affordable compared to the Contax combo

Cons:

  • Not as low-light capable at 2.8

  • Depth of field not as shallow as other options

Mamiya 645 with 80mm 1.9

Pros:

  • Similar depth of field

  • Cheaper

  • More reliable

  • More reliable

Cons:

  • Arguably not as pleasant bokeh (often described as "weak" or "busy"), some say

  • No autofocus

Mamiya 645 w/ other projection lens options listed above

Pros: 

  • This solution is going to be pretty much the same as using the Pentax 645

    • Great lens quality, shallow depth of field, etc.

Cons: 

  • I've heard the focusing screen is darker on the earlier Mamiya 645s. However, I’ve heard great things about the AFDII and newer matte screens.

Digital Options/Alternatives to Contax 645 and/or Medium Format Film

Perhaps you've thought about getting the look of the 80mm f/2, but would like to consider digital options. Since "the look" of the medium format perspective is unique and interesting, here are a few options that provide some of that "look".

Keep in mind that film 645s shoot a negative that is 56 x 42mm. Many digital backs or "digital medium format" 645s are a different crop than film 645s.

The largest sensor size at the time of this writing for digital 645 is 53.9 x 40.4mm for a "CCD" sensor and 53.4 x 40.1mm for a "CMOS" sensor. Though slightly smaller than "true" 645, these are very close to their film counterparts.

Phase One XF or DF+ w/ IQ260 w/ Contax 80mm f/2, Cinelux, etc.

Pros:

  • Large 53.7 x 40.4 sensor size

  • If you shoot a lot of film, switching to digital could save tons over the years. We calculated that, when shooting only 10 rolls per wedding at 30 weddings a year, we'd save about $7,500 per year on film, developing/scanning, shipping, etc.

  • Since you're investing in valuable goods, you can sell your gear at some point and still recover cost. With film, you shoot it and there's no object that you can sell/use to recover your initial investment.

Cons: 

  • Expensive

  • Have heard images referred to as a bit "crunchy" compared to film

Phase One XF or H2 Body w/ IQ1 100mp Digital Back w/ Contax 80mm f/2, Cinelux, etc.

Pros: 

  • Large sensor size of 53.4 x 40.1 (which is about as big as you get at this time

  • 15 stops of dynamic range

  • If you shoot a lot of film, switching to digital could save tons over the years. We calculated that, when shooting only 10 rolls per wedding at 30 weddings a year, we'd save about $7,500 per year on film, developing/scanning, shipping, etc.

  • Since you're investing in valuable goods, you can sell your gear at some point and still recover cost. With film, you shoot it and there's no object that you can sell/use to recover your initial investment.

Cons:

  • Expensive

  • Difficult to find used

  • Have heard images referred to as a bit "crunchy" compared to film

Phase One XF + Leaf Credo 60 w/ Contax 80mm f/2, Cinelux, etc.

Pros: 

  • Large sensor size of 53.9 x 40.4

  • Handles light a lot like film, in my opinion.

  • If you shoot a lot of film, switching to digital could save tons over the years. We calculated that, when shooting only 10 rolls per wedding at 30 weddings a year, we'd save about $7,500 per year on film, developing/scanning, shipping, etc.

  • Since you're investing in valuable goods, you can sell your gear at some point and still recover cost. With film, you shoot it and there's no object that you can sell/use to recover your initial investment.

Cons: 

  • Expensive up front cost.

  • If your workflow is heavily dependent on your lab providing you with scans that look exactly how you want them, switching to digital may cause unwanted editing stress.

  • I still love film : )

Fuji GFX 50


Pros: 

  • We love this option!

  • Native 4:3 ratio, which we love

  • Ability to shoot in different ratios

  • Great in low-light/High ISO capabilities

  • Can accommodate many lenses

  • If you shoot a lot of film, switching to digital could save tons over the years. We calculated that, when shooting only 10 rolls per wedding at 30 weddings a year, we'd save about $7,500 per year on film, developing/scanning, shipping, etc.

  • Since you're investing in valuable goods, you can sell your gear at some point and still recover cost. With film, you shoot it and there's no object that you can sell/use to recover your initial investment.

  • Can use Speedbooster to achieve more shallow depth of field

Cons: 

  • Not a true 645 (43.8 x 32.9mm sensor vs 56 x 42mm)

  • Expensive up front cost

  • Many lenses can appear sterile as they do on any other camera

  • If your workflow is heavily dependent on your lab providing you with scans that look exactly how you want them, switching to digital may cause unwanted editing stress.

  • If Speedbooster is used, distortion/images quality reduction may occur

To check out this body and average cost to getting into the system, view the Fuji GFX 50S on Ebay and Amazon

Also, be sure to see our full Fujifilm GFX 50S review as well as our GFX 100 review for more thoughts on this camera system!

Image taken with Fuji GFX 50S and Schneider Cinelux 105mm f/2

Image taken with Fuji GFX 50S and Schneider Cinelux 105mm f/2

Fuji GFX 50S with Schneider Cinelux Ultra from The Boutique Lens

Fuji GFX 50S with Schneider Cinelux Ultra from The Boutique Lens

Sony A7Riii w/ Zeiss 80mm f/2 + Speedbooster

Pros: 

  • Smaller body and weight

  • Can use Kipon Baveyes C645 Speedbooster adapter effectively

  • Has a look very close to Contax 645/80mm when using Speedbooster

Cons:

  • Speedbooster may effect image quality to some degree; minor distortion may occur in certain parts of the image including some effect to the bokeh which might be described as some loss to "buttery-smoothness" and added "jittery-ness"

  • If your workflow is heavily dependent on your lab providing you with scans that look exactly how you want them, switching to digital may cause unwanted editing stress.


67 vs 645 From a Business POV

We estimate that, if we shoot 4,500 film photos per year, then at 10 per roll that's 450 rolls per year. For the film and then the processing, that's  about $9,675. Now, if we're using a 645, that's about 281 rolls per year for a total of $6,046, a savings of over $3,600. That's enough to buy a whole other Contax body, or at least pay for the repairs. That's assuming that the hit/keep rate on the 645 is comparable to the 67 and that we are indeed shooting equal amounts of film.

Image of bride and groom taken during wedding using Contax 645 and Zeiss 80mm f/2 on Fuji 400h, developed by State Film Lab

Image of bride and groom taken during wedding using Contax 645 and Zeiss 80mm f/2 on Fuji 400h, developed by State Film Lab

Pentax 67 vs Contax 645

Out of all these, my current choice is the Pentax 67. Generally speaking, the larger 6x7 perspective is the most interesting, in my opinion. The 6x7 negatives are just glorious. Yes, it's heavy, and no it doesn't have autofocus, but that's ok. It produces the lovely portraits I want it to and nailing focus is easy with the large viewing screen.

The Pentax 67 has a look to it as unique as the Contax combo. I personally prefer the perspective of the 67 over the Contax combo, although I still believe the Contax combo has slightly better plasticity/micro-contrast, which lends itself to amazing up close shots with super lovely bokeh. They're different looks with different strengths, and I honestly couldn't pick one over the other universally in terms of image quality.

Image taken with Pentax 67 using the SMC 105mm f/2.4 lens

Image taken with Pentax 67 using the SMC 105mm f/2.4 lens

The Pentax 67 is a camera with plenty of replacement parts and the price has yet to shoot as high as the Contax 645. In my mind, this is a huge reason why I want to continue becoming super familiar with the Pentax 67. My philosophy is that the camera I'm most familiar with is the camera that I essentially become one with--I'm more able to focus on composition, timing, and artistic expression.

So, since the Pentax 67 has so many wonderful aspects and since it seems like it will be very serviceable/replaceable in the case of failure, it's my current workhorse.

With that said, my wife is shooting the Contax 645 with 80mm f/2. The main reason for her to shoot the Contax is size, weight, and probably most importantly, having 16 frames vs 10. Speaking from a business perspective, the cost difference between 10 frames and 16 frames is pretty astonishing as we've shown above. 

Though I love my 67, the cost difference between shooting 67 and 645 is the biggest deterrent for me. My wife and I are both very interested in using a Cinelux f/2 lens on a Pentax 645, largely because of the reliability, availability, and price point. 

Image of groom smiling taking using Pentax 67 with Schneider Cinelux Ultra MC 120mm f/2

Image of groom smiling taking using Pentax 67 with Schneider Cinelux Ultra MC 120mm f/2

Contax 645 vs Pentax 67 For Wedding Photography

As a wedding photographer, I am sometimes met with amazement by others who would never consider the Pentax 67 for wedding photography. However, I find it a joy to use at weddings. 

The largest concerns with using the Pentax 67 at weddings are:

  • Weight

  • Difficulty with film loading

  • Only 10 frames per roll

  • Loudness of the shutter

  • No autofocus

I think these are all valid concerns.

Weight: I do struggle with the weight of carrying my Pentax 67 all day. In my opinion, the biggest advantage of the Contax 645 over the Pentax 67 for weddings is that the Contax is a bit lighter.  However, I typically will have an assistant hold it when I don't need to be shooting it. Plus, with all the money I've saved on not buying a Contax, I can afford a set of weights and a membership to the gym, enabling me to gain some extra muscle to tolerate the minor weight difference between the Contax and the Pentax. 

Film loading: After much practice, I feel pretty confident with loading my Pentax 67 quickly. The biggest difficulty I had was getting the fresh roll's spool to lock into place. Once I learned that you could apply pressure to the locking metal knob on the bottom while rolling the roll backward, it's become a much easier process. Also, using all that money saved on not buying a Contax 645 kit means you can afford to hire an assistant to load your Pentax 67 for you! 

Only 10 frames: I suppose digital-focused photographers might say to a 35mm user, "only 36 exposures?" or a 35mm user to a 645 user "only 16 frames?". I like to think that 10 frames lend itself to "quality over quantity" mentality. While my math would say that having 16 frames should save a lot of money vs having 10, I also have found that my keepers with the 67 are much higher than with 645. So there's definitely some give and take. 

Loudness of the shutter: I will admit--I've gotten some looks from guests during the wedding ceremony when this thing slaps. But honestly, I don't think it's that big of a deal. I actually find my Pentax 645 to be a more annoying of a shutter sound and advance. 

No autofocus: After shooting the Pentax 67 for a while, autofocus became far less important to me. I can clearly see my focus and am becoming better and better at snapping the subject into focus. I don't know that I've ever had a higher in focus ratio with any other camera (including digital).

When compared to the Contax 645, despite these "cons" to using the Pentax 67,  I still think the Pentax 67 is the best option for me currently. I'm aware that film loading can be much quicker with the interchangeable backs of the Contax, but it's not super convenient to carry around a lot of preloaded backs.

I've seen many Contax shooters merely shoot and then load a roll directly into the back of the body. To me, this seems almost as time-consuming as loading a roll into the Pentax 67, and slightly more awkward than loading with the 67 since you must remove the film insert.

Image of Bride during getting ready taken with Contax 645 and Zeiss 80mm f/2

Image of Bride during getting ready taken with Contax 645 and Zeiss 80mm f/2

Future Possible Solutions to the Contax 645 Dilemna

It's quite possible that kickstarter projects or something similar are generated to provide solutions to the era of failing film cameras. But, other than that, there are a few options that might prove very realistic in the coming years.

Digital cameras image quality is becoming better and better. While I don't perceive anything replacing the look of film completely anytime soon, a camera similar to the Fuji GFX matched with various lenses could be a good choice. Also, I've seen very favorable results from Phase One XF with Lead Credo 60 digital back.

As technology progesses, these rather expensive systems/their technology should become more accessible. This may make it more financially feasible to find oneself shooting a digital camera that provides a perspective close to a true 645 negative. That, coupled with lenses such as the 80mm f/2 and Schneider Cinelux lenses will allow shooting an image that is very similar to what we love about being able to shoot on medium format film.

Conclusion

Although an amazing kit, the Contax 645/ Zeiss 80mm combo is in a potentially dangerous position as the bodies known for their skittishness become more rare and more hoarded. Several other options exists, although each has it's own drawbacks. There are a handful of really great options out there that present there own challenges and drawbacks.

I choose to believe that, ultimately, amazing photographs can be made despite the lack or presence of certain gear. That said, the Pentax 67 is my current choice for professional work.  

What are your thoughts? What other camera bodies would you include? 


Related Blog Posts


Other Similar Articles from Other Websites on Contax 645 Comparison


Other Articles you might FInd Interest In


16 Comments

13 Comments

How to Adapt Projector Lenses to Pentax 67 Camera

Super Snaplite 7" f/1.9

Super Snaplite 7" f/1.9


Note: This post is part of our "Learn Blog" for photographers. For workshops, coaching, and other resources designed to help grow your skills as a photographer click here (after you read the article, of course)!  To be transparent, all links are paid advertising, as a portion of any purchase made while using these links is credited to us. Please, consider using our links to help support what we do! Thank you!


Why Adapt Projector Lenses?

A while back, I began to experiment with different lenses on my Pentax 67. My desire was to find a lens that was faster than the 105mm f/2.4 and at a better portrait length, which I consider to be about 180mm on a 6x7 negative or about 80-100mm on a full frame/35mm camera.

The solution I encountered was adapting old projector lenses. These lenses have several wonderful characteristics and some characteristics that are less desirable:

Pros: 

  • Very large apertures (f/1.7, 1.8, 1.9, 2 are normal)

  • Super shallow depth of field

  • Great for low-light

  • Typically very good optical quality glass

  • Have very interesting bokeh, some even have "swirling" bokeh on certain camera bodies

Cons:

  • Old and may therefore very commonly have fungus, balsam separation, etc.

  • Often very heavy

  • Usually, don't have a way to change the aperture

  • Some very nice ones are quite rare and hard to find/stumble upon

  • Since 1) they are older and 2) were intended for use in projectors usually used in dark areas, these lenses often do not have lens coatings like modern lenses to reduce flare

  • Images may often appear de-contrasted and will need post-processing to correct as desired

How to Adapt Projector Lenses to Pentax 67

The best and easiest way to adapt a projector lens is to contact The Boutique Lens. When buying direct from them, you can know that the lens you order will be the correct distance from the sensor in order for you to achieve the appropriate focus. Self-adapting can get you some pretty frustrating results where the lens either focuses out too far, or only very close.

If you’re dead-set on self-adapting your own lens, you can go that route. Since this can be so daunting with many variables, I'm going to make it as simple as possible. And, just as a note, I have linked to the specific sellers' items who have been tested and recommended by myself and others much more experienced than myself. I have heard that certain items from certain sellers are prone to breaking. Again, these items are ones that I have used and recommend. Buy from other sellers at your own risk.  

Buy these things:

  • m65 to Pentax 67 adapter

  • m65 helicoid (17-31mm is best for most lenses)

    • The mm size will affect various lenses in different ways. The key is finding the mm size that allows you to achieve the focus distance you want which is typically a meter or so out to infinity.

  • m65 thread adapter lens mount

    • The mm size will depend on the rear of the lens you want to use.

    • Be sure to first have your lens picked out

    • Measure the rear of the lens from the outer edge to outer edge

    • Convert to mm

  • A lens that will cover the full 6x7 negative size

    • It is best if it covers a little more than the 6x7 since barely covering will lead to optical issues at the corners, most notably, pronounced vignetting, poor sharpness, etc.

    • Lenses over 105mm might work. 120mm and over are good bets. And lenses over 140mm should be excellent bets if designed for 35/70mm cinema film

    • Lenses that will cover are usually designed for 35/70mm cinema film and listings typically show this info

    • Certain lenses that do not fully "cover" may leave empty space on the negative and/or will cause vignetting to various degrees

    • I will suggest a few lenses below in another section

The m65 to Pentax 67 adapter mounts to the Pentax 67 like a lens would. It then attaches to the m65 helicoid, which acts as the focusing apparatus. Then, the thread adapter attaches to the m65 helicoid. Finally, your projector lens goes into the thread adapter. 

The rear of the lens will need to fit the m65 thread adapter lens mount. For instance, if the diameter of the rear of the lens is 80mm, the thread adapter lens mount will need to be 80mm. 

Some Ideas for Lenses to Try

This is a short list of lenses that are likely to work for your Pentax 67. 

  • Kollmorgen Super Snaplite

  • B&L Super Cinephor

  • Schneider Cinelux (requires different adapters to reach infinity)

    • 115mm, 120mm, 125mm, 135mm, 150mm

  • ISCO Cinelux Ultra (requires different adapters to reach infinity)

    • 110mm, 115mm, 125mm, 130mm, 135mm

Buying Pre-Adapted Projector Lenses

Finding, adapting, and effectively adjusting the right lens can be time-consuming, frustrating, and difficult, and sometimes your project just doesn't work out.

Though you'll end up paying more, you can purchase pre-adapted lenses from places such as The Boutique Lens.

Though more expensive, you're essentially paying someone else to spend all the time of looking for, acquiring, and adapting lenses.

Projector Lens Example Gallery

Super Snaplite 7" f/1.9

Super Snaplite 7" f/1.9

Isco Ultra MC 110mm f/2

Isco Ultra MC 110mm f/2

ISCO Ultra MC 110mm f/2

ISCO Ultra MC 110mm f/2

Kollmorgan Super Snaplite 178mm f/1.9

Kollmorgan Super Snaplite 178mm f/1.9

Snaplite 7" f/1.9

Snaplite 7" f/1.9

Bausch & Lomb Super Cinephor 178mm f/1.9

Bausch & Lomb Super Cinephor 178mm f/1.9

Kollmorgan Super Snaplite 178mm f/1.9 (If my memory serves me right)

Kollmorgan Super Snaplite 178mm f/1.9 (If my memory serves me right)

Bausch & Lomb Super Cinephor 178mm f/1.9

Bausch & Lomb Super Cinephor 178mm f/1.9

Bausch & Lomb Super Cinephor 178mm f/1.9 or Kollmorgan Super Snaplite 178mm f/1.9 (Forgot)

Bausch & Lomb Super Cinephor 178mm f/1.9 or Kollmorgan Super Snaplite 178mm f/1.9 (Forgot)

Bausch & Lomb Super Cinephor 178mm f/1.9

Bausch & Lomb Super Cinephor 178mm f/1.9

Bausch & Lomb Super Cinephor 178mm f/1.9

Bausch & Lomb Super Cinephor 178mm f/1.9

13 Comments

How to Tell the Difference Between the Multi-Coated vs Single-Coated Voigtlander 35mm f/1.4 Nokton Classic SC vs MC

Comment

How to Tell the Difference Between the Multi-Coated vs Single-Coated Voigtlander 35mm f/1.4 Nokton Classic SC vs MC


Note: This post is part of our "Learn Blog" for photographers. For workshops, coaching, and other resources designed to help grow your skills as a photographer click here (after you read the article, of course)!  To be transparent, all links are paid advertising, as a portion of any purchase made while using these links is credited to us. Please, consider using our links to help support what we do! Thank you!


Voigtlander 35mm f/1.4 Nokton Classic SC vs MC Versions

I recently decided to purchase a Leica M2 and wanted to get a Voigtlander 35mm f/1.4 Nokton Classic to go with it. However, I quickly noticed that there are two different versions, the SC (single-coated) and the MC (multi-coated). So, I figured I should discover why that matters, and how to spot the difference when buying used. 

In this article, I've aimed not to give a full review of these lenses. Rather, I'm merely discussing how to tell the difference between the single-coated and multi-coated versions. 

How to Tell the Difference Between the Voigtlander SC and MC

So let's jump right into it. The easiest way to tell the difference is to look at the front of the lens. You'll see that it says NOKTON CLASSIC. If the lens is single-coated, it will have blue "SC" after the word classic. If you look closely at the image, you'll notice a blue "SC". If it's multi-coated, it won't have anything directly after the word classic.  

Now, why does that matter? Well, supposedly the SC version is made for black-and-white photography, specifically. The MC version is made specifically for color photography, or high contrast black-and-white photography. In case you're wondering, I actually bought a version before knowing the difference, and received the MC, which is the one I wanted.   

If you're considering buying one these amazing lenses, please consider supporting us by clicking here and using our links! Both Amazon and Ebay will give us a portion of your purchase. Thanks in advance!

For a great image quality/character comparison of the two versions, please visit this comparison of the Leica Summilux 35mm 1.4 vs the Voigtlander 35mm Nokton SC and MC versions, plus the Canon LTM 35mm 1.5, click here!

If you found this article helpful, please give it a like, comment and share below!

Comment

Comment

The Best Price On Fuji 400H 120 Film


Note: Since prices can and do fluctuate, I attempt to update this post from time to time. With that said, if some numbers are slightly off, please recognize that I cannot follow the prices perfectly all the time.

This post is part of our "Learn Blog" for photographers. For workshops, coaching, and other resources designed to help grow your skills as a photographer click here (after you read the article, of course)! To be transparent, all links are paid advertising, as a portion of any purchase made while using these links is credited to us. Please, consider using our links to help support what we do! Thank you!


Buy Fuji 400H Cheap

When you're shooting a lot of (fairly costly) film, you try to save money without cutting corners. But, there’s some horror stories of people receiving film that wasn’t stored properly. That means it’s not enough to just buy film cheap, you also want it to come from a reputable seller. BUT, when there’s a reputable seller, who also has it at the best price, it’s a no-brainer.

So, here's what I do to save hundreds of dollars when buying my Fuji 400H 120 at the best price.

Best Place to Buy Fuji 400H 120

So, after tons of research, I discovered that after shipping + tax, Mel Pierce's listing on Amazon for 60 rolls is by far the best price on Fuji 400H 120 film. It's even more cost effective than buying 100 rolls, for whatever reason.

At $398.97 (as of 6/2/17 UPDATE: price as of 6/21/17 is 389.97, so it's even cheaper currently!), that's about $6.67 a roll, vs buying for about $7.50-$8.50 per roll (if you buy 5 rolls at a time on Amazon). *Update 11/5/18: Price is now $399.99 with free shipping. Just a tiny bit more expensive, but probably still the best deal out there. 

Other places will have Fuji 400H for pretty good prices, but then they hit you with taxes and/or shipping costs and they don’t allow you to use some of the other methods I discuss below. In the end, I have yet to find a better price on Fuji 400H then the link I just shared above.

What I Do to Save EVEN MORE

Cheap gas using kroger fuel points

If you’re using a card such as Amazon’s Prime Card which gives you 5% cash back, you can end up knocking $5 for every $100 spent.

I end up saving about another $50 off the total when I order from the Mel Pierce Listing by using my Amex Blue Cash card that gives me 6% cash back at grocery stores.

For example, I take my Amex and buy an Amazon gift card from Kroger, which not only gives me 6% back on $399.99 (just a general average of what I’ve seen the price around) for $24 off which equals $375.99 for or $6.27 per roll, but I also get 2x fuel points (sometimes 4x), which I use to get $1.00 off my gas per gallon (which can end up being another $20+ off the amount total that I spent on that film, ultimately).

Not counting the gas-savings, this is $2.24 cheaper per roll than buying 5 rolls at $8.51 on Amazon (or many other places for that matter). That means that every 10 rolls you go through is $22.40 saved, and every 100 rolls is $224 saved!!! That all adds up quick, my friends. 

If you don't have a Kroger, I believe the Amex card still works for 6% cash back at places like Publix. Or, you could also use something like your Amazon Store Card to get 5% cash back, which is still a pretty good deal. 

Get It Before It's Too Late!

Whatever you do, who knows how much longer Mel Pierce will have this savings available, so go snag some Fuji 400H quick by using the link below!

If this helped you at all, please consider using our link to go to Amazon. They'll give us a portion of your purchase, which we use to help fund other posts like this!


Other Articles


Comment

Comment

Post Wedding Hangover: Shooting Multiple Weddings In a Weekend and Tips for Recovery

Chad-Christine-Wedding-Rixie-Manor-Preview (14 of 34).jpg

Note: This post is part of our "Learn Blog" for photographers. For workshops, coaching, and other resources designed to help grow your skills as a photographer click here (after you read the article, of course)! 

Note: Since it's one way we help to provide for our family, please also take note that any links provided here are links to products that we use or have used and can recommend, unless otherwise noted. We did not receive any of the products in exchange to write this article. We do we receive a portion of sales from when you make a purchase using our links, so please do!


Once you finish reading this post, you'll gain:

  • More confidence to handle wedding day stress
  • A list of supplements for natural, clean energy, better stress management, and faster recovery
  • Quick and easy ways to prepare yourself for creating best wedding experience possible for your clients 

Medical disclaimer: We ARE NOT medical professionals. Any information provided in this article in not intended to treat any disorder, and should not be taken as medical advice. All side effects and dangers associated with taking supplements or performing activities should be considered beforehand before attempting. Please consult a professional before taking any supplements.


How to Minimize and Recover from Post-Wedding Burnout

You and I probably agree--client experience is HUGE.

And giving your all is ESSENTIAL to nailing it!

But, In all honesty, it's best that we acknowledge that our body and mind gets tired and NEEDS to relax. The key to growth is often to come to terms with our weaknesses. To break limits, we need to first acknowledge them. 

So when mental, physical, and all sorts of fitness are required to navigate the emotionally, physically, socially, and mentally demanding environment of a wedding, taking certain steps can be the difference between a sub-par or "ok" client experience and an amazing "wow" experience.

If you've tried to provide that "wow" experience you've felt it--that "I feel like I just got ran over by a bus" feeling.

It's comprised of lingering mental fatigue matched only by acute and intense muscle soreness. What makes it even more intense is if you have to photograph two weddings in one weekend!

Michele and I have found that there are several ways to help prepare for weddings, both before, during, and after weddings to help mitigate, treat, and rebound from what we'll call "bus syndrome".

 So, without further ado, here's our lists of top ways to prepare for and prevent post-wedding "bus syndrome"!


1. Have a plan to deal with aches and pains as they arise: GET THIS instead of Ibuprophen/Pain Killers!

One of the biggest issues that we encounter during weddings is aches and pains from carrying gear, bending, standing, etc. If they aren't dealt with they quickly lead to mental fatigue which prevents you from exercising your creativity, interacting socially, and directing people for things like family formals, which require a lot of mental focus. 

Ibuprophen can sometimes be helpful, but it takes awhile to kick in. Plus, it can be hard on your insides, and for some, can cause stomach irritation.

So instead, we HIGHLY recommend Arnicare. It's is one of those things that JUST WORKS and works FAST for soothing aches and pains. We prefer it to things like Tylenol, aspirin, or ibuprofen because it's homeopathic, natural,  and is applied directly to the area you feel pain for quick relief. It's seriously a HUGE life-saver when it comes to dealing with pain during and after the wedding day. 

We use the gel, but there's cream, tablets, and even little packets with yummy pellets.


2. Don't just exercise and eat right, DE-STRESS exercising and eating right

Look, I know this is going to sound so cliche, but stick with us for some unique perspective for wedding photographers.

Don't eat foods that make you crash! Michele and I both have reactive blood sugar levels, and we tend to get super tired if we eat something that doesn't sustain. So, we make sure to eat things we know that OUR bodies handle well and provide with long-lasting energy.

Eating right and exercising can take a lot of time, so we try to simplify everything. We pick simple, non-stressful workouts like running on our elliptical. 

As far as food, one thing that we've really found super quick and easy is steel-cut oats with Kerrygold grass-fed butter and xylitol for sweetener (to avoid sugar-crashes!). We love steel-cut oats because they're loaded with nutrients, have pleasant texture, and are very filling. 

Also, sweet potatoes are GREAT for quick, sustaining energy. We use an Instant Pot to cook both oatmeal and sweet potatoes because of how quick and easy it is to use! 

3. Start relaxing at least a day or two before

We've found that beginning to wind down a bit and trying to give our systems a bit more rest a few days before weddings is a big help to avoiding burning out.

4. SLEEP!

Getting a good night's sleep is so essential! However, sometimes that can be tough, especially with things like destination weddings. So, this is a "do your best but be prepared with other means" solution.

If you're anything like us and many other creatives, going to sleep early and then waking up early the next day can be sometimes impossible! On the nights where we're wired but need to sleep, we'll take a small amount of Magnesium Malate, Vitamin D, Lugol's Solution Iodine, Inositol (which comes in powder form and taste sweet like sugar!), and a small dose of Melatonin. Of course, it's probably better just to take one at a time, starting out. We've just found that to be a combination that works well for us. 

Melatonin should not be taken regularly since it will disrupt your bodies natural production, but taken with the other supplements on fairly irregularly can help give you an amazing deep sleep that leaves you feeling rested the next day.     

5. Stretch the day of!

Make sure to hit all your major muscle groups! We stretch our hamstrings, gluts, shoulders, chest and back mainly since we've found those to be the spots we get most sore and fatigued.  

6. Don't just take pain killers!!! Take specific supplements targeted at helping your body deal with mental and physical stress

We obviously don't recommend starting to take all these at once, but trying one at a time and figuring out what works best for you is a definite option for helping your body adapt to the stress of weddings.

We recommend supplements called adaptogens plus others such as ashwagandha and maca. Also one of our favorites, Reishi helps your body deal with stress while boosting immunity, reducing inflation, and helping with allergies (and even asthma!). 

If you have joint pain of any sort, taking something like Reishi and Tumeric to help deal with swelling is a great idea.  

For added endurance, we like Cordyceps. It helps to improve endurance by improving blood flow.

Taking Lugol's Iodine will also help with avoiding adrenal fatigue burnout and stress. If the liquid is off-putting like it is to Michele, we recommend using the Iodoral pills which eliminate the taste. 

For brain support take Lion's Mane! It's a great supplement that helps improve brain performance and supports your nerves--there's even been studies that show it can help alzeihmer's sufferers! It's definitely another favorite of ours. Also incredibly good for brain health and energy levels is Sunflower Lecithin. 

Another great supplement we keep on hand is Oscillococcinum . We swear by this stuff--it's made for flu symptoms, but we take it even if we're feeling run down, and it works wonders. If it's just placebo, it's a darn good one at that! These are also good to have on hand in case you start feeling like you're coming down with the flu.

7. Drink the right stuff!

On the day of, drink bulletproof coffee! We use virgin, cold-pressed organic coconut oil with Kerrygold grass fed butter. The flavor and consistency of these in coffee is just amazing. Because of it's robust, and full flavor, our coffee of choice is New England Coffee, although that's just us : ). Also worth noting, coconut oil helps give you energy and helps your brain deal with stress. It's great to take it by itself, too!

When we're in a rush, such as before, on the way to, and during the wedding, we drink Vita Coco Latte.  It's a great quick and easy solution for coffee with coconut water added for hydration and energy. If you don't like coffee, or you don't want to take a big scoop of coconut oil straight, try coconut water! It's full of electrolytes and will help your body deal with stress and help prevent dehydration. 

If you'd rather drink tea, our favorite, Yogi Teas Perfect Energy is FANTASTIC. It tastes great and gives a very noticeable and sustaining boost to our energy levels. They also have other energy teas such as Sweet Tangerine Positive Energy and Refreshing Mint Vital Energy, but we have yet to try them. I actually just found them while writing this, so I'm really pumped to try them all!

For wedding pros looking to avoid burnout, we DON'T recommend: 

  • Energy drinks or any quick energy boost with lots of sugars. 5 Hour Energy is a lot better, but we much prefer things like coconut with coffee over that. But hey! That's just us.
  • Coffee by itself. Plain coffee without something to help recharge your adrenals can contribute to adrenal fatique, which is a whole other problem. Sure, coffee tastes great (well, to a lot of us anyhow) and helps in the short term by providing a pick-me-up. But without supporting your adrenals, burnout will be right around the corner. 

8. The day after, treat yourself right!

The day relax, eat right, and stretch! It's not uncommon for us to feel worn down for a day or two after the wedding. But, getting plenty of rest and good food definitely helps. Planning for these things is definitely a must, as rest and relaxation doesn't happen without planning--although crashing does.  

If you're like us, you probably enjoy tea, not just for energy, but also for relaxation. We get Yogi Honey Lavender Stress Relief. It has a good taste, especially if you add just a little honey to it. 

    We'd love to hear from you! What are some other tips that you've used to prepare for and recover from weddings? Please like, share, and comment below so others can benefit from this info!

    Comment

    Comment

    How To Speed Up My Lightroom Workflow, "Like Wow!" Review of the Behringer X Touch Mini for Lightroom

    Using the Behringer X Touch Mini to Enhance Lightroom Workflow


    This thing is amazing at fine-tuning your adjustments in Lightroom and speeding up your workflow, and at $60, I say it is more than sufficient when compared to the other Lightroom dial and slider tools. 

    If you're interested and you found this video helpful, please use our links below as Ebay and Amazon will give us a portion of the proceeds! Thanks in advance!

    Comment

    Comment

    How Do I Change the Thumbnail Photo When Sharing My Website On Facebook?


    Note: This post is part of our "Learn Blog" for small business SEO and photographers. For workshops, coaching, and other resources designed to help grow your skills as a photographer click here (after you watch the video, of course)!


    Video: How to Change Social Sharing Picture


    Directions


    So, Facebook is showing a picture that you don't want! If you're using Squarespace, here's how to change it.

    Here's the order of links you'll need to click:

    1. Once you're logged into Squarespace, click "Design"
    2. Next, click "Logo & Title". At the very bottom, you'll see your social sharing photo. If you haven't chosen one yet, upload a photo. If you want to change the photo from one that's already chosen, select the trash can icon when you hover over your current photo.
    3. Go to https://developers.facebook.com/tools/debug/og/object/ and enter in your URL.
    4. Click "Fetch New Scrape Information"

    Now your website URL photo should be updated!

    Click here to return back the "Learn" Blog Feed

    Comment