Comment

SEO for Photographers

If you're like me a few years back, doing SEO as a photographer might sound like a complex, techy term that's more trouble than it's worth. But, diving into the world of SEO was one of the best decisions I made for my photography business. Let's break down how you can use SEO to book more clients and make your photography stand out online.

Pssst! If you’d like to watch a speech on SEO in the Age of A.i. that I gave for a high-level private mastermind, check it out below!

Why SEO Matters for Photographers Like Us

In our line of work, capturing beautiful moments is just part of the job. The other part? Making sure people can find us to capture those moments! That's where SEO comes in. It's all about making your website buddy-buddy with search engines so that when someone types in "Wedding Photographer in [Your City]," your name pops up.

My Top SEO Tips for Photographers

  1. Find the Right Keywords: Think like your client. What would they type into Google? Tools like Ubersuggest are great for this. You want keywords that are popular but not so competitive that you're a small fish in a big pond.

  2. Spruce Up Those Titles and Headings: Your website's titles and headings should be like signposts, guiding both clients and search engines. Include your keywords in a way that's natural and makes sense.

  3. Get Local with SEO: I can't stress this enough – make sure your website screams your location and what you do. This is super important for local SEO, helping nearby clients find you.

  4. Content That Connects: Your homepage should tell your story and what you offer, using the keywords you've picked out. It's like a handshake with your potential clients.

  5. Keep an Eye on Your Progress: Tools like Google Analytics are your best friends. They tell you what's working and what's not, so you can tweak your strategy accordingly.

  6. Quality Backlinks: These are like votes of confidence from other websites. Aim for backlinks from reputable sites in the photography or wedding industry.

How SEO Changed My Game

Once I got the hang of SEO, the difference was night and day. My website started climbing up the search engine ranks, and the inquiries started rolling in. It's not just about getting traffic; it's about getting the right traffic – people who are looking for exactly what you offer.

Next-Steps SEO Resources for Photographers

Be sure to join my Facebook Group “Easy SEO with Jeff the Wedding Photographer”! I give away lots of free content inside of there that will help you get going!

If you’re a wedding photographer, be sure to also take a look at my SEO for wedding photographers blog post!

Wrapping It Up

SEO might seem a bit overwhelming at first, but trust me, it's worth the effort. Start small, keep learning, and watch as your photography business grows online. Remember, SEO is a marathon, not a sprint. Stick with it, and you'll see the results

Comment

Comment

Which Website Builder is the Best for Photographers and SEO?

Best website building platform for photographers and their seo graphic of woman laughing with laptop in lap

I’ve helped a lot of photographers craft their website to rank on Google and book dream clients. Some were on Wordpress, others on Showit, still others on Wix, Squarespace, Pixieset, and others you’ve probably never heard of it. Over the years, I’ve learned the strengths, weaknesses, and quirks or each platform, as well as which ones are the best for SEO.

Why You Should Listen to Me, Specifically (at Least About this Topic)

If you didn’t know by now, I’m the author of the popular Ultimate SEO Guide, the creator of the Easy SEO Facebook Group, as well as an invitation-only mentorship course for SEO with an amazing track record of helping photographers craft their website, copywriting, and portfolio in order to convert dream clients as well as Google so your website ranks on Google.

(I do not have any affiliations or affiliate links to any website platform, so you can trust that I’m not just trying to get you to use any specific one).

The Answer: Which website platform is the best for photographers and SEO?

I’m a big fan of just giving you the answer. If you want the deets, you can read further. I know some people will balk at me that I’m NOT going to say “Wordpress”, but I’ve got to be honest based on my experience.

The truth is, you can rank on any website builder as long as you focus on the future of SEO.

That said…

The most consistent success I’ve seen photographers have when it comes to a website builder and SEO is with Showit + the Wordpress Blog.

Showit has a lot of versatility when it comes to aesthetics (which can be an immediate brand upgrade).

The only qualms I have with Showit are that it has it’s quirks, such as the need to reeeally make sure that your mobile and desktop versions are doing exactly what you want. It’s not uncommon for someone to have broken links in their mobile version because they did something on desktop and just never fixed it on mobile.

Conclusion

The best thing to do when it comes to a website building platform is to use one that you’ll actually log in and use. Most builders offer free trials, so be sure to check that out and find which one suits you and your style!

That being said, Showit tends to be the winner for most, especially wedding photographers.

If you’ve found this blog post helpful, please share this article in a group that you think would benefit!


Comment

Comment

SEO for Wedding Videographers

This SEO for wedding videographers post will inform you as a videographer on how to not only rank on Google to book clients, but how to use the fact that you’re ranking to generate more leads earlier in their booking process so you can charge more. I’ve written a post on wedding photographer SEO that also has some good tips and videos that will also work for videographers, so be sure to check that out after this!

We first started using this method in our business, but quickly realized that it can massively help wedding videographers even more than it can photographers. In fact, this isn’t just theory, we’ve coached and guided actual videographers implement this framework which has led them not only to rank for one, but multiple locations (even different states!), many of which they have never even stepped foot in.

So, this isn’t merely “Wedding Videographers SEO”, but a specific approach to SEO that wedding videographers can use to dominate in their market while, if wanted, also ranking in destination areas, even if they’ve never worked there.

Our background and approach doesn’t only come from ranking our own business on Google for multiple locations. It comes from being close friends with someone that worked for Google and not only learning their insider secrets, but also watching them work over their shoulder. Beyond that, we’ve helped an army of wedding photographers and wedding videographers nail their SEO in a botton-line, revenue increasing manner.

The Old Way of Doing SEO vs the New Way of Weddng Videographer SEO

This is important because we don’t just focus on “ranking”. We focus on crafting an elevated experience that maxes out dopamine response from visitors. Now, Google through the power of AI is learning how to intrepret your visitor’s experience on their page. So, if you take the long-term approach of maxxing out dopamine (think excitement, reward, curiosity, etc.), then instead of just ranking short-term, you’ll rank long-term with minimal if not zero long-term effort.

This needs to be said because much of the “traditional” SEO approaches are very outdated and focus merely on “hacking algorithms”. So, understand that you want to align yourself with Google so they see you as an asset that they want to show to everyone.

Think of it this way: Google makes money by showing ads. So, if they give the best search results, then people will continue to use Google, and therefore more people will see ads more often. Thus, Google makes more money by providing search results of websites that create this most dopamine response.

Now, this is super nice because if your website triggers dopamine to visitors, you’ll also nurture them to want to work with you specifically, while also nurturing them to spend more with you based on increasing levels of perceived value that creates higher levels of satisfaction correlated with spending more.

This means that you can’t see ranking on merely “hacking the algorithm” like most gurus would have you to believe. Instead, you must learn to create an internal picture of your ideal client and then use your site to craft an image of yourself in the mind of your visitor so that they see that working with you is the gateway to more fully experiencing and confirming the particular identity that makes them feel excited and safe.

How to Do Wedding Videographer SEO That Helps You Book Dream Clients

So, what are the practical ways of doing this?

Depending on what you’ve nailed down so far, you may start in a different spot than someone else, but here’s the general steps we see wedding videographers taking to succeed with organic traffic:

  1. Know your ideal client deeply

  2. Begin to understand what would excite them about you

  3. Understand what your current visitors are doing on your site

  4. Craft a “flow” from page to page that you feel is designed to communicate a picture of yourself in the minds of your visitors based on what excites them

  5. Analyze if your visitors are following your “flow”. If they are, great. If they aren’t, diagnose why they are not.

  6. Make micro-changes that result in increasing levels of actions that cause them to follow your pre-determinded “flow”, ultimately results in more clicking around, more time spent on site, and more contact form completions.

  7. Use this same method for blog-posts that are lists of wedding vendors (wedding photographers, wedding planners, etc.)

All these steps mean that you may need to adjust your website layout, your copy (words on your page), in order to max out the “dopamine response” of your visitors so Google will see you as an asset.

But, if you can do this, then by choosing keywords with a tool like Ubersuggest you can choose high value keywords and rank fairly quickly. We see many rank in as little as 30-90 days, and then begin to add $10k or more per month of bookings.

Want more info on this SEO for Wedding Videography Approach?

This is obviously a pretty brief flyover, so if you’d like to see more explanation and content on this exact approach, be sure to join the EasySEO with Jeff the Wedding Photographer Facebook Group!

Comment

4 Comments

What's in Our Bag: The Gear We Use to Photograph Weddings and More

what's-in-our-bag-overlay.jpg

Wondering what gear we use?

Well, we’ve finally created the definitive list!

Enjoy!

Cameras

Canon 5DIV

Why we love it: Our 5Divs have been a huge upgrade to our 5Diii.

What we use it for: Candids, portraits, reception

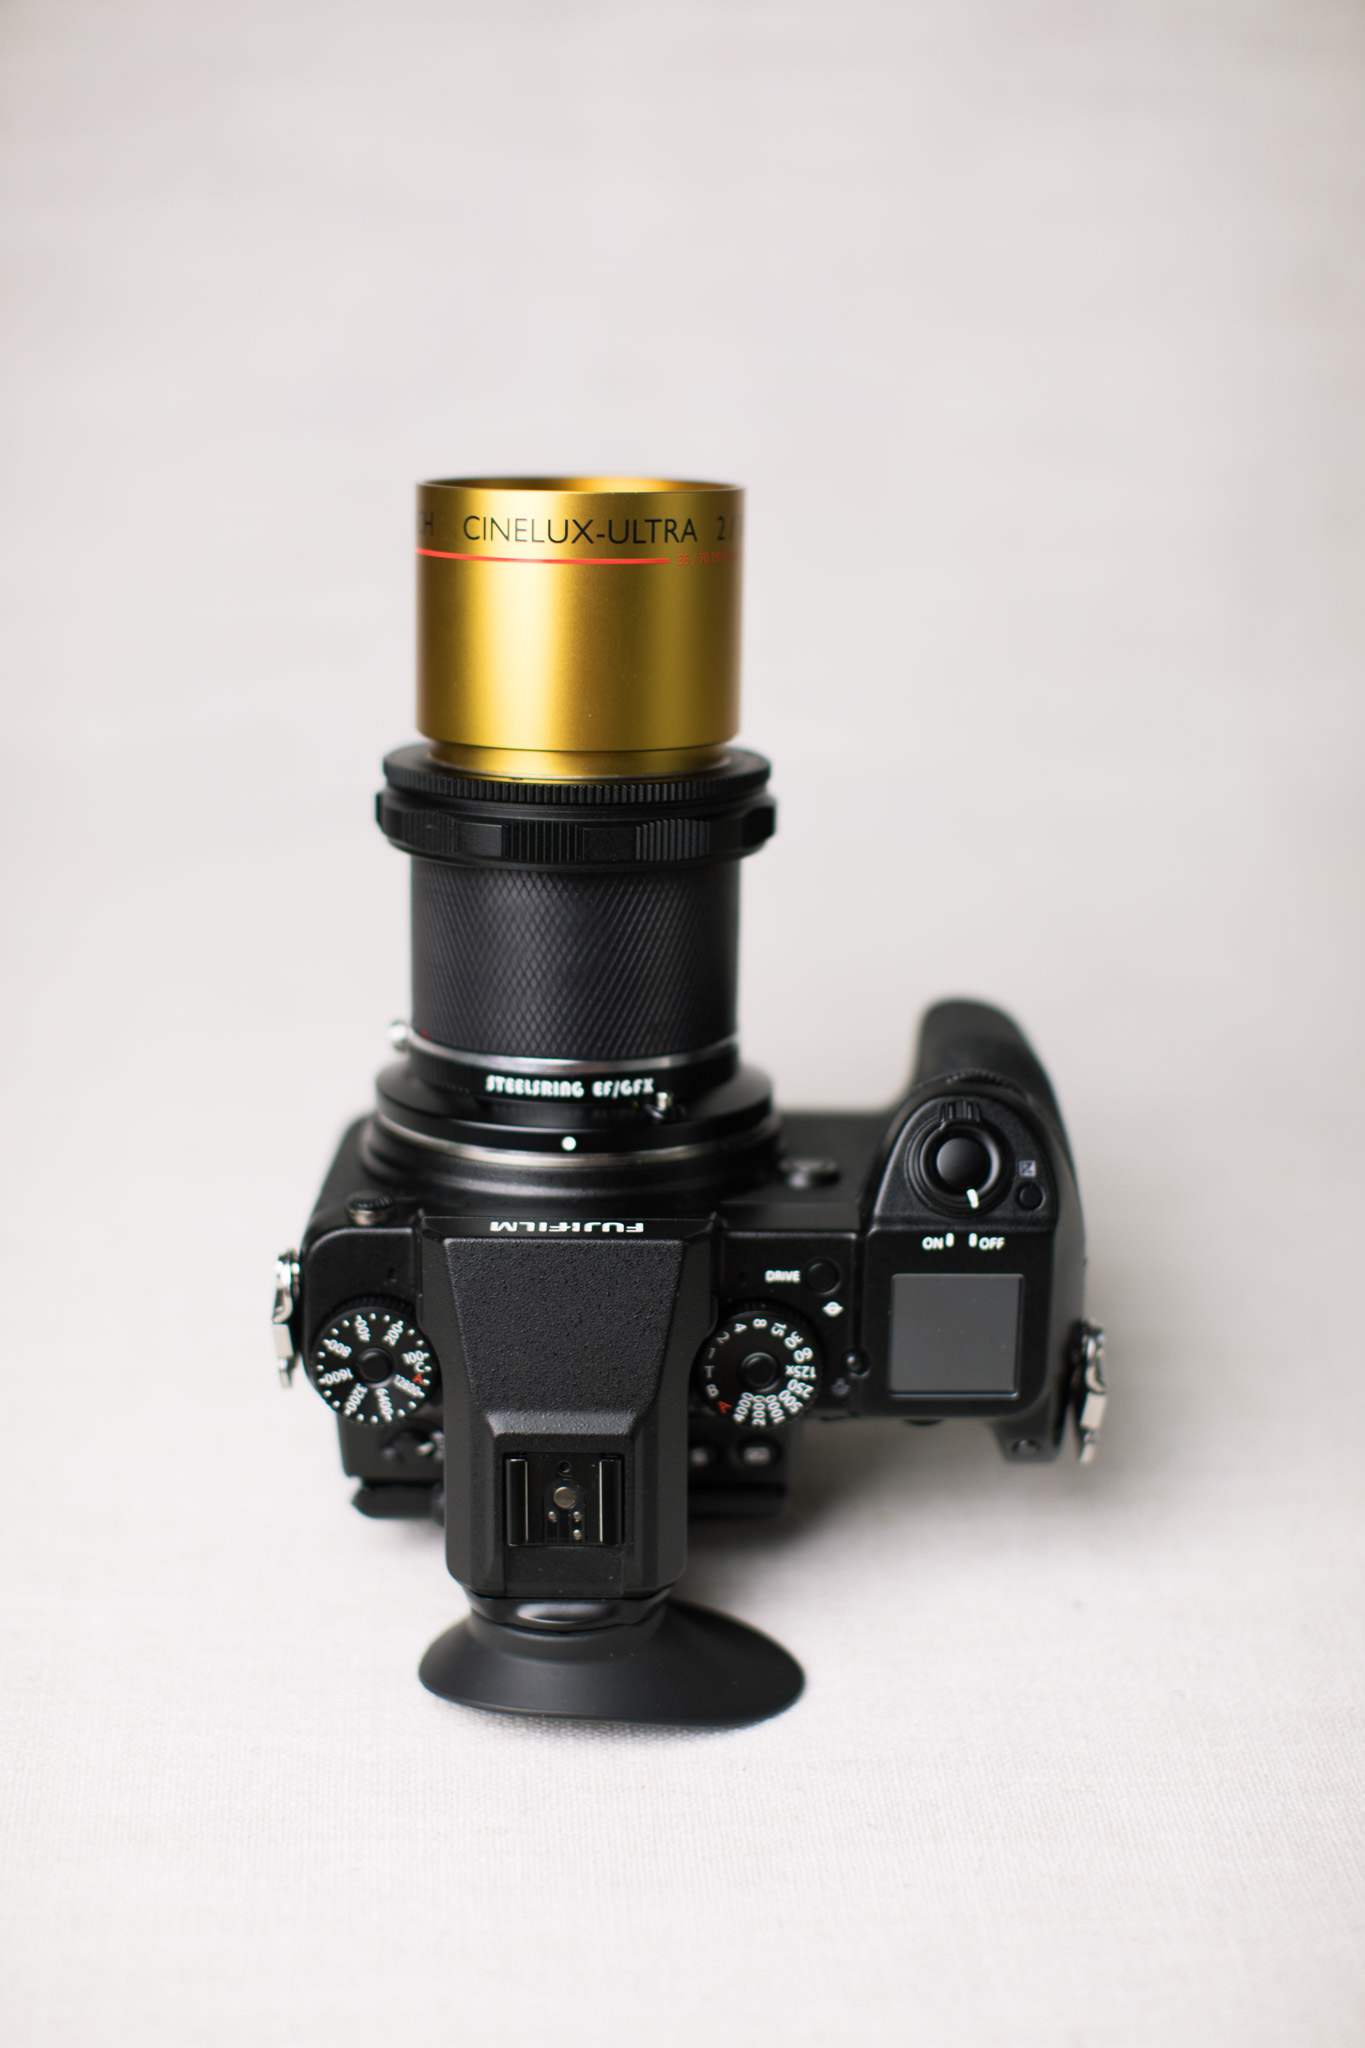
Fuji GFX 50S with Steelsring Adapter (to use Canon lenses)

Why we love it: We absolutely love the GFX 50S for portraits. It has “the look”, if you know what we mean!

What we use it for: Portraits, candids, reception

Pentax 67

Why we love it: The pictures from the Pentax 67 are fantastic. It’s a large negative and it's a joy to shoot!

What we use it for: Portraits

Pentax 645

Why we love it: The Pentax 645 is a little more ergonomic than the 67 for smaller hands. Plus, it has 16 frames per roll vs the 10 of the Pentax 67.

What we use it for: Portraits

Lenses

Canon 85L

Why we love it: The 85L has “a look” especially at f/1.6 and lower!

What we use it for: Portraits

Canon 35Lii

Why we love it: This lens is great for candids, getting ready, dance floor, and more! It has excellent autofocus and looks awesome!

What we use it for: Candids, some portraits, dance floor, environmental, video

Canon 50L

Why we love it: The 50L has a very particular “look” at f/1.6 and lower.

What we use it for: Portraits, Candids

Canon 135L

Why we love it: This lens renders beautifully and has great autofocus!

What we use it for: Ceremony shots (especially for Catholic weddings) and receptions

Canon 85 1.8

Why we love it: This lens is a good cheaper alternative to the 85L

What we use it for: Ceremonies and receptions

Canon 16-35L

Why we love it: The 16-35 is great for tighter spaces, as well as when you need to capture a whole room.

What we use it for: Ceremonies, receptions

Schneider Cineluxes (various)

Why we love it: Cinelux lenses render sooo beautifully!

What we use it for: Portraits

Lighting

Godox v860ii Speedlight

Why we love it: the recycles on the Godox and Flashpoint flashes is insane! One battery will last you all day and beyond!

What we use it for: Anytime we need more light!

Canon 600EX-RT

Why we love it: This flash has been incredibly reliable, though it’s recycle time is not near as quick as the lithium powered Godox flashes

What we use it for: Anytime we need more light!

Godox XT2 Flash Trigger

Why we love it: Integrates well with Godox flashes

What we use it for: Off-camera flash for group photos and during receptions

Godox AD200 Strobes

Why we love it: These things are bright, quick, and lightweight!

What we use it for: Anytime the speedlights aren’t powerful/quick enough.

Flashbender 2 On-Camera Light Modifier

Why we love it: Honestly, this thing may look a little silly, but it’s fantastic when you don’t have neutral ceilings to bounce off of and/or have time to set up off-camera flash.

What we use it for: Low-light scenarios where we need quick lighting and bounce flash isn’t an option.

Tripod/Monopod

Manfrotto 190 Tripod with Manfrotto MHXPRO-3w Head

Why we love it: This tripod combo is lightweight, solid, and can handle just about any camera setup!

What we use it for: Low-light photos requiring slow shutter speeds, video

Sirui SUP224SR Carbon-Fiber Photo/Video Monopod

Why we love it: This monopod is really stable on it’s feet! It’s lightweight and very sturdy.

What we use it for: Ceremony shots where we need extra stability for long lenses, quick low-light reception shots with slow shutter speeds

Film

Fuji 400H

Why we love it: It looks beautiful! Enough said??

What we use it for: Portraits

Portra 800

Why we love it: This film does great when the light isn’t bright enough for Fuji400H.

What we use it for: Portraits

Drones

Mavic Pro 2

Why we love it: This thing works so incredibly well…almost anyone can fly it!

What we use it for: Environmental portraits, venue shots, video

Mavic 2 Zoom

Why we love it: Though it’s not as good in low-light as the Mavic 2 Pro, the Zoom is so versatile at capturing interesting angles.

What we use it for: Environmental portraits, venue shots, video

Wondering what programs we use to grow our business from four to six-figures within 3 years?

Check out our Tools for Growing Your Photography Business!


More From Our Blog


4 Comments

4 Comments

Tools for Six-Figure Wedding Photographers in 2020

Tools for growing your photography business overlay picture of Michele holding a camera

Note: This post is part of our "Learn Blog" for photographers. For workshops, coaching, and other resources designed to help grow your skills as a photographer click here (after you read the article, of course)! To be transparent, all links are paid advertising, as a portion of any purchase made while using these links is credited to us. Please, consider using our links to help support what we do! Thank you!


There are transformational tools that can help take your business to the next level.

For us as professional photographers who grew our business from part-time four-figures to full-time six-figures within three years, we experienced massive growth that was both caused and supported by key tools!

In this article, we’ll share with you some of those top tools for photographers that you can use to grow your business, too!

There’s of course “our photo gear” (which you can visit by clicking here) as well as gear that we recommend for new photographers based on your budget range, so here we won’t be focusing on “photo gear” as much as software and a couple hardware.

#1 SEO

One of the BIGGEST investments we made into our business was ensuring that our website shows up when brides are searching.

If you want to start getting some good SEO direction and learning how we used SEO to grow our business, be sure to join our Easy SEO Facebook Group!

#2 HoneyBook

Honeybook Honeybook front page.jpeg

One of the tools that made growing our business possible was and still is HoneyBook.

If you’re unsure about whether you want to use HoneyBook vs Dubsado vs 17hats, be sure to check out our comparison/HoneyBook Review!

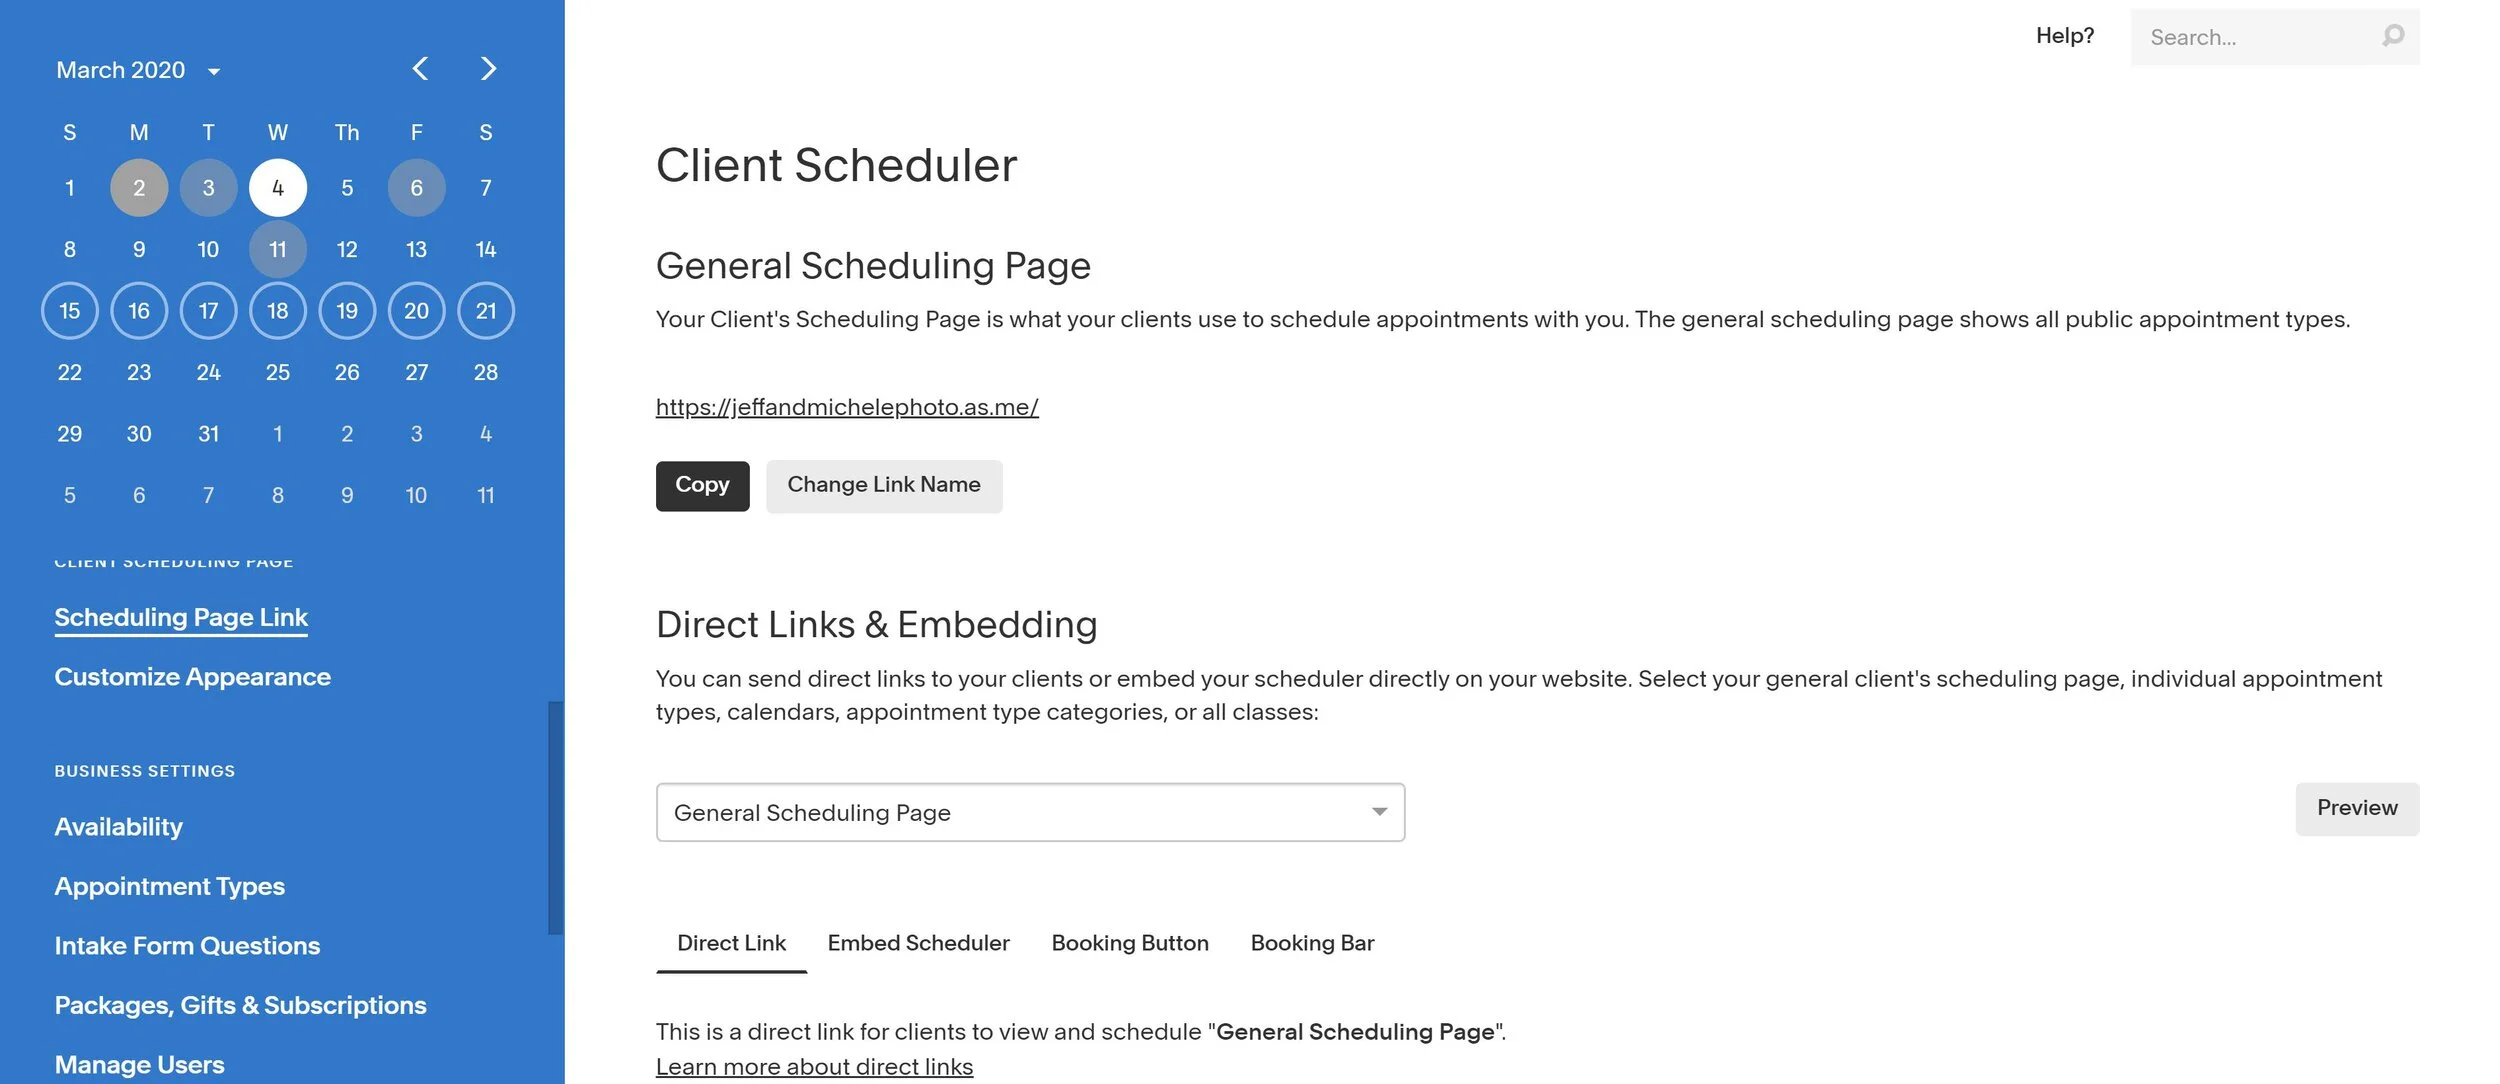
#3 Acuity Scheduling

Acuity.jpeg

Want to stay scheduled? Acuity is a fantastic tool that allows your clients to click customized links and schedule an appointment with you! This is by far one of our favorite tools that we use to create a great client experience!

Click here to check it out!

#4 Smugmug/Pic-Time

Pic-Time.jpeg

USBs are a thing of the past! There are a number of programs you can use to host your photos in a pleasant way. Not only are they the best way to deliver photos to your clients, but you can also make passive income with them!

We first began with SmugMug which has made us thousands of dollars in passive income over the years. Since we love the control and marketing tools it offers, we’ve also joined Pic-Time!

If you’re interested in Pic-Time, use our unique code Q6REMG to get a free month!

#5 Adobe Lightroom & Photoshop

LR screenshot.jpeg

This one is pretty much a no-brainer. If you don’t already have Lightroom and Photoshop, use our link to get started on using the standard industry programs for editing your photographs!

Click here to get Lightroom!

#5 Gmail Gsuite for a Professional @yourwebsitehere.com Email Address

We use Gsuite so we can use our domain name (jeffandmichelephoto.com) as our email domain (contact@jeffandmichelephoto.com).

A personal plan for $6 per month is enough to get you a @yourdomain.com email address, though you can get a business plan if you need more Google Drive storage.

Use our unique codes to get a 20% discount on your first year!

Basic Plan: 64WYKPC9GTVR96J

Business Plan: R3WEWHU7JYT4XJV

#6 Lensrentals

Want to start testing out gear without spending a bunch up front? Give Lensrentals a go!

234x60

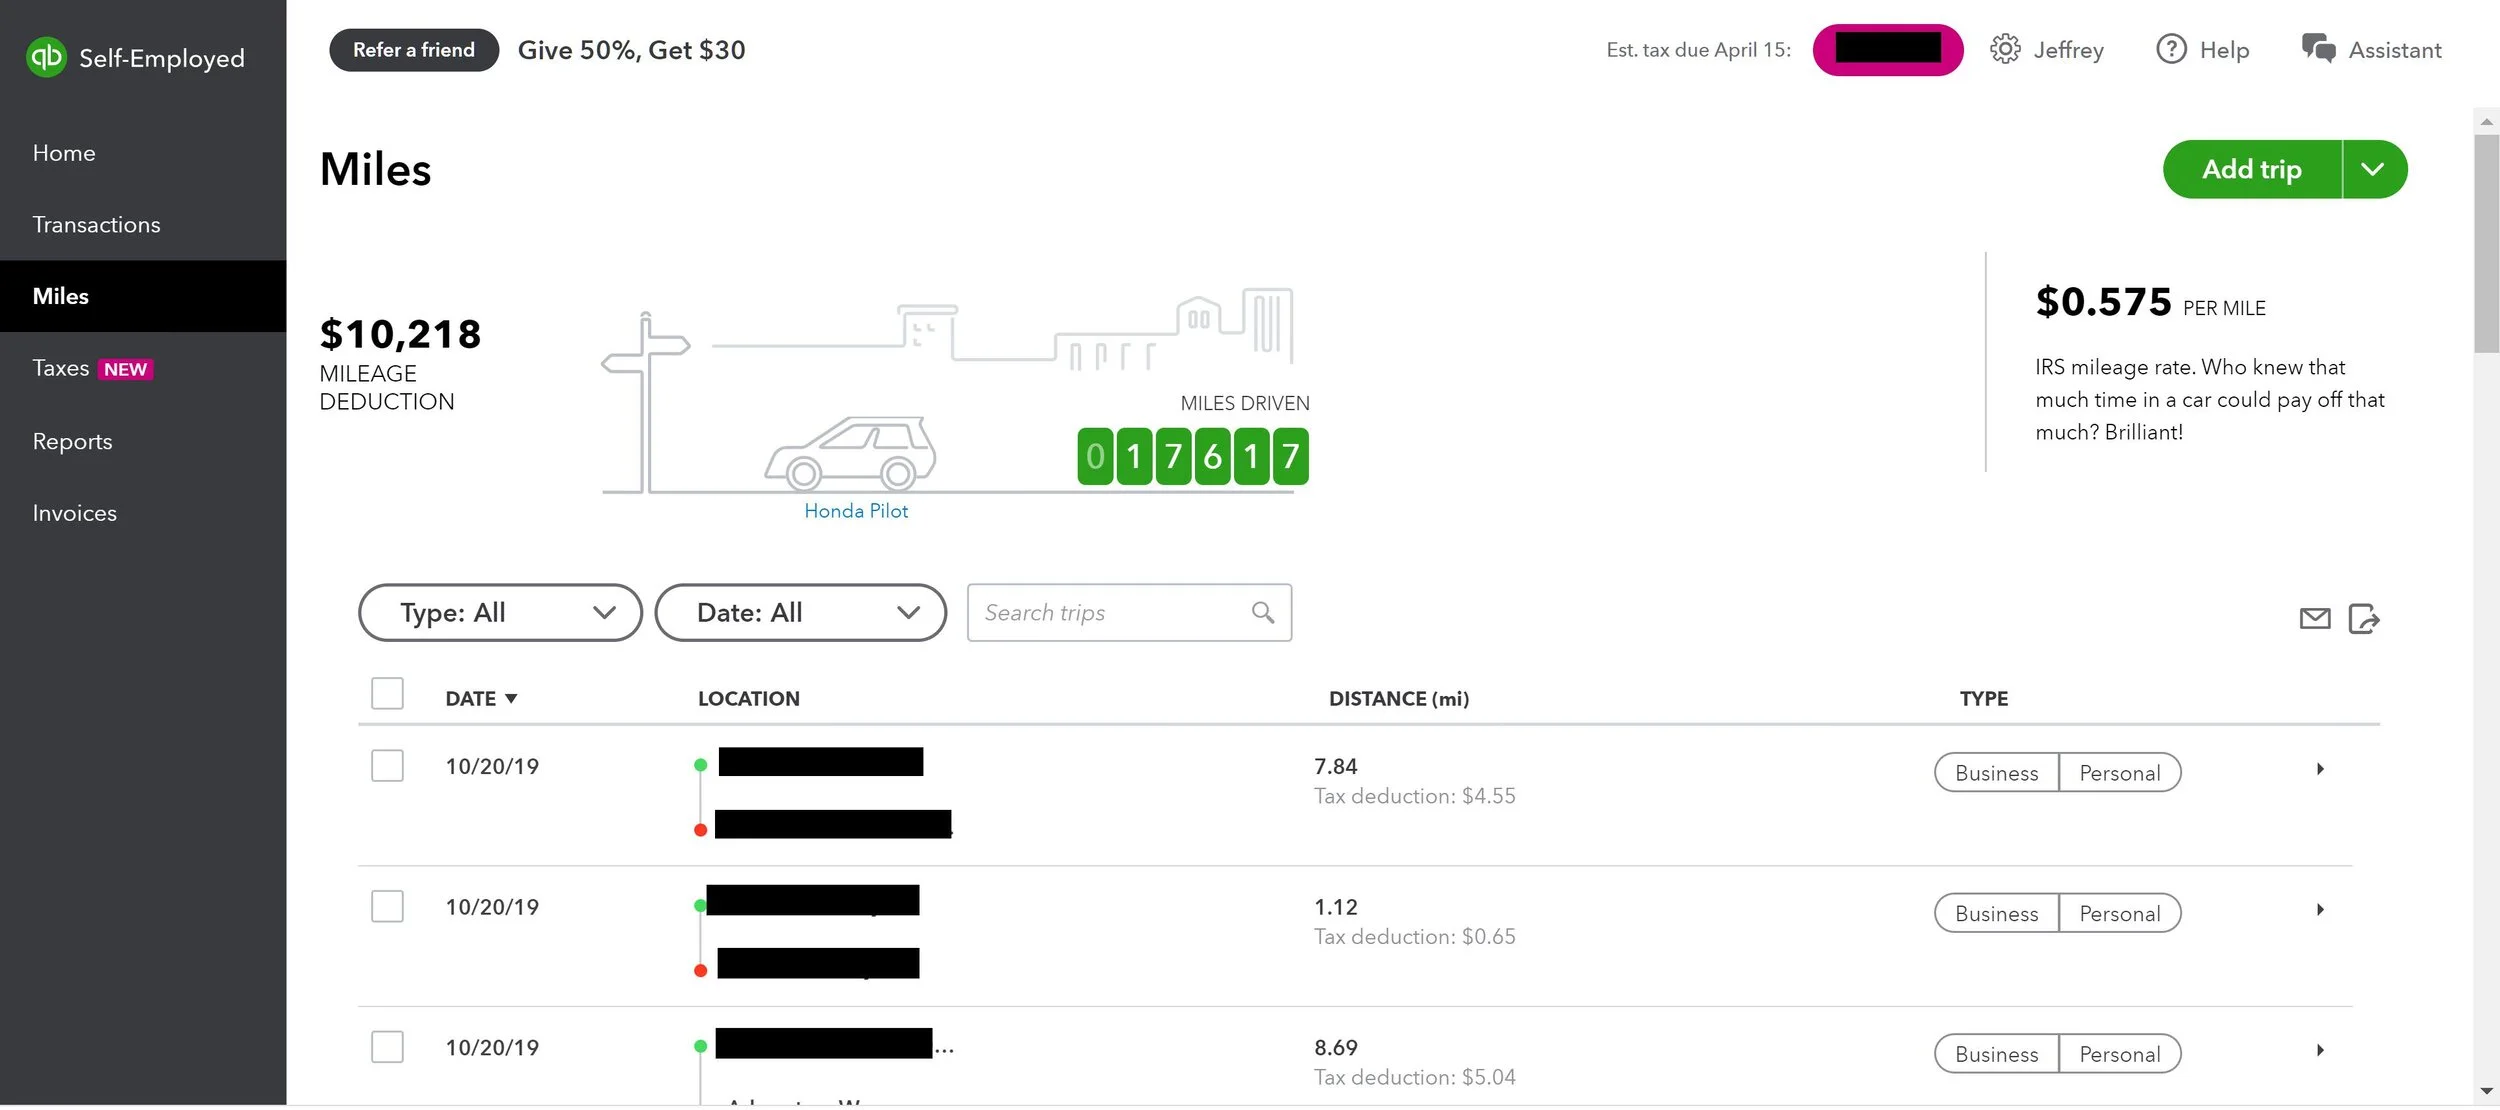
#7 Quickbooks Self-Employed

QB 2.jpeg

If you need to keep track of your expenses/mileage and more, give Quickbooks Self-Employed a go!

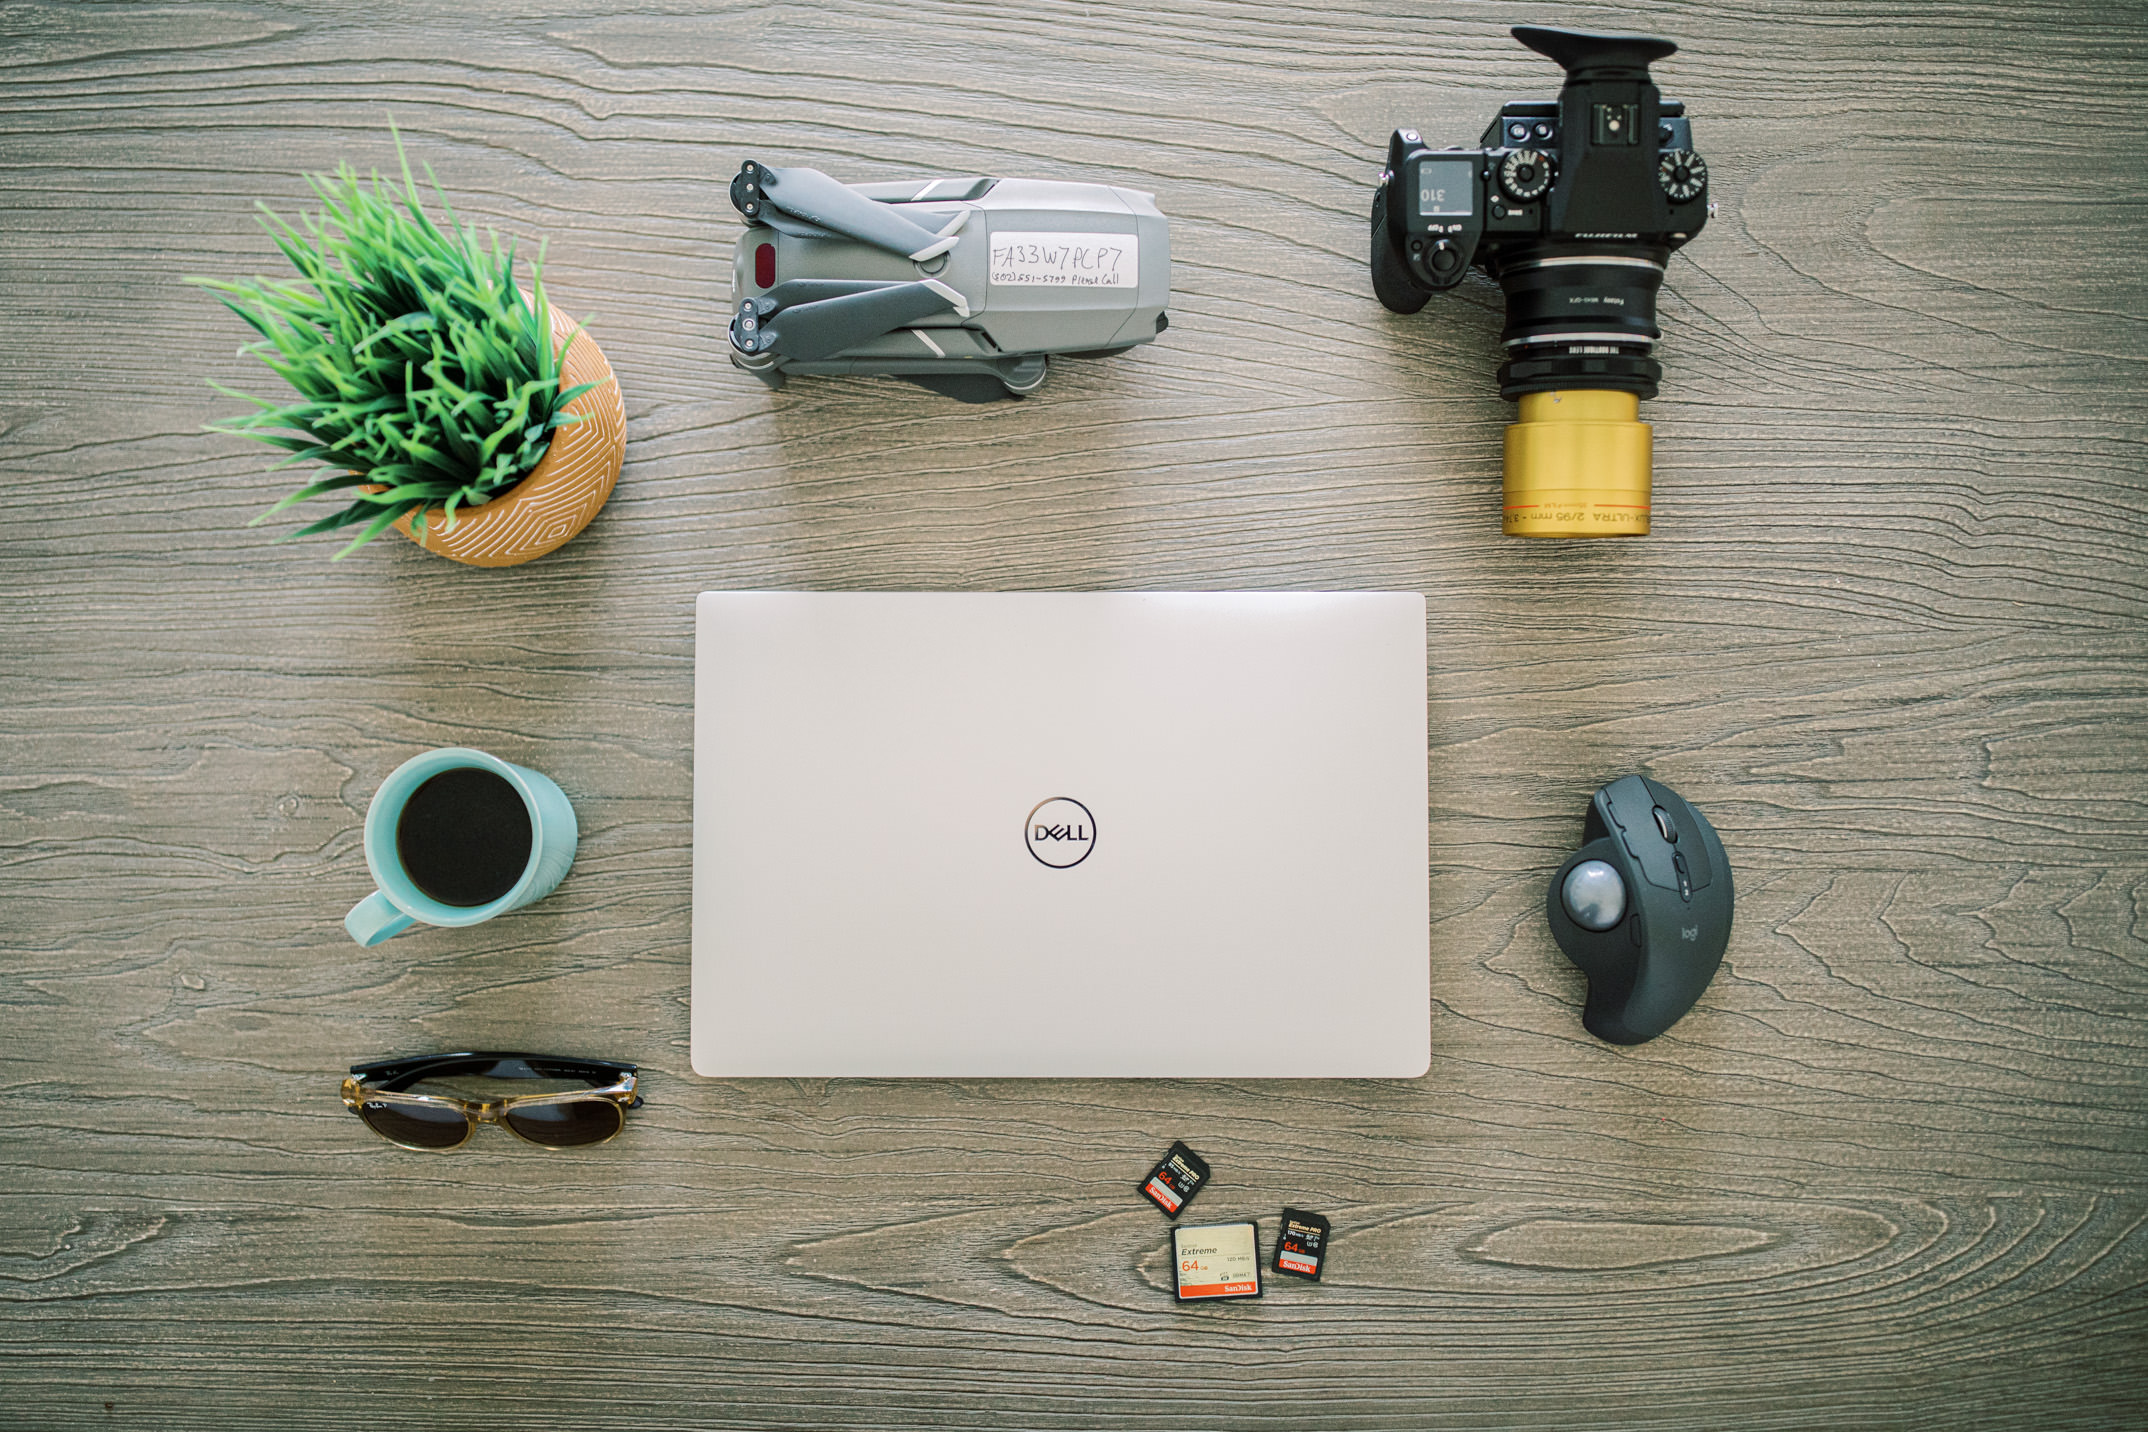
#8 A Fantastic Editing-Ready Laptop

Best+Editing+Laptop+for+Wedding+Photographers-4.jpg

Having a speedy and functional laptop is huge for us! We’re wrote a post on our choice for the Best Laptop for Editing Photos. Whether you decide to use a PC or a MAC, find something you’re comfortable with and go with it!

#9 An Ergonomic Editing Mouse

This may seem like a small, non-significant thing to include in our list, but it’s actually huge! A good mouse can really improve your workflow and prevent physical discomfort caused from poor ergonomics!

We use the Logitech MX Ergo and LOVE the clickwheel and other buttons that can be assigned to certain action like skipping to the next photo in Lightroom.

Curious about any tools that we didn’t mention? Have more questions? Reach out in the comments below!


More Articles for Photographers


4 Comments

Comment

Canon Announces New EOS R5 on February 13th 2020!

Photo by Rafael Leão on Unsplash

Over the last three years, Sony has continually tempted us with key upgrades they’ve been rolling out with their mirrorless A7r series cameras. However, we’ve clung to our Canon gear, firmly believing that Canon can’t possibly go much longer without finally cannibalizing its lineup and offering a truly professional-grade mirrorless camera with dual card slots.

We’ve waited patiently based on new announcements rumored to be coming out February 2020. Well, here we are, and we just got a solid teaser.

As of February 13th, Canon Global has officially announced the new EOS R5:

The EOS R System enables greater freedom in lens design thanks to a wider lens mount diameter, short back focus and high-speed system for transmitting data between the camera and lens, resulting in an imaging system that delivers higher image quality and greater ease-of-use.

New Canon EOS R5 Features and Improvements

Though a whole lot hasn’t been disclosed, a few key features of interest are:

  • “Dual Media Slots” aka DUAL CARDS SLOTS!

  • “8K video capture capability [which] will enable users to extract high-resolution still images from video footage as well as process 8K video into higher-quality 4K video”

  • “20 frames per second (FPS) using an electronic shutter and up to approximately 12 FPS using a mechanical shutter”

  • “a high-performance coordinated image stabilization (IS) system that integrates the camera's in-body IS with IS systems on attached RF lenses”

  • “improved transmission functionality, operability and reliability”

Anything Else in Canon Releasing in 2020?

The 2.13.2020 Canon also announced the production and release of nine new RF lenses including the RF 100-500mm F4.5-7.1 L IS USM.

Want more from our blog? Be sure to join our newsletter!


Recent Blog Posts


Comment

Comment

Best Pad Prompter Teleprompters Under $500 in 2020

teleprompt.jpg

Note: This post is part of our "Learn Blog" for photographers. For workshops, coaching, and other resources designed to help grow your skills as a photographer click here (after you read the article, of course)! To be transparent, all links are paid advertising, as a portion of any purchase made while using these links is credited to us. Please, consider using our links to help support what we do! Thank you!

Since we’ve begin making online courses and more videos in general, we took a long, hard look at the best teleprompters available for under $500. Teleprompters can get expensive, but if you’re not needing anything too fancy, a number of great options have popped up over the recent years!

As a tip, if you’re planning on using your prompter fairly close to the camera, you may want to stick with a cell-phone as your device vs a tablet. The reason is this: if your reading area is too large for how close it is, you’ll be able to see your eyes going back-and-forth.

Keep that in mind when looking at these prompters.

Best Cell Phone ONLY Prompters

Parrot Teleprompter 2 - Best Travel Friendly Prompter

The Parrot is great for a small, lightweight, highly portable teleprompter. The hood containing the glass mounts via an adapter that screws into your lens filter thread. Simple enough!

The Parrot is at the time of writing $99 on Amazon.

Glide Gear TP 75 - Highest Quality Compact Prompter

This is a really cool little prompter! It’s compact, though not as small as the Parrot. Also noteworthy, it mounts to a tripod like some of the larger teleprompters. It can also mount directly to your laptop, which might be nice for someone using a webcam.

It also comes with a carrying-case, making this guy a great option for those looking for great build with excellent portability!

The TP75 is at the time of writing $179 on Amazon.

Best Prompters for Cell Phones and Tablets Under $500

Caddie Buddy 70/30 Teleprompter - Cheapest High Quality Prompter

The Caddie Buddy is a sturdy, very basic teleprompter. As far as a full-size prompter, it’s about as cheap as you can go while still having excellent reviews!

The Caddie Buddy isn’t fancy—but it gets the job done!

The Caddie Buddy is at the time of writing $164.95 on Amazon.

Glide Gear TMP100 Teleprompter - Best Value Prompter

The TMP100 looks sleek and is a great value. It also includes a travel bag, which is a nice touch! If you’re looking for a nice balance of quality and price-point in a full-size pad prompter, the TMP100 is the way to go!

The Glide Gear TMP100 is at the time of writing $198 on Amazon.

OneTakeOnly Pad Prompter - Highest Quality Prompter (with Drawbacks)

The OneTakeOnly is the nicest looking out of all the full-size pad prompters on our list. It has excellent reviews (mostly on B&H). The biggest drawback to this prompter is that it does NOT have a built in mount for your camera to sit on.

So, you’ll have to either use your tripod for your camera and then mount the OneTakeOnly on a lightstand, or some other set-up, like attaching it to a 15mm rig like this one.

Also worth noting, the OneTakeOnly comes with a 6-month warranty.

The OneTakeOnly is at the time of writing $375 on Amazon.


More from our blog


Comment

Comment

Honeybook vs Dubsado vs 17hats 2021

Which is the best? Honeybook vs Dubsado vs 17hats? Graphic for blog

Note: This post is part of our "Learn Blog" for photographers. For workshops, coaching, and other resources designed to help grow your skills as a photographer click here (after you read the article, of course)! To be transparent, all links are paid advertising, as a portion of any purchase made while using these links is credited to us. Please, consider using our links to help support what we do! Thank you!


Spoiler alert: If you’re looking for the short answer to the question, “which is best? HoneyBook vs Dubsado vs 17hats?”, we’ll be candid: we LOVE HoneyBook! So, this is definitely a comparison between Honeybook vs Dubsado vs 17hats, but it’s also a HoneyBook Review, since we’ll dive a little deeper into the specific features of HoneyBook.

If that’s all you wanted to know, click here to go grab your free trial and 50% off your first year, on us!

Best Client Management Solution for Wedding Photographers: HoneyBook Vs Dubsado Vs 17hats

Get Organized, Stop Double Booking/Prevent Double Booking Wedding Clients, and Provide Better Client Service with the Best CRM for Wedding Photographers

Are you taking on enough clients that you’re starting to think you need a better way to stay organized and avoid big mistakes like double-booking? Well, then it’s definitely time to invest in Client Relationship Manager (CRM)! But, which client relationship management provider is the best for wedding photographers?

Which CRM is Best For Wedding Photographers?

HoneyBook vs Dubsado vs 17hats

When we started getting a lot more inquiries and needed to be very organized beyond our ability to just track it on paper/in email, we set out to test some of the CRMs our friends had recommended.

The main ones we had heard about were:

So, when it comes to the main contenders it’s really Honeybook vs Dubsado vs 17hats. At this point, we’ll go ahead a say, we chose HoneyBook as our CRM, but it was also the LAST one we tried.

We’re really big into “try before you buy” so we decided to take each for a test run. Our main motivating factor for choosing one over the others? It really needed to just “click”; we’re huge on not only factoring things by their “features”, but instead making sure you buy what you’ll actually use.

It’s a lesson we learned by grocery shopping—we’ve had our seasons of thinking we’ll go super healthy beyond our current level of eating, so we’d stock our fridge full of “super food” that would actually only sit in our fridge for way pass the expiration.

Lesson? Try before you buy and only buy what you’ll actually use.

17hats vs Honeybook

Honeybook 17hats front page.jpeg

17hats was the first we tried. It was “alright”. We found that it wasn’t “that” exciting or compelling. It just didn’t make us “flow” in terms of being excited about putting a client in and having an exciting work path.

It’s sort of funny to mention, but we honestly weren’t real excited about the colors used on the website and how everything made us feel. That’s a small thing, but again, it’s something that would affect how propelled we were to actually use the product.

Dubsado vs Honeybook

Honeybook Dubsado front page.jpeg

We have a lot of friends that use Dubsado. We did find it a bit more intuitive than 17hats, but honestly, we just weren’t sold. We tend to think of projects as going in a linear fashion along a pipeline. Dubsado doesn’t seem to visualize any of this, so it didn’t feel intuitive. Again, the feeling didn’t click and instead made tracking clients seem burdensome.

So, when it comes to the question of HoneyBook vs Dubsado, we found ourselves not excited to use Dubsado while we were really excited using HoneyBook.

HoneyBook vs Dubsado vs 17hats

Screenshot of HoneyBook front page for HoneyBook Review

HoneyBook is the CRM that we now use! For us, it was the most intuitive and we found ourselves just plain excited to use it whenever we logged in. It just “worked” for us. A lot of the features I’ll mention about HoneyBook are quite possibly on other CRMs at this point, but again, we’ve found the features in HoneyBook very exciting because we’ve actually made use of them.

HoneyBook Review and Features

Say Goodbye to Double-Booking!

When you have a date booked, HoneyBook will tell you. Anytime you get a new lead for a date that’s already booked, you’ll be notified. We LOVE that. It also let’s you know what other inquiries have been made on a certain day.

This is a great tool to use for analyzing what dates you normally book each year, and how many inquiries you usually get for each date, so that you can be choosy in the years coming!

Honeybook Booked Tenatative.jpeg

Keep Organized with Your Own Customizeable Honeybook Pipeline

The customizeable HoneyBook pipeline is really helpful in tracking where you leads and clients are in your funnel.

Reasons why HoneyBook is the Best Client Management System

We use this feature to keep track of new leads, where they’re at in our “sales funnel”, and where booked clients are at in the “client experience funnel”. This makes it super easy to know how best serve people where they are. It also makes it easy to aggregate your clients into a “ready to ask for reviews” section on your pipeline, so that you can gain a list of people to ask!

Honeybook’s Magically Cumstomizeable Contact Form

HoneyBook’s contact form is very, very good. When a client fills it out, it populates all sorts of good info about the person who just completed it. The contact form is easily placed in your websites code injection and can be customized directly within HoneyBook.

Reports

To optimize all our advertising efforts, we LOVE tracking where our brides find us and other fun-facts about the discovery process. We’ve learned interesting things such as that the source that we receive the most leads is like fourth in terms of actual “value”. We actually didn’t know this until we looked at our reports and had considered cutting advertising that brought us higher paying clients!

Honeybook lead sources.jpeg

Templates and Automation with Honeybook

This is one of the greatest reasons we love HoneyBook. We make extensive use of the templates and automation. We’ve created templates for almost any contract, brochure, follow up email, gallery delivery, etc. email you could possibly image.

We just select the template and we’re good to go!

The Honeybook Phone App!

Besides HoneyBook, as far as we know, only 17hats has an app. As far as HoneyBooks app, it is TREMENDOUSLY helpful in tracking/responding to leads/clients on the go.

There’s More

There’s a lot more to why we love HoneyBook, but we recommend that you do what we did—Give it a try!

Use our link and get 50% off your first year of HoneyBook!


More Articles For Photographers


Comment

6 Comments

Best Film Emulation Presets: Matching Digital to Film

C1ick-match-article-overlay.jpg

Note: This post is part of our "Learn Blog" for photographers. For workshops, coaching, and other resources designed to help grow your skills as a photographer click here (after you read the article, of course)!


Ah, the great task of matching digital files to film scans. Compared to and/or complimenting film, it is so so nice to have the security, quickness, and flexibility of digital. But, oh! to match it to the beauty of film—that’s a whole other story.

We’ve written in other recent articles about the best cameras and lenses to match digital to film, and now we’re here to chat about our favorite editing tool for making our digital to match our favorite film stocks!

Michael & Kathleen Wedding - Jeff & Michele Photo (Web Use Only)-86.jpg

In this article, we’ll talking about…

  • A brief history of film emulation to show how we arrived at our favorite tool

  • The Modern Era of Film Emulation and how it will help you be a better or at least a more efficient photographer

  • Our favorite presets for matching digital to film (or should we say, profiles!)

A Brief History of Film Matching

Asato & Victoria The Olmsted Wedding Peek-0.jpg

Several years back, Kirk Mastin first released his “Mastin Labs” presets, and it rocked the world of digital editing for those of us who wanted edits closer to our favorite film stocks.

Yet, there was much to be desired still from those presets. Most of us with a keen eye towards film found ourselves doing constant tweaks, trying to get images to look less “crispy” and to more truly reflect not only the colors of film, but also the “look”.

Edited with C1ick Match. Photoraphed using the 150mm f/2.3 Schneider Cinelux Xenon from The Boutique Lens

Edited with C1ick Match. Photoraphed using the 150mm f/2.3 Schneider Cinelux Xenon from The Boutique Lens

Since Mastin Labs preset were released, a number of film emulation iterations have risen that have all attempted to bridge the gap over which Mastin first ventured. Many of these are excellent and can create beautiful results, from Jose Villa’s Presets, to Noble, to the Grovers Presets and many others.

Patric & Katie Richwood on the River Wedding - Jeff & Michele Photo (Web Use Only)-45.jpg

And yet, one film emulation tool has begun to take the market by storm among many well-known, long-time film shooters. And to boot, it’s technically NOT a preset. It’s a profile.

The Modern Era of Film Emulation

30 Rising Stars 2019 Jeff & Michele-22.jpg

Film emulation, along with excellent gear that rivals and beats many film cameras in terms of dynamic range, has entered a new era leaving many long-time film shooters even unsure which photo is film and which is digital.

Particularly tricky to the well-trained eye is C1ick Match, a collection of film emulated profiles that have managed to beautifully replicate both Kodak and Fujifilm stocks including Portra 400 and Fuji 400H.

What is a Profile and How Does is Compare to a Preset?

Best film emulation-1-4.jpg

Most wedding photographers are familiar with presets, but profile will throw quite a few off. To keep it simple, a profile is exactly like a preset, accept once it’s applied from the Profile Tab in LR, all your sliders remain zeroed out.

Parker & Amelia Wedding Peek - Jeff & Michele Photo-1.jpg

The benefit to this is that, even after the profile is applied, you still have a wide range of control over your sliders, where a preset would cause the slider to move and thus prevent as drastic of slider flexibility.

Our Favorite Film Emulation Tool for Lightroom: C1ick Match

C1ick Example-1.jpg

Without a doubt, C1ick Match has amazed us more than any other preset/profile. They’re easy to install, use, and really do look incredibly like film!

Mastin Vs C1ick Match for Film Matching

We actually made a transition from Mastin Labs to C1ick Match due to C1ick appearing to have a more film like gradation in color, especially in the highlights. The shadows and colors in general just seem to match film better. Also, the overall look just feels more like film, instead of that “crispy” digital look.

More Info On C1ick Match

C1ick Match began in the summer of 2009 by Dustin Stockel as a scientific approach to achieving a look that was similar in rendering to how Noritsu and Frontier scanners create a well-balanced scan.

Since their release, Dustin has provided impressive updates that continue improving the work-flow speed of many hybrid photographers. Our work-flow has drastically improved.

On top of all that, there’s a thriving community of photographers that can provide plenty of more feedback and examples in the C1ick Match Community Facebook Group!

BONUS PROMO CODE: So, what are you waiting for? Head over to C1ick Match’s Website now and get up to 20% off using our unique code: JEFFANDMICHELE


Other Articles From Our Blog


6 Comments

1 Comment

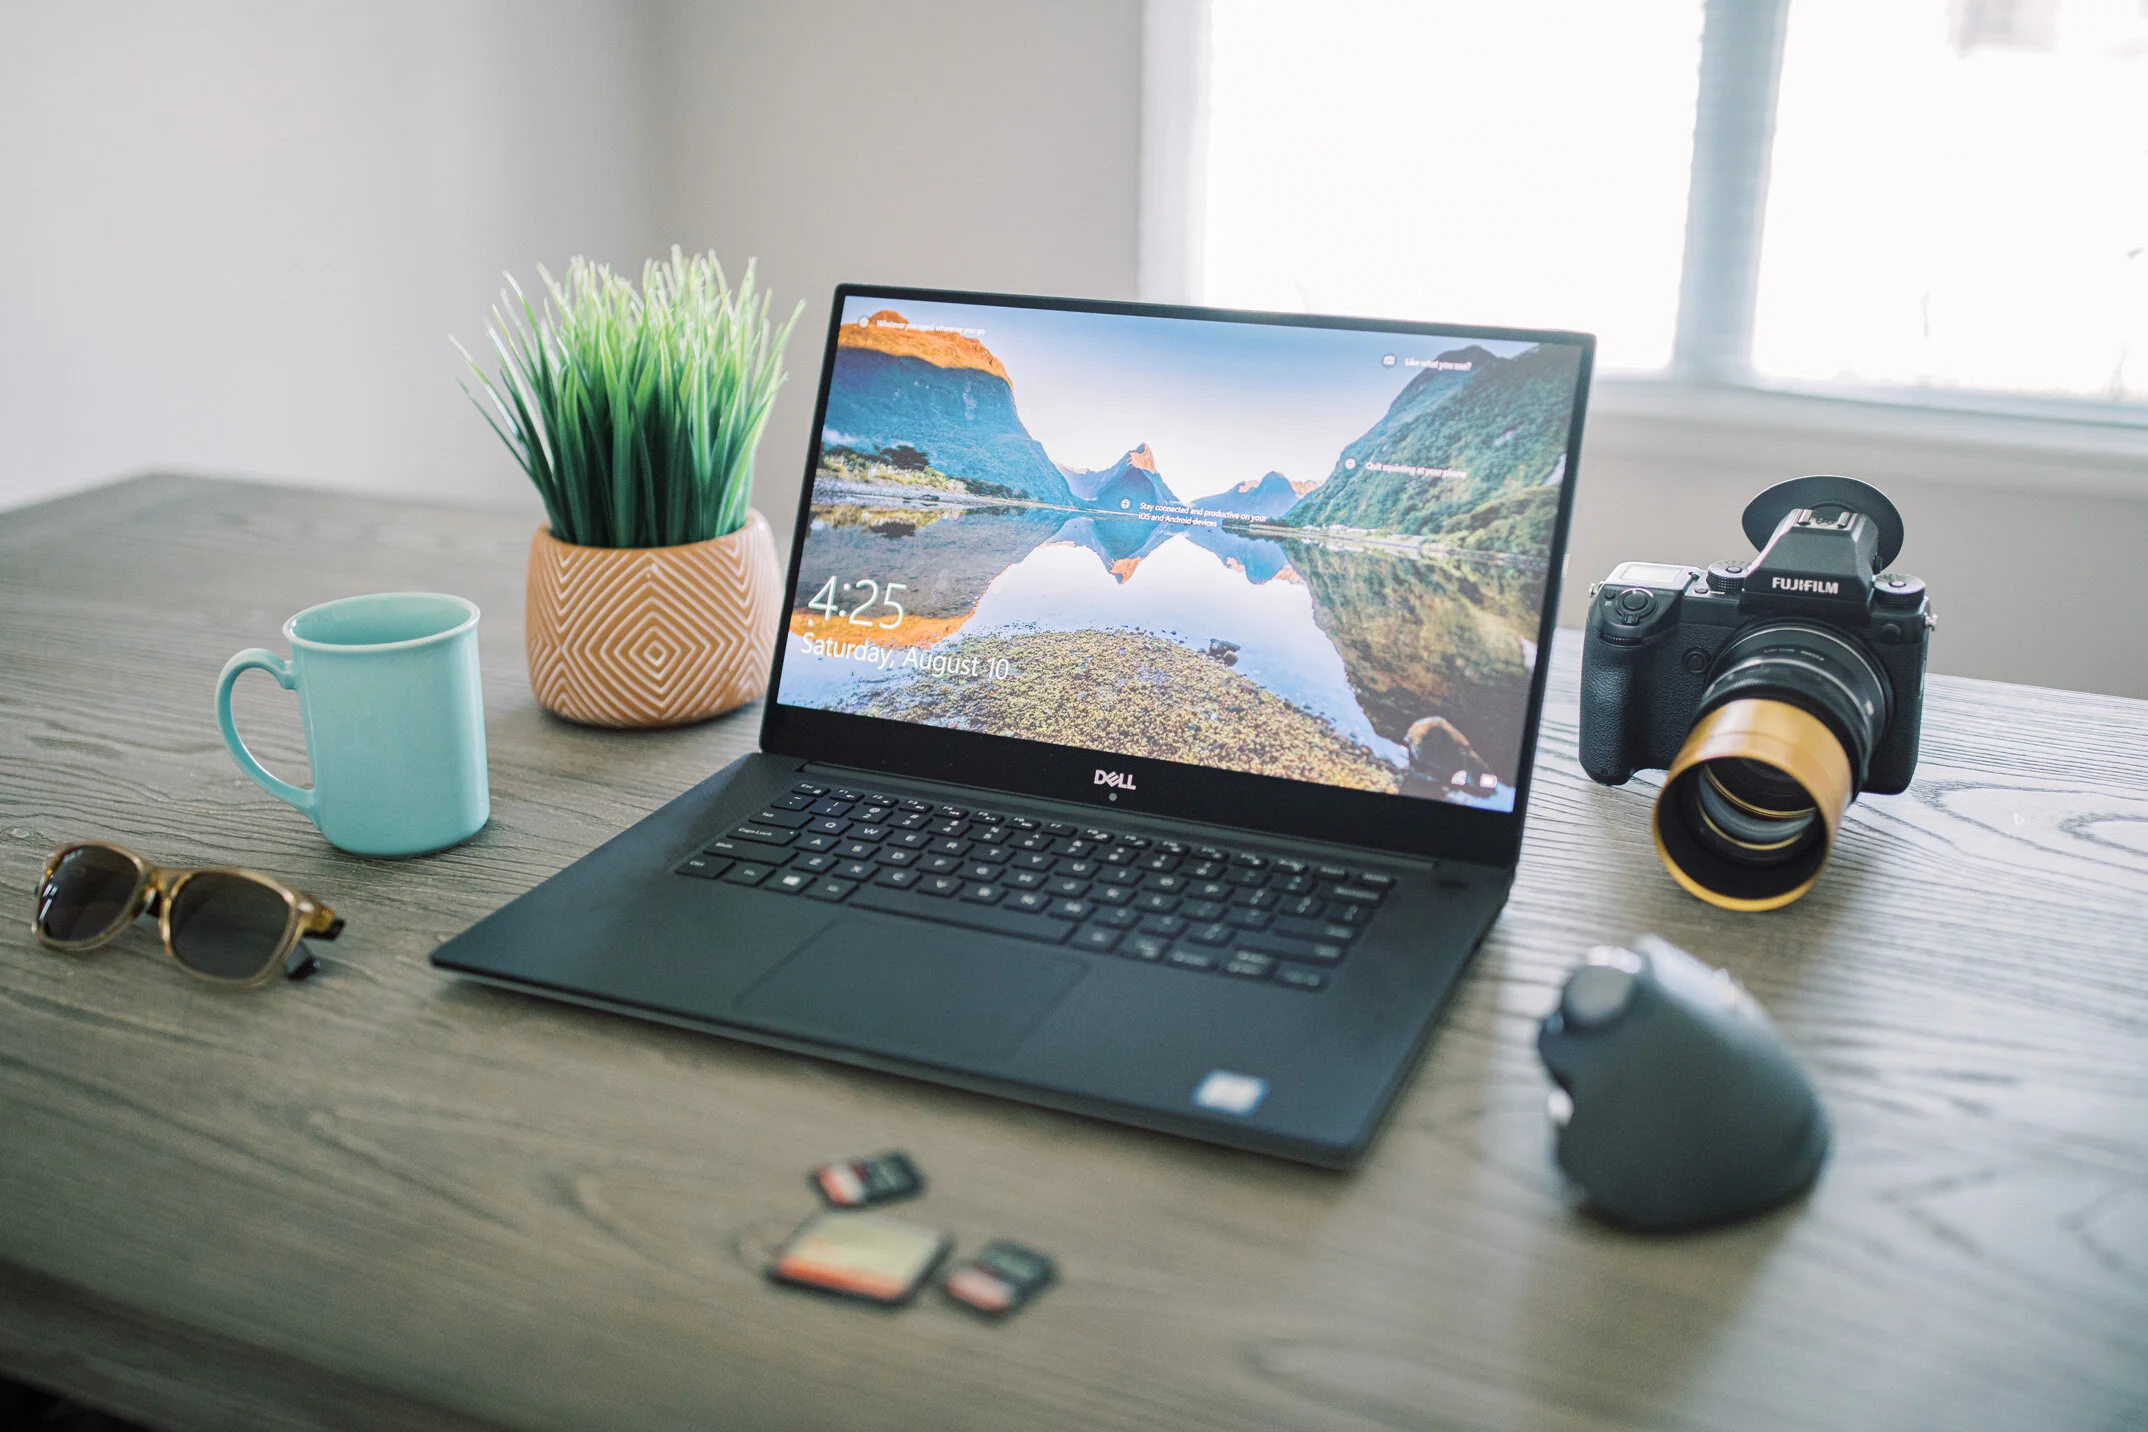
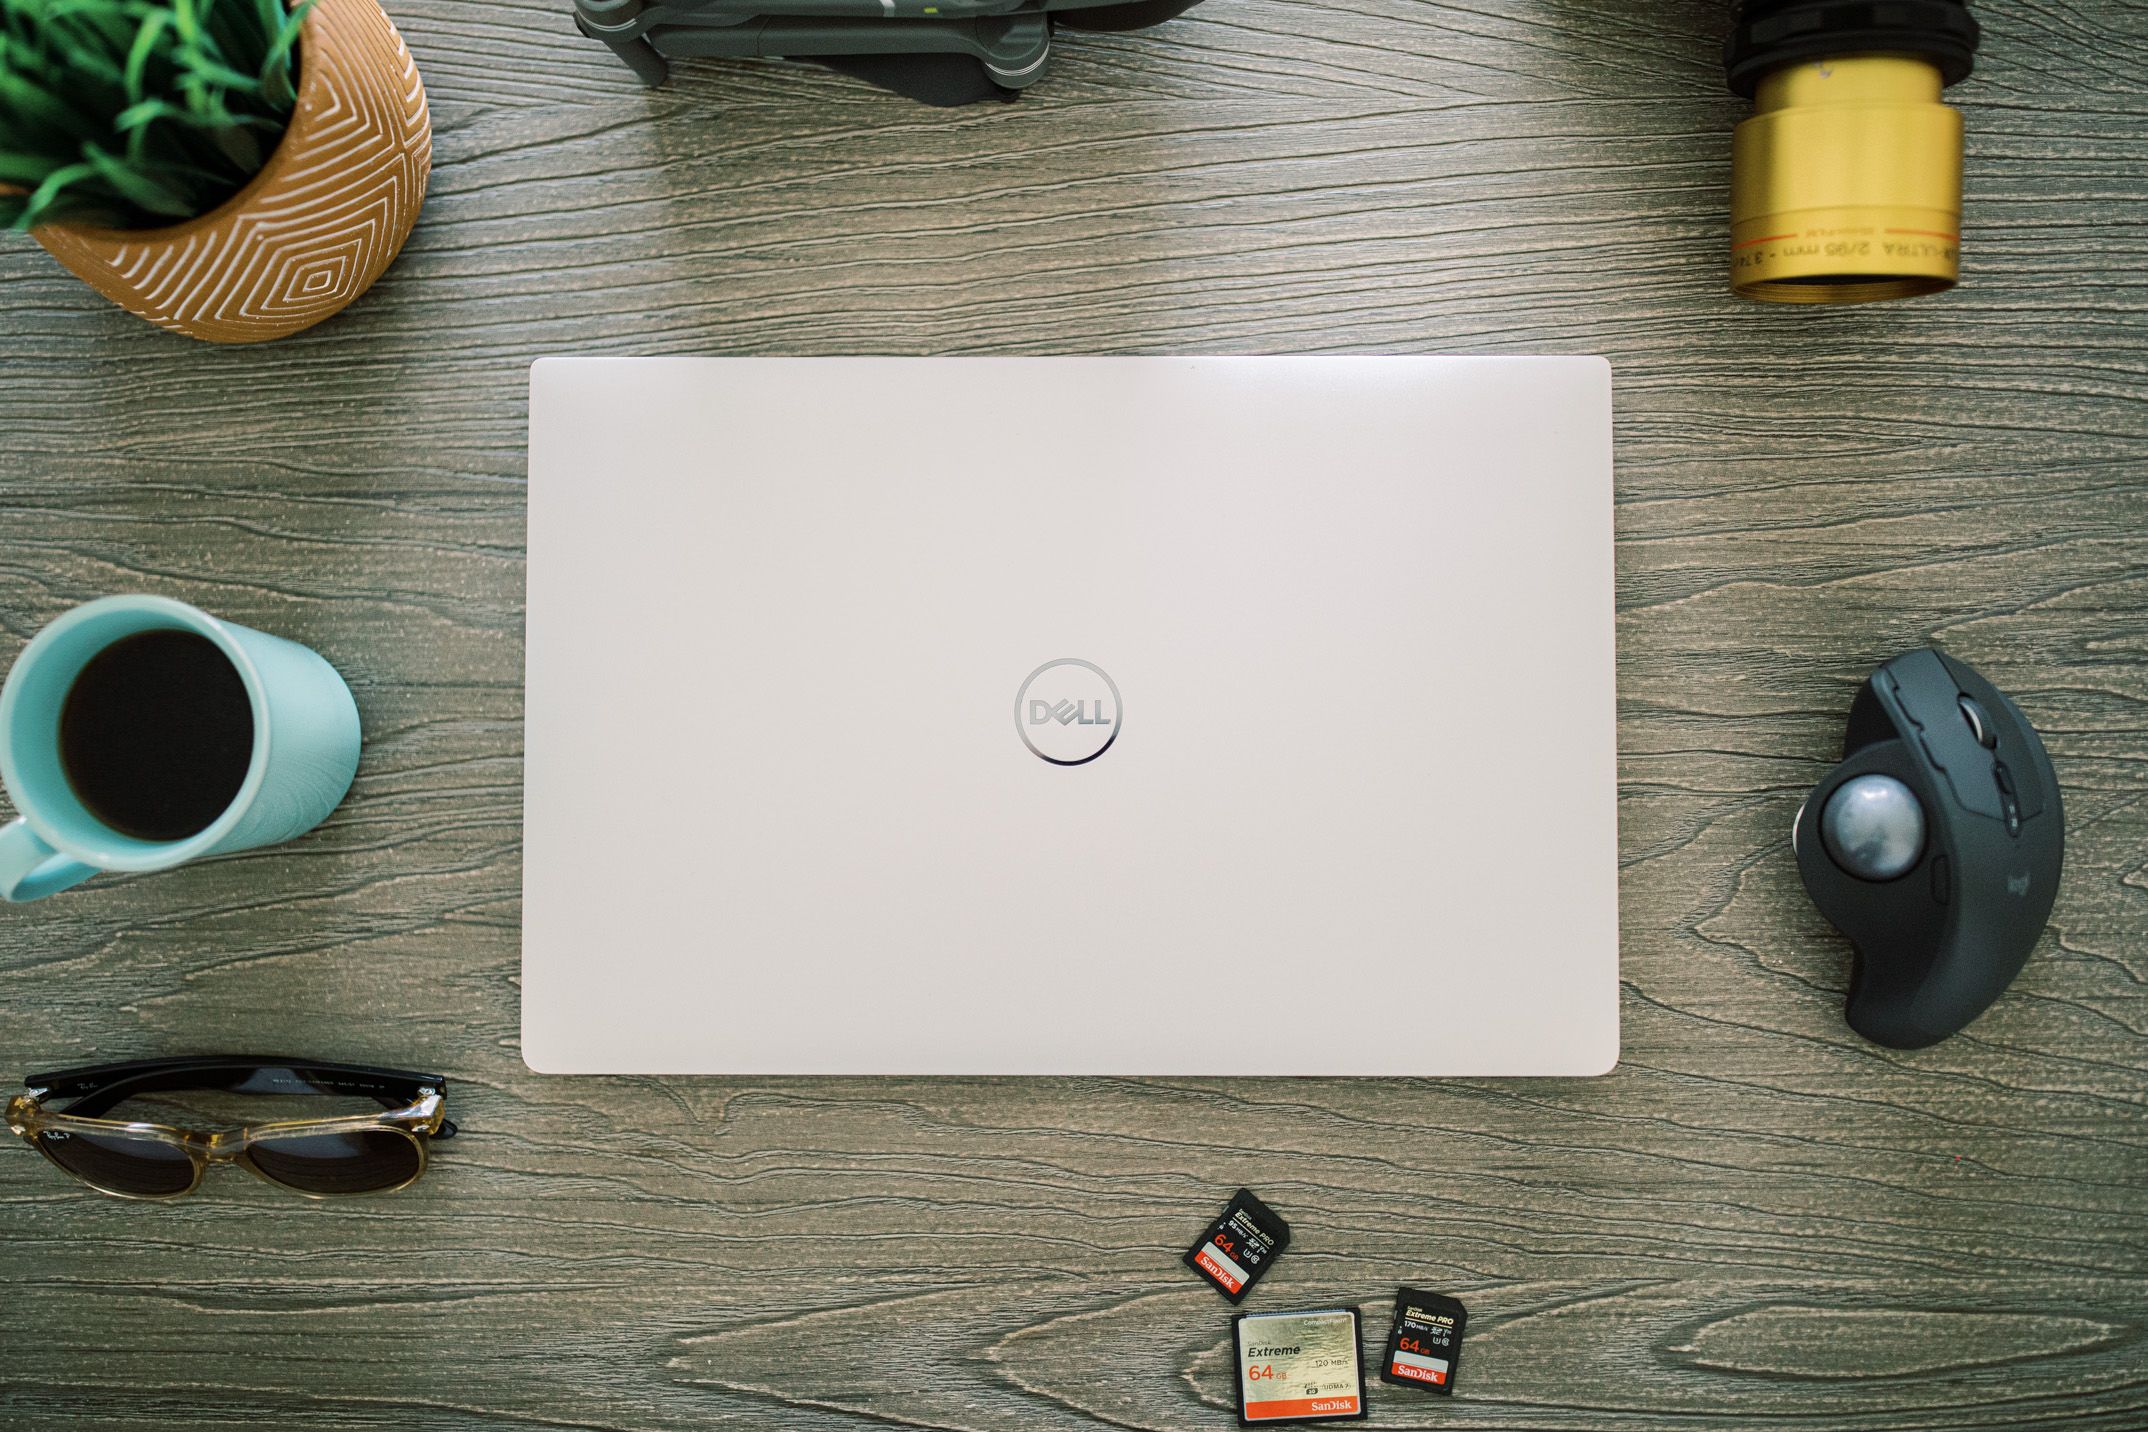
Best Laptop For Editing Wedding Photos: Dell XPS 15 Review

Best Photo Editing Laptop for Wedding Photographers, the Dell XPS 15

Best Photo Editing Laptop for Wedding Photographers, the Dell XPS 15


Note: This post is part of our "Learn Blog" for photographers. For workshops, coaching, and other resources designed to help grow your skills as a photographer click here (after you read the article, of course)! To be transparent, all links are paid advertising, as a portion of any purchase made while using these links is credited to us. Please, consider using our links to help support what we do! Thank you!


If you’re wondering which photo editing laptop is the best option for you as a wedding photographer editing a high volume of photos that require excellent color and precise edits, look no further that the Dell XPS 15.

On our journey to find the best laptop for editing wedding photos we wrestled with the technical and practical aspects of photo editing on a laptop and arrived at this conclusion: the Dell XPS 15 is the best laptop for wedding photographers.

Now, of course this is our conclusion—we fully believe “to each his/her own”. But, in this article, we’ll talk about what brought us to the XPS 15, covering topics including:

  • Why We Decided to Not Use a MacBook

  • Viruses and Malware: Mac vs PC

  • What Are the Minimum and Ideal Recommended Requirements for a Laptop Being Used for Editing Wedding Photos Via Lightroom?

  • Why We Feel that the Dell XPS 15 is the Best Laptop for Professional Wedding Photographers

  • Dell XPS 15 Features

  • Dell XPS 15 Computing Power

  • Dell XPS 15 Screen Quality

  • Battery Life

  • Aesthetics

  • The Touch Pad and Editing on the Go

  • Support and Warranty

  • Cost

Best Photo Editing Laptop for Wedding Photographers, the Dell XPS 15

Best Photo Editing Laptop for Wedding Photographers, the Dell XPS 15

Why We Decided to Not Use a MacBook

Cost of Power-Per-Dollar

For us, it’s been well known for some time that Apple has been charging a premium largely because their marketing generates a premium. But, is it really because of performance? No. No, it’s not.

SLR Lounge did a test awhile back comparing a Mac vs PC for dollar-to-power performance. They’re results? PC was more power per the dollar.

What’s the justification for this? Apple charges a premium largely because of their marketing—they just CAN charge because people like their marketing.

So, decide if you want to pay more for marketing, or pay less and get better computing performance.

Best Photo Editing Laptop for Wedding Photographers, the Dell XPS 15

Best Photo Editing Laptop for Wedding Photographers, the Dell XPS 15

But What About Viruses and Malware?: Mac vs PC

Years ago, the claim from Pro-Apple voices was that Macs didn’t get viruses. In response to that suggestion, it was also suggested that Apple performance was affected by the shear amount of power that the virus program required, slowing it down about as much as a malware might.

That said, nowadays, Apple is probably still a little better at not getting viruses, though they have a higher risk of getting a more serious virus when compared to a PC operating on Windows. Check out this quote from computerhope.com:

In 2015, the senior e-threat analyst at Bitdefender, Bogdan Botezatu, was quoted as saying "Mac OS X software has more high-risk vulnerabilities than all versions of Windows put together."

Nowadays, unless you’re doing pretty shady and/or questionable stuff that might expose you to viruses/malware, whether you choose Mac or PC for your laptop isn’t going to matter too much . So you shouldn’t choose Mac because “Mac doesn’t get viruses”.

Best Photo Editing Laptop for Wedding Photographers, the Dell XPS 15

Best Photo Editing Laptop for Wedding Photographers, the Dell XPS 15

What Minimum and Ideal Requirements Should I Have for a Laptop That’s Going to be Used for Editing Wedding Photos?

When looking for a laptop, we knew we wanted something that could run seamlessly without having excessive slowdowns due to the large numbers of photos we were editing and exporting.

So, here’s our list of the minimum and suggested specs for a photo editing laptop:

  • RAM: 12GB min; 32GB ideal

  • Processor: i5 min; i7 or i9 ideally

  • Memory: 1TB HDD min; 2TB SSD ideally

  • Graphics card: 1050 min; 1060 ideally

  • Screen: 1920 x 1080 min; 4k OLED ideally

That said, the Dell XPS 15 that we bought, met or exceeded our minimum requirements extremely well for the price-point. This, among other factors, is what set the XPS 15 among our original top picks for the best laptop for editing wedding photos.

Best Photo Editing Laptop for Wedding Photographers, the Dell XPS 15

Best Photo Editing Laptop for Wedding Photographers, the Dell XPS 15

Why the Dell XPS 15 is the Best Laptop for Wedding Photographers

The Dell XPS 15 is the best laptop for editing wedding photos in our mind because of its computing power, features, screen quality, battery life, and support through Dell. It’s quick and easy to edit photos on due to the great computing power and beautiful screen.

Computing Power

We purchased the 8750H version which features 32gb of RAM, a 1TB SSD, a 1050ti GPU, and an i7 processor. It runs fantastic.

Dell XPS 15 RAM

Since RAM so greatly affects your ability to maintain speed when running programs and editing, we say not to skimp. The Dell XPS 15 that we bought has 32gb of RAM, which keeps our editing flow nice and smooth.

Dell XPS 15 Processor

The XPS 15 we bought has a i7 8750H which has plenty of speed to handle editing. We considered going with an i9 processor, but it was only marginally better performing (about 6% faster) than the i7 8750H, with a pricetag that we couldn’t justify.

Dell XPS 15 Memory

The XPS 15 has various iterations that feature different size and types of memory. The one we purchased has 1TB of SSD memory. This gives us plenty of working space to store photos on the go without filling up our hard drive and affecting computer speed.

Just a note: SSD is preferable to HDD since SSD is much faster.

If you’re not familiar with different memory (HDD vs SSD), give this article a brief read!

Best Photo Editing Laptop for Wedding Photographers, the Dell XPS 15

Best Photo Editing Laptop for Wedding Photographers, the Dell XPS 15

Dell XPS 15 Graphics Card

Featuring a GTX 1050ti, the XPS 15 has plenty of power for editing photos and even 4k video. That said, we would have preferred to have a little more power from something like a 1060. But, alas, that’s ok. No biggie—just dreamin’.

Screen Quality

The screens on the Dell XPS 15 are great. On the one we bought, we love that it has a 4K touch screen. The 2019 version of the Dell XPS 15 has an OLED screen which should in theory more accurately respresent true whites and true blacks.

Touch Pad

The touch pad of the XPS 15 is actually very usable. This was surprising to me, because I normally despise editing from a touch pad.

Battery Life

Battery life with the Dell XPS 15 is pretty good. With heavy editing, I’d say we could get probably 4-5 hours out of it on a single charge.

Aesthetics

I personally think the design of the Dell XPS 15 is great. It’s thin, sleek, and modern.

Portability

Weight

The weight of the XPS 15 is about 4.6 pounds. It feels pretty lightweight to us!

Size

The XPS measures 14.06 x 9.27 x 0.66-inches.

At this size and weight, it is highly portable. This is one of the factors why we chose the Dell XPS 15 over the higher powered Dell G7. If portability and battery life weren’t as big of factors, the G7 would be a great candidate, besides the fact that it doesn’t have a 4k screen.

Cost

Out of all the laptops that we looked at for editing our wedding photos, the XPS 15 had all the features we wanted. Not only that, but the cost was very reasonable compared to the rest of the market.

Brand new, fully loaded, an XPS 15 like the one we bought can be found for around $1,600-$1,800. Models with less RAM and memory can be found for less.

Support and Warranty

Dell is known for having pretty good support and excellent warranties. A good friend of mine who is a Central Florida Wedding Photographer bought a used Dell XPS 15 that had a screen issue. He called Dell and a tech showed up at his house and fixed it, no additional cost.

Where to Buy a Dell XPS 15

We highly recommend purchasing your laptop through an authorized seller on eBay. Dell actually has an eBay account and tends to sell their laptops at pretty good prices on there! Whoever you buy from, be sure they have a good seller rating and a good return policy!

We usually don’t recommend buying refurbished or used since there are so many variables that affect your laptop.

At the time of writing, Dell has a listing on eBay for new XPS 15s just like ours.

Click here to check out other Dell XPS 15s similar to the one we bought!

Best Photo Editing Laptop for Wedding Photographers Review Conclusion

With it’s robust power, beautiful screen, and convenient size and weight, the Dell XPS 15 is truly our current top pick for the best editing laptop for wedding photographers.

Please share your thoughts in the comments section just below the other recent articles section!


Other Recent Articles


1 Comment

8 Comments

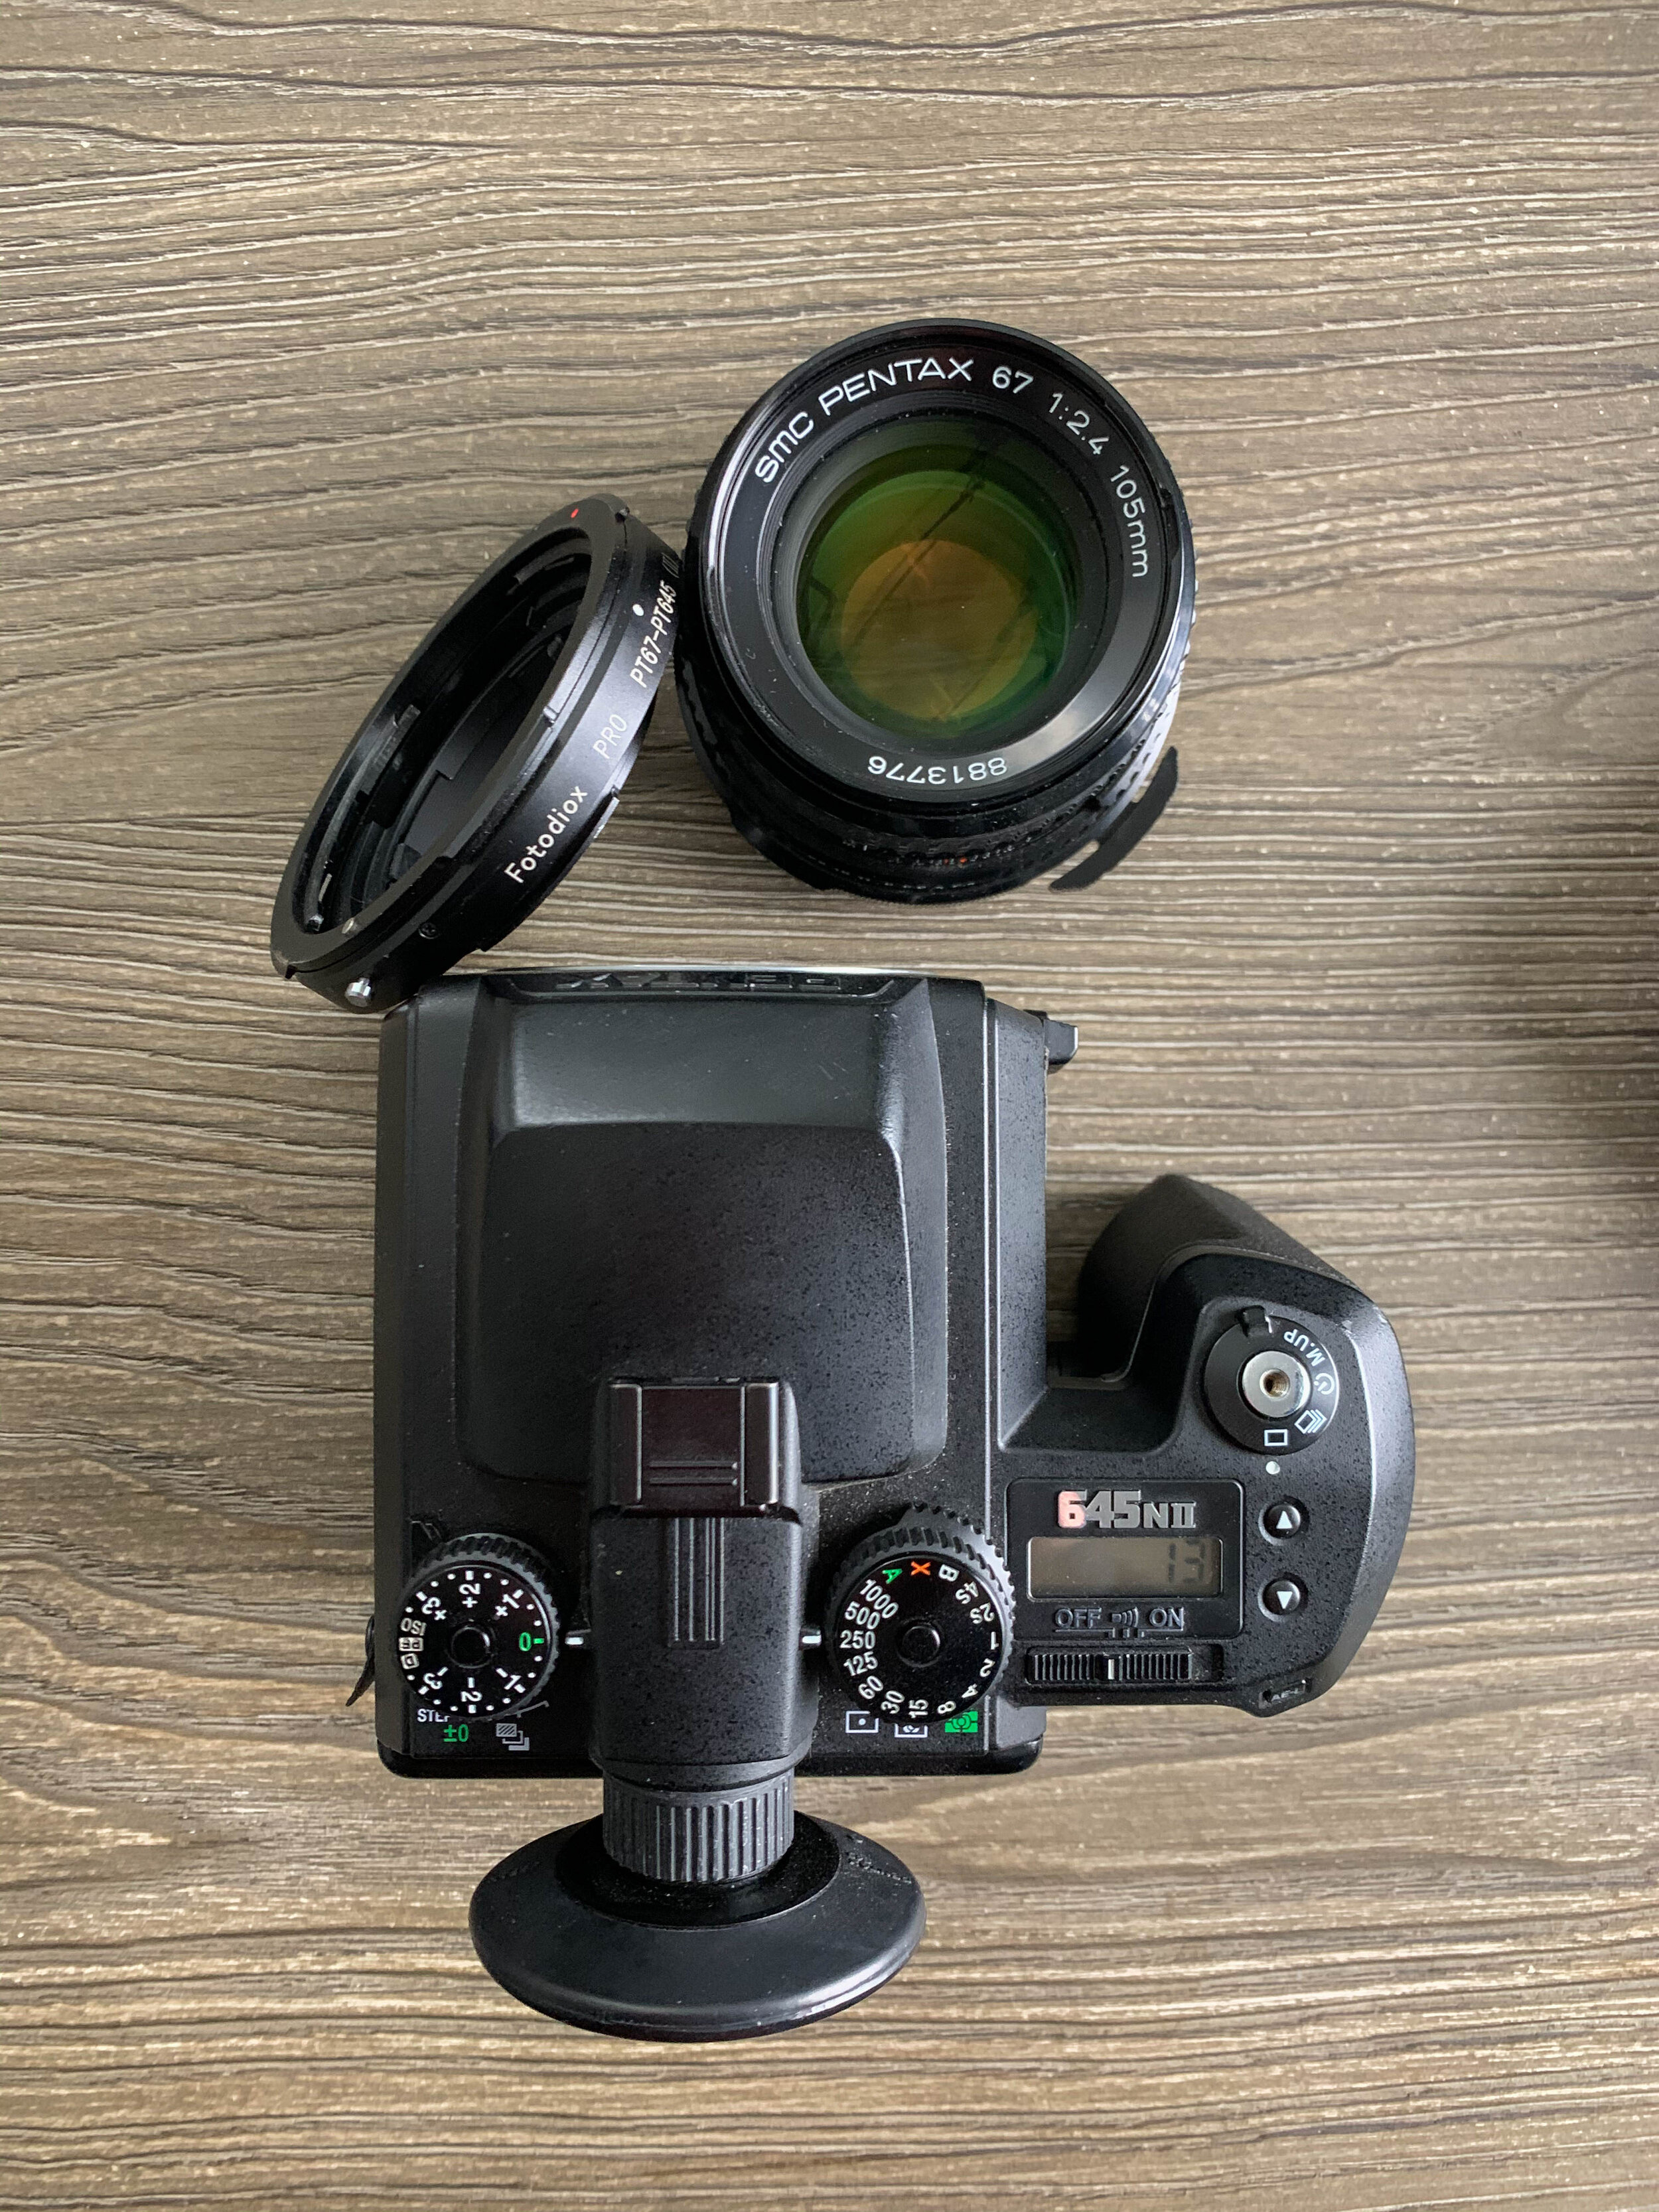
How to Adapt the Pentax 67 105mm f/2.4 to Pentax 645

Image of Pentax 645nii with Pentax 67 105mm f/2.4 and P67 to P645 Adapter

Image of Pentax 645nii with Pentax 67 105mm f/2.4 and P67 to P645 Adapter


Note: This post is part of our "Learn Blog" for photographers. For workshops, coaching, and other resources designed to help grow your skills as a photographer click here (after you read the article, of course)!  To be transparent, all links are paid advertising, as a portion of any purchase made while using these links is credited to us. Please, consider using our links to help support what we do! Thank you!


If you’ve landed here, you’ve probably realized that the Pentax 67 105mm f/2.4 is a great option to mount on your Pentax 645!

So, here’s a super simple guide to show each step to easily mounting it!

1. Pick out which version of the 105mm 2.4 you’d like to purchase.

I talk in depth about the version differences and pricing of the various versions in my Pentax 67 105mm f/2.4 Version Differences post. To sum it up, I recommend buying an SMC, if you can afford it. The reasoning for that is mostly because it doesn’t have radioactive glass (like the earlier versions) and, because it’s newer, it’ll have less chances of developing fungus, theoretically speaking.

2. Head over to eBay to add a 105mm to your cart.

This is pretty simple, right? eBay is great because you’ve got seller protection—so if something isn’t as described, you can return it. We do recommend making sure the seller has good ratings and offers a return policy of at least 14 days.

Click here to head to eBay to get a 105mm!

3. Add a Pentax 67 to Pentax 645 adapter to your cart and place your order!

This adapter will allow you to use the 105mm on your Pentax 645. Pretty cool, right? Add one to your cart and then checkout!

4. Put it all together!

Once you’ve got all your parts, simply attach the adapter to your Pentax 645, then attach you 105mm to the adapter, and BAM, your ready to start shooting!

I hope this simple guide was helpful!

To get started on making your purchases, click this link!

Other Lenses You May Want to Adapt to Your Pentax 645

Schneider Cinelux Lenses

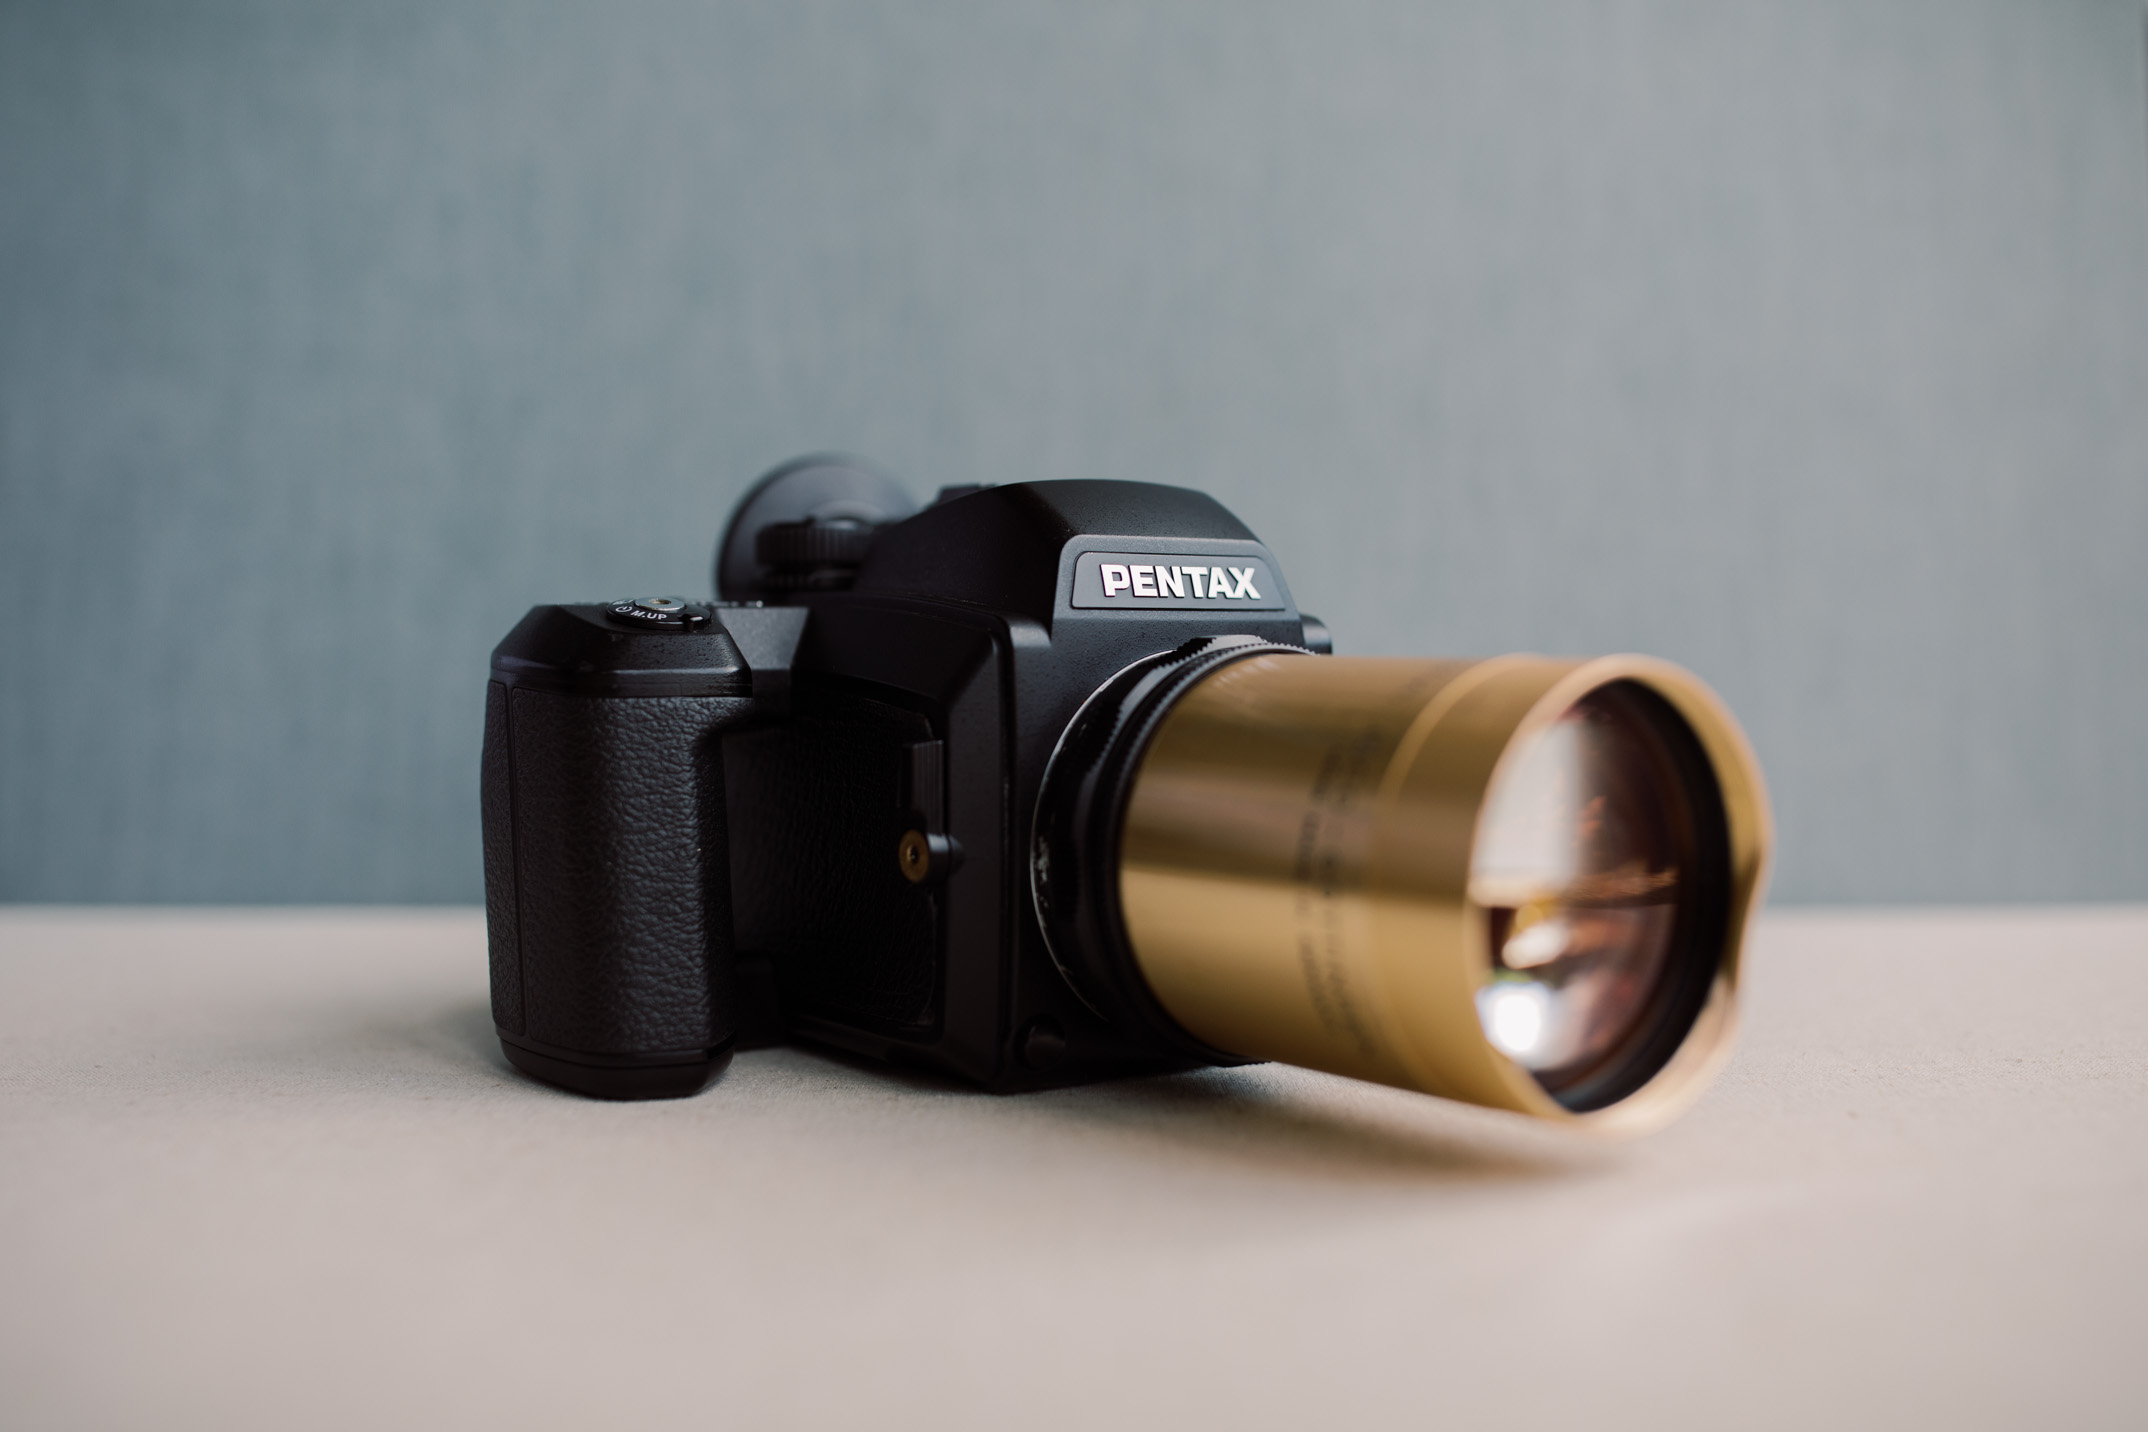
Cinelux lenses are my personal favorite adapted lens option for Pentax 645. The Boutique Lens has a variety of Cinelux lenses which are absolutely beautiful matches for using with your Pentax 645. These lenses will rival and perhaps even outperform lenses such as the Contax Zeiss 80mm f/2 for the Contax 645.

Click here to view The Boutique Lens Collection!

Pentax 67 90mm f/2.8

This is a great lens that’s a little bit smaller and lightweight than the 105mm!

Click here to view the Pentax 67 90mm on eBay!

Pentax 67 75mm f/2.8

Out of all the Pentax 67 lenses, this one has perhaps the most smooth and interesting rendering.

Click here to view the Pentax 67 75mm AL on eBay!

Thanks For Reading!

We hope this post has helped you figure out how to adapt the Pentax 67 105mm lens to your Pentax 645! Have you tried other lenses we didn’t mention? We want to hear from you in the comments below!


More Interesting Posts


8 Comments

4 Comments

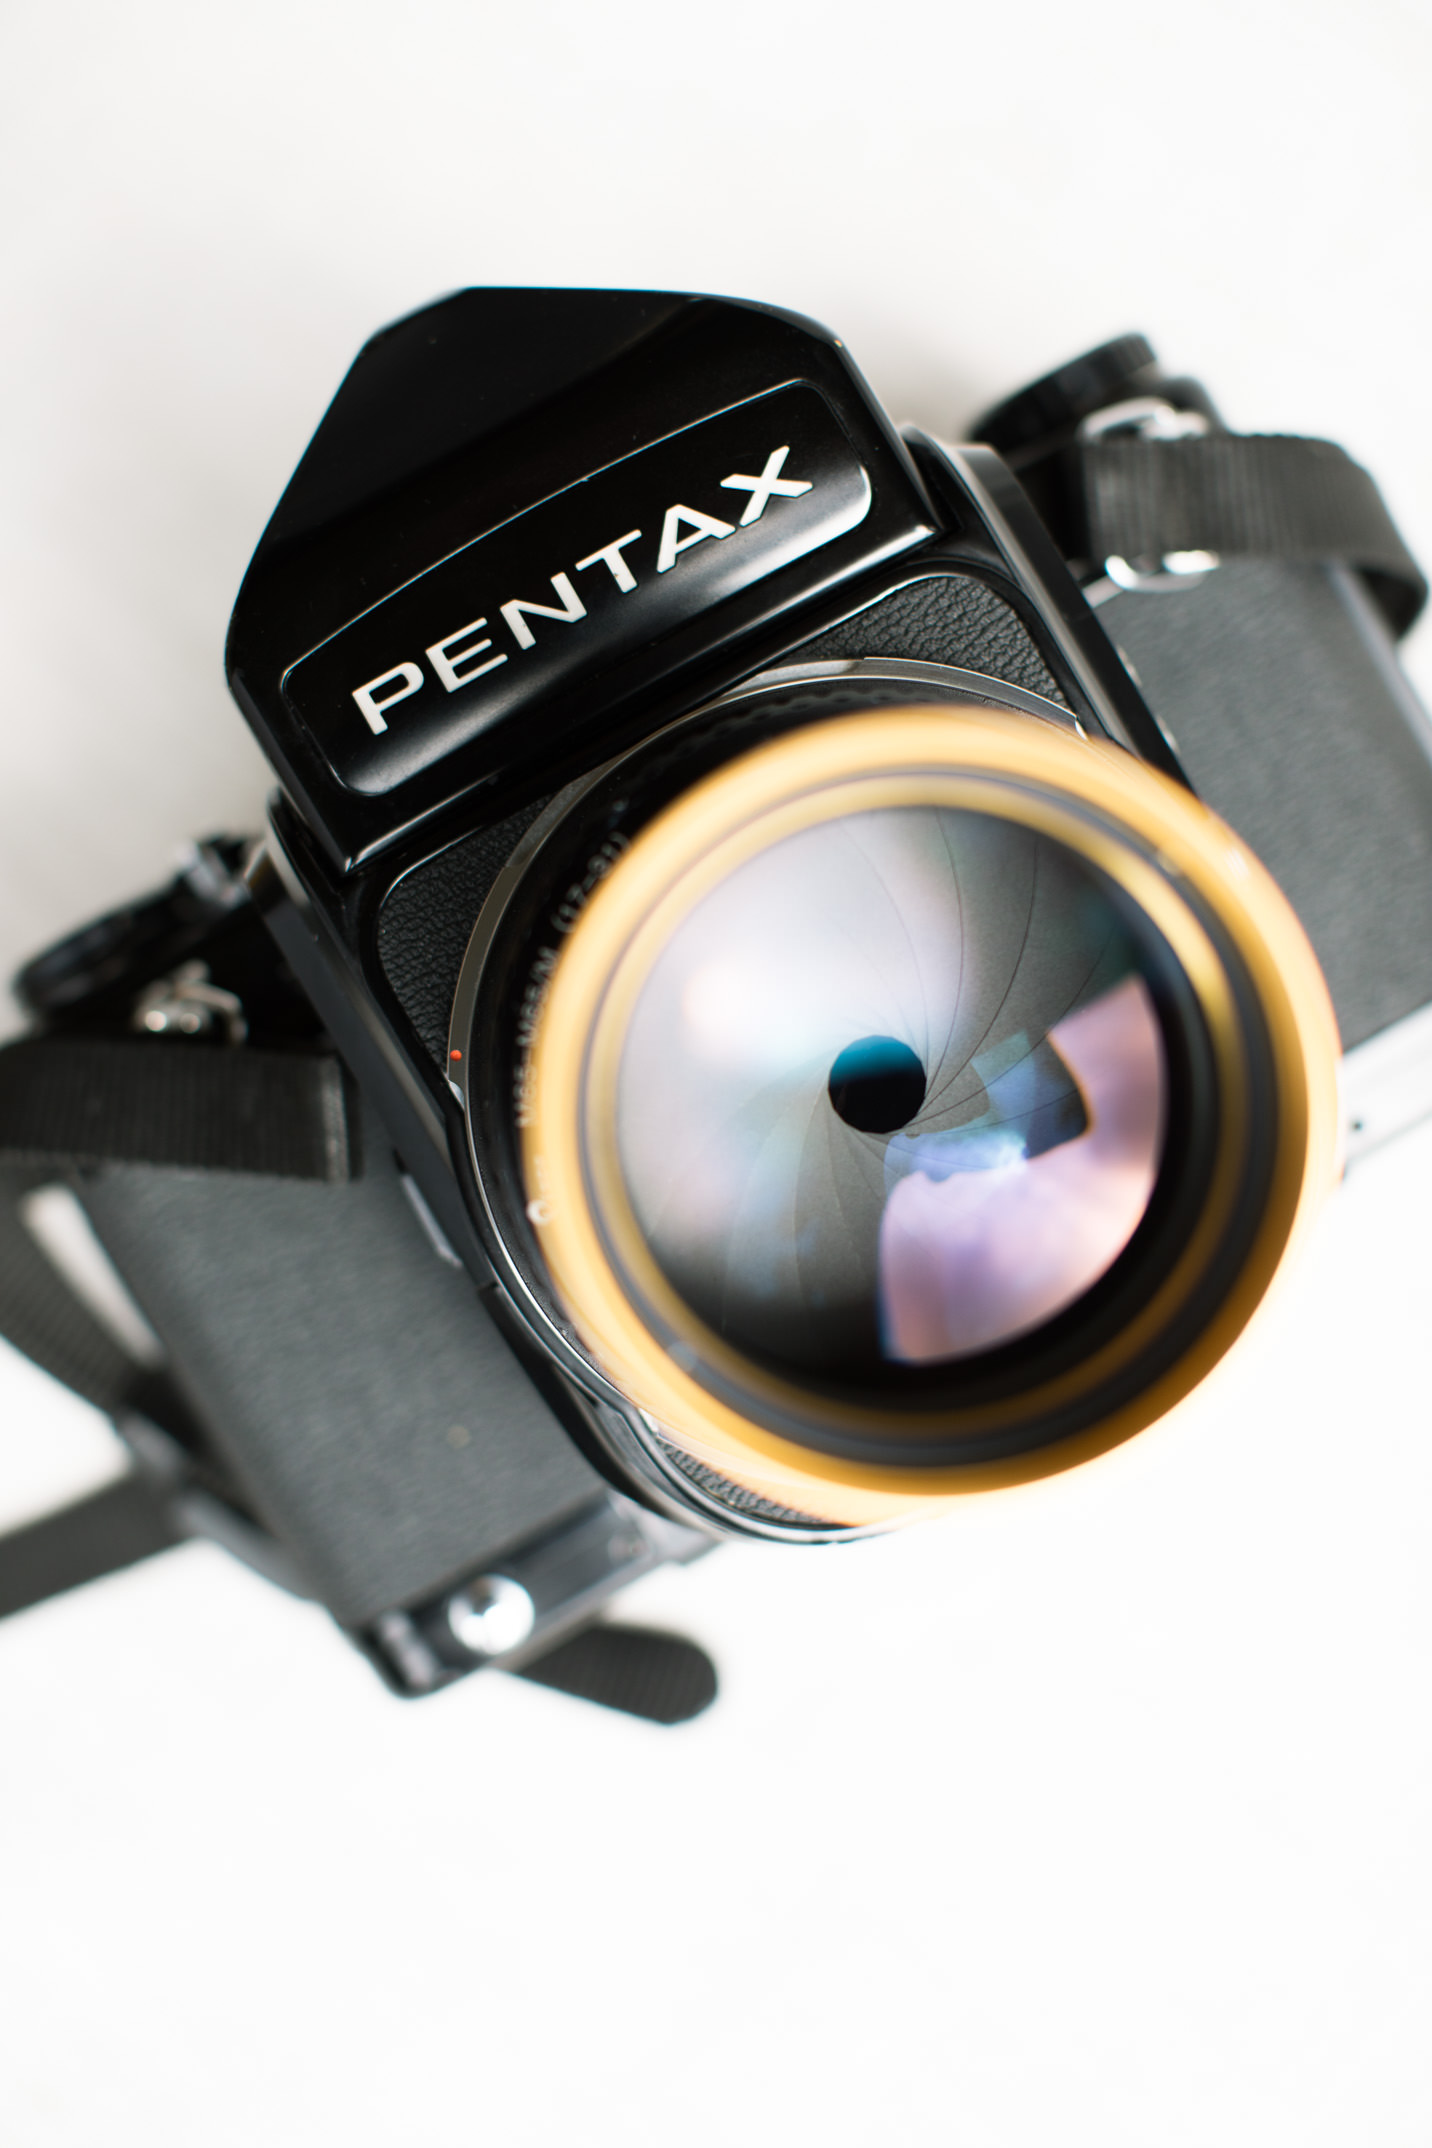
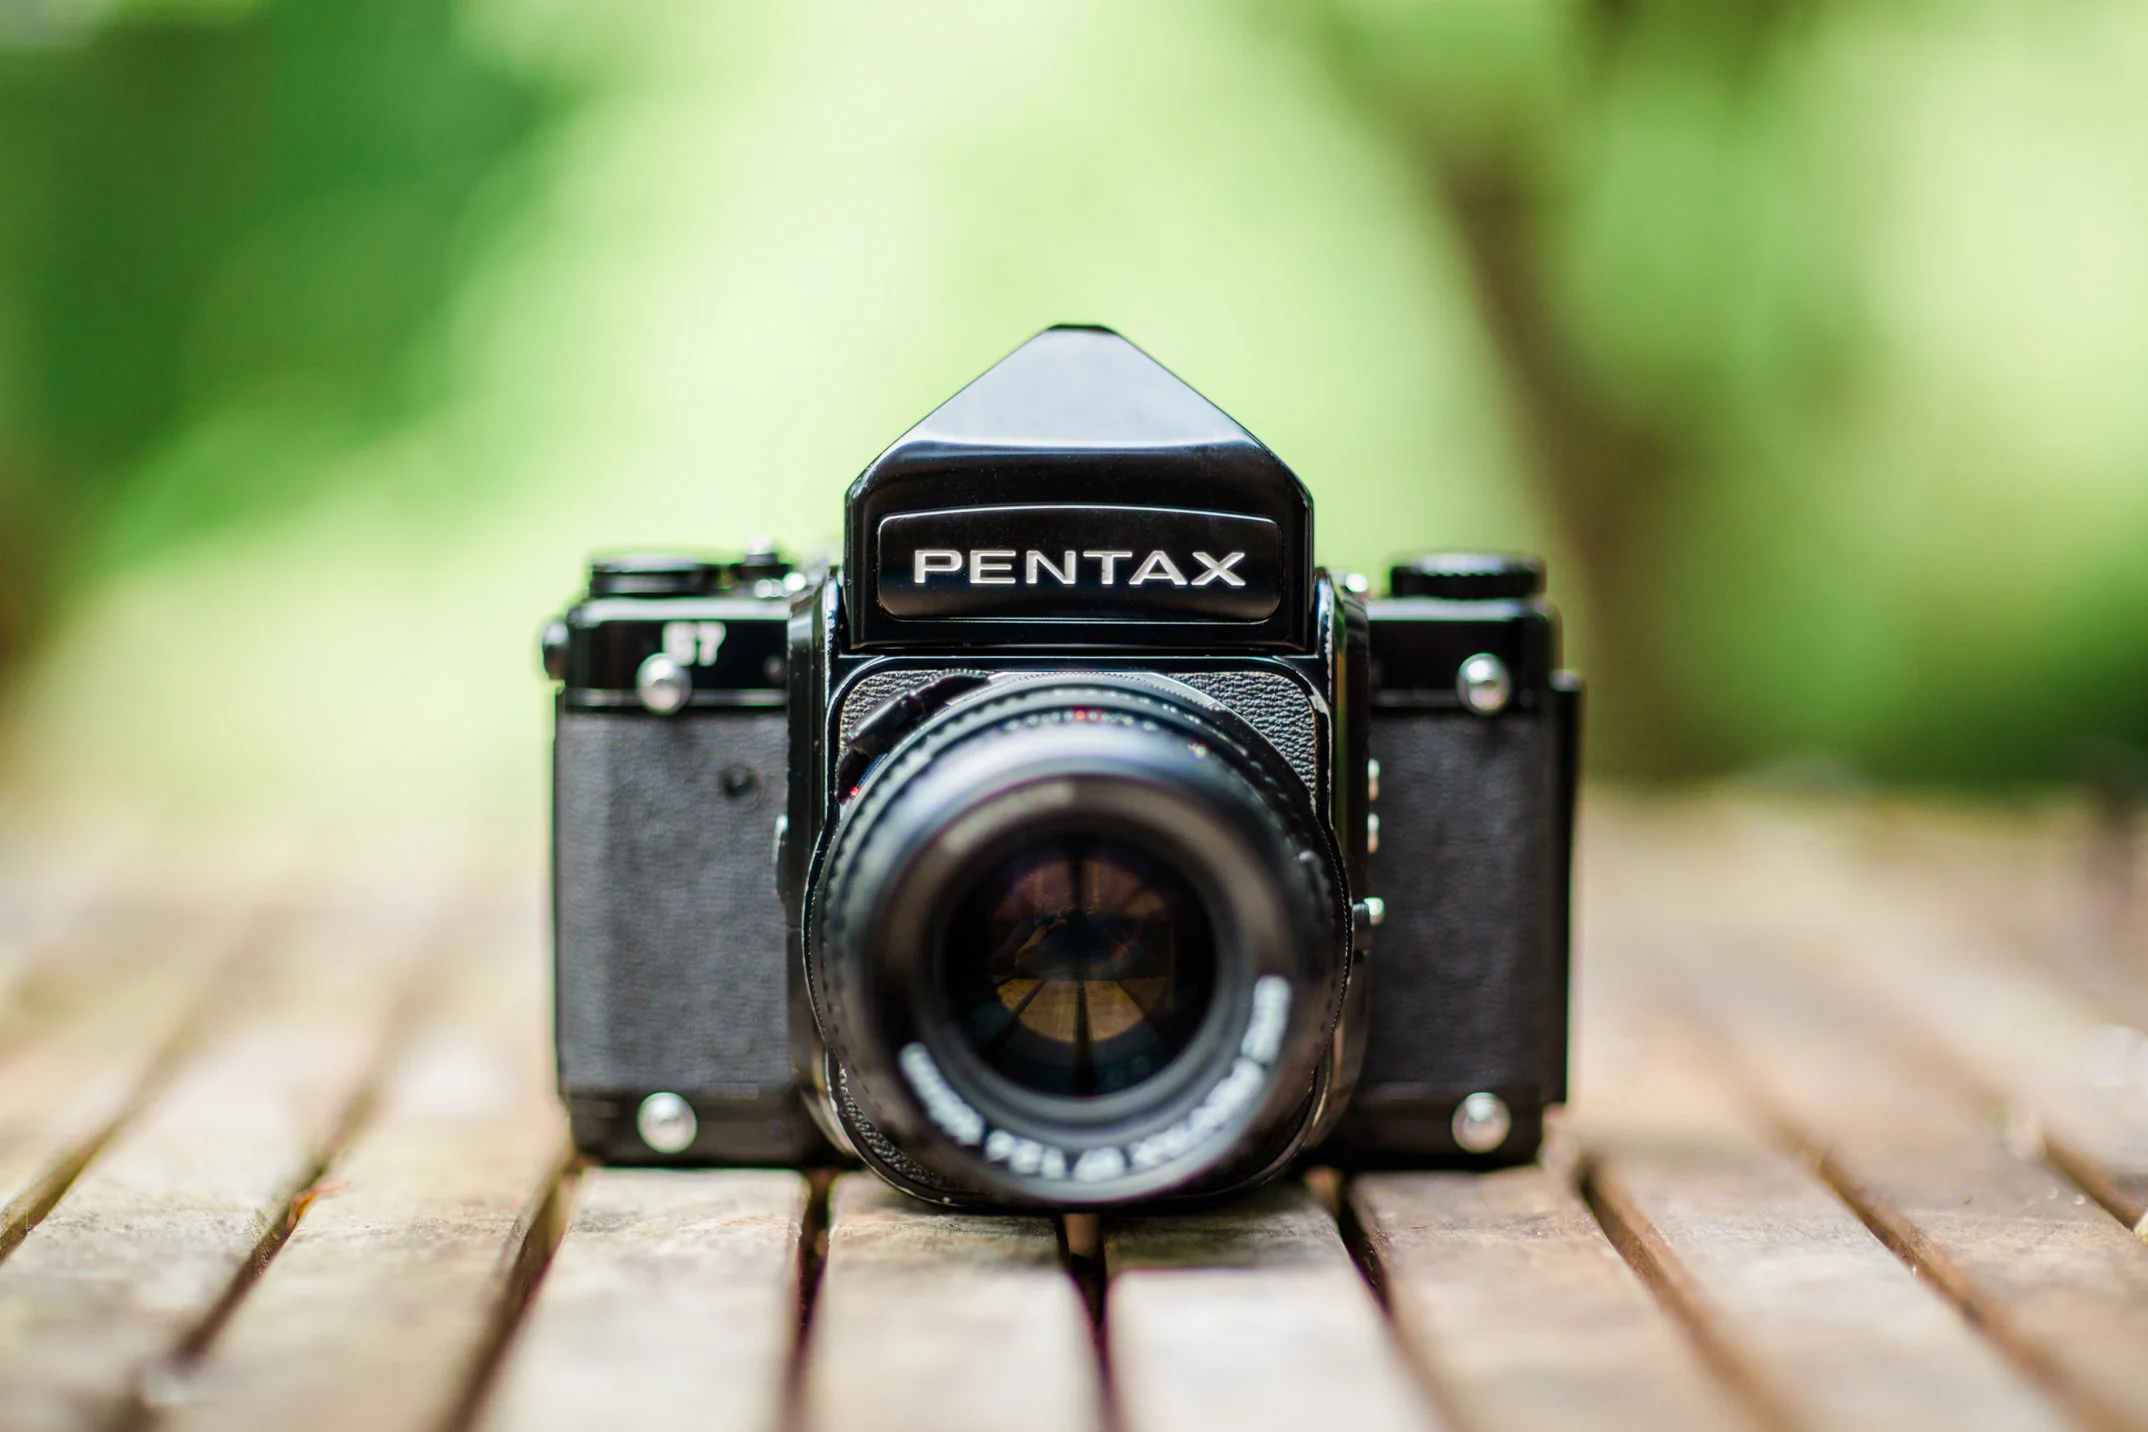
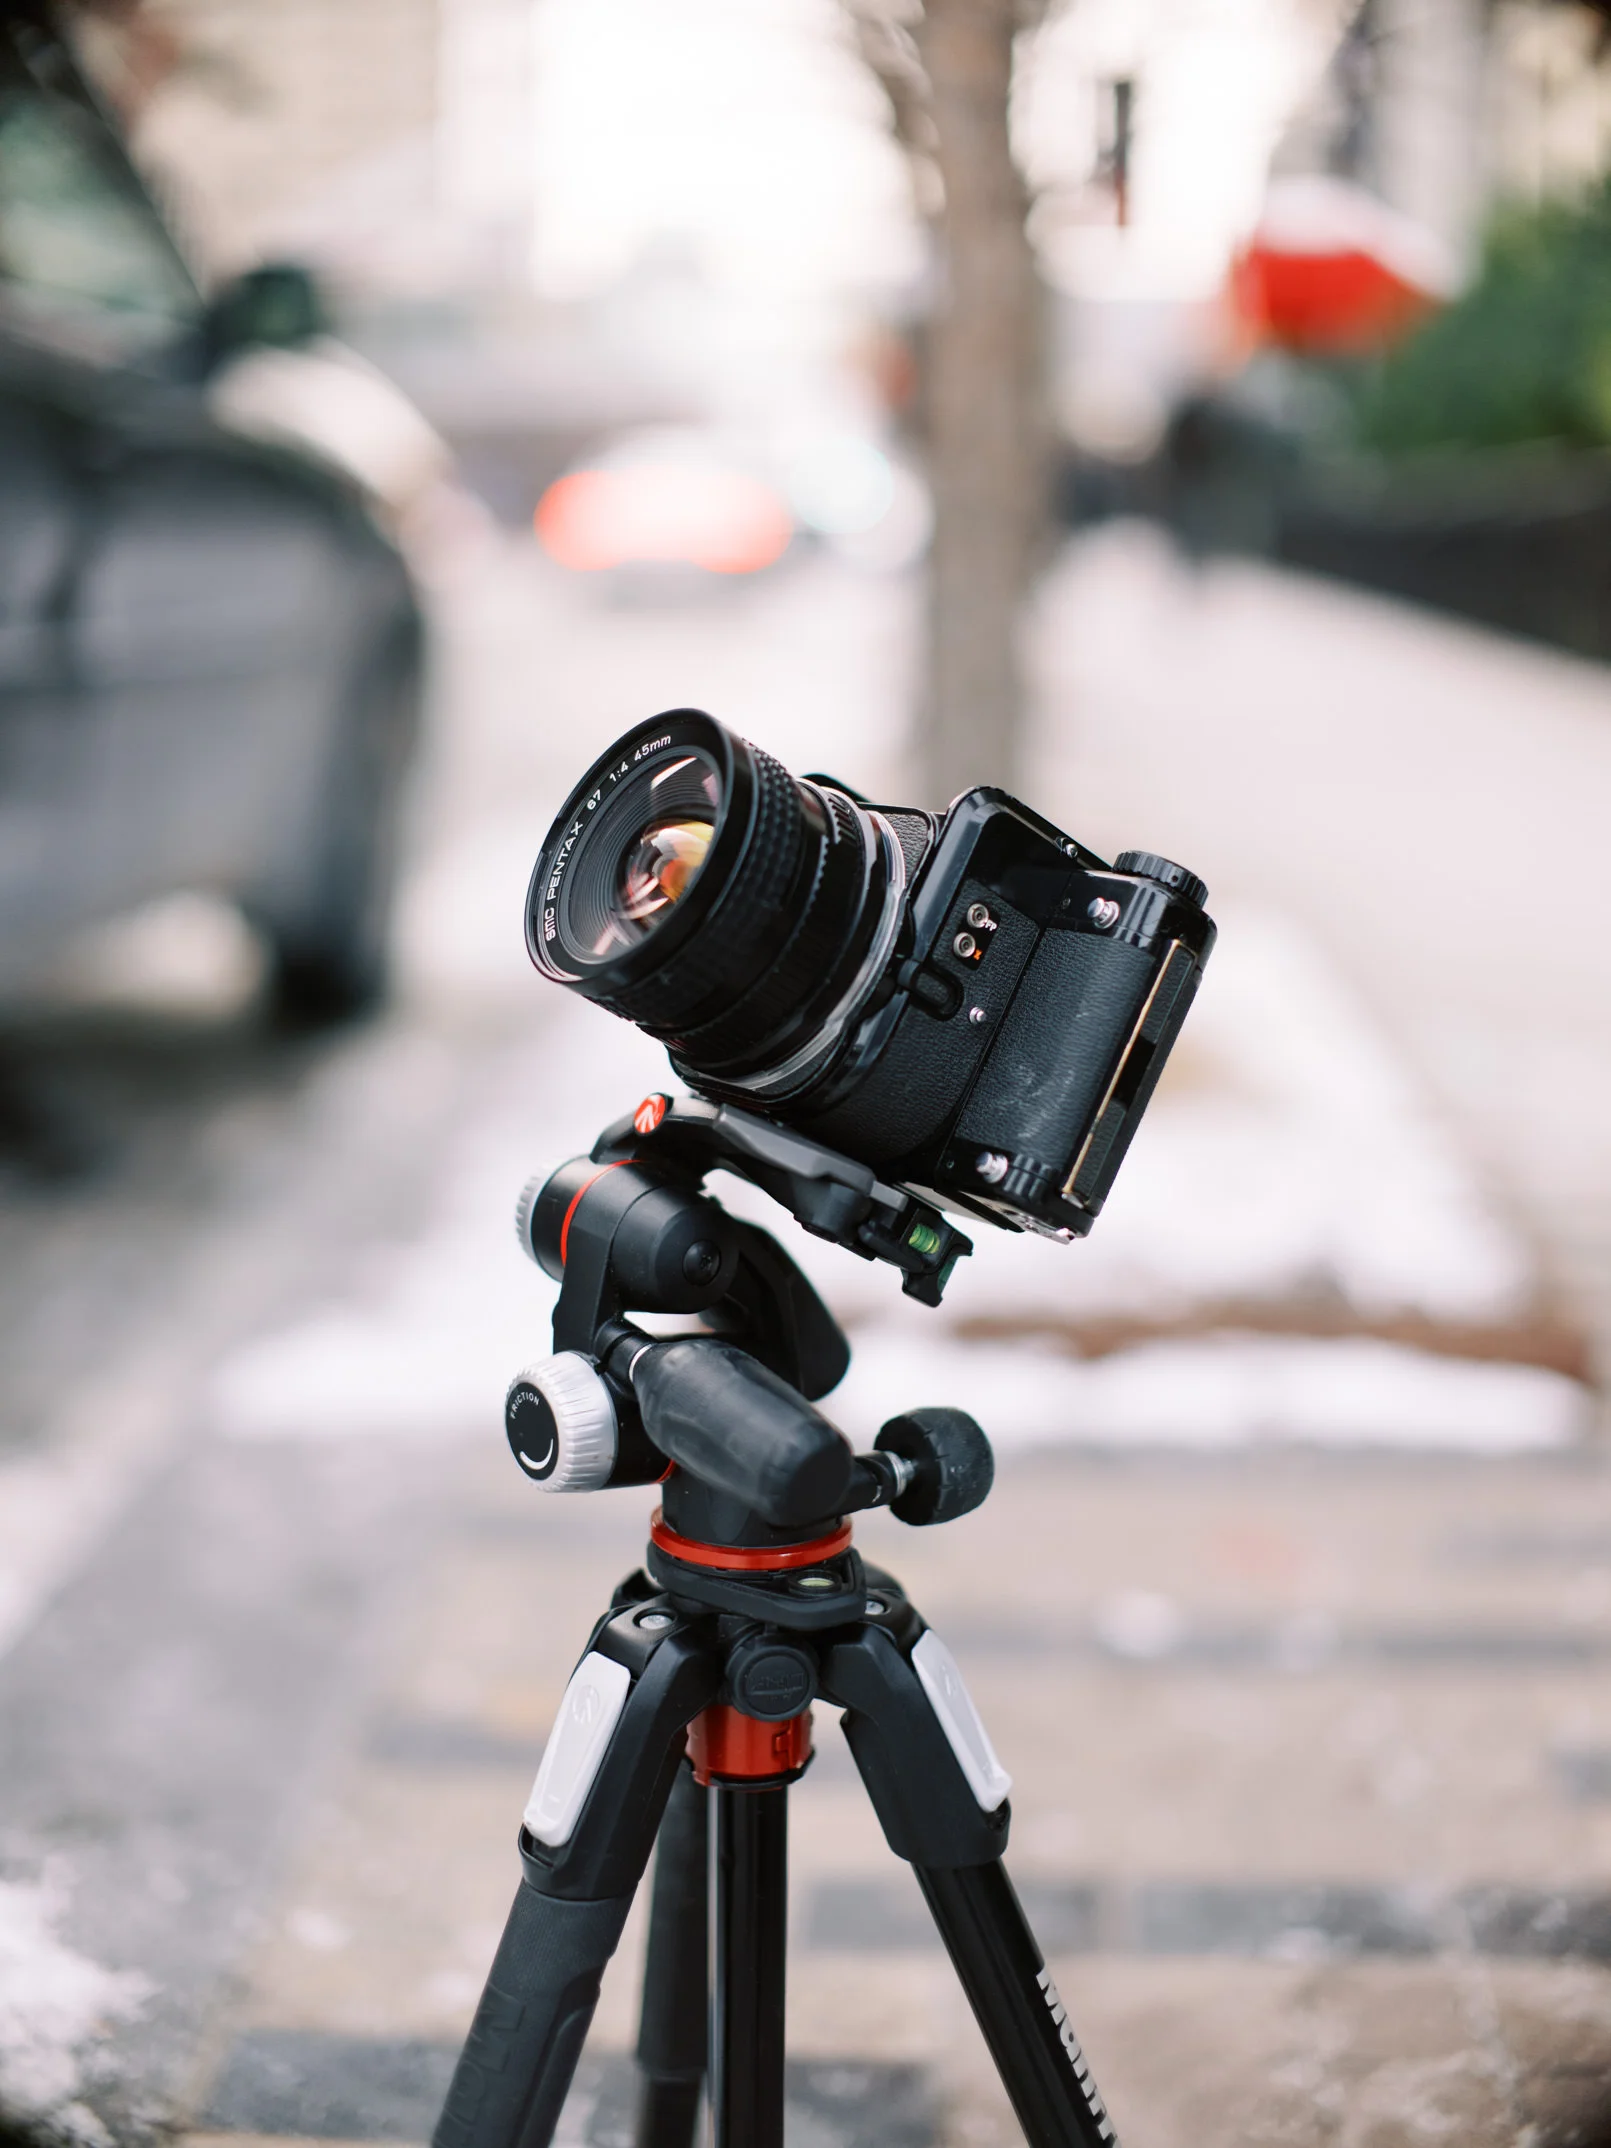
Pentax 67 Review

Schneider Cinelux (Cine Xenon) 115mm f-2 on Pentax 67-386.jpg

Note: This post is part of our "Learn Blog" for photographers. For workshops, coaching, and other resources designed to help grow your skills as a photographer click here (after you read the article, of course)!  To be transparent, all links are paid advertising, as a portion of any purchase made while using these links is credited to us. Please, consider using our links to help support what we do! Thank you!


Ah, the Pentax 67—infamous, mighty, and oft accused “Beast”. My review of the Pentax 67 will be a tad different than others, I believe. I’ve shot weddings with this thing (without an assistant) and won’t argue for it being “large”, “beastly”, or heavy. In fact, I don’t think it’s that much heavier or less dynamic than the Pentax 645, which I also regularly use.

To start, I would like to explain that this Pentax 67 review will really be a review of all Pentax 67 versions besides the Pentax 67ii. So, that means this is also a Pentax 6x7 review!

pentax 67 115mm-1.jpg

Pentax 67 Review: Why I Bought a Pentax 67

The big reasons I first started looking into a Pentax 67 were as follows:

  • Easy to focus

  • Shallow depth of field

  • Varying Lens Selection

  • Aspect ratio (5:4)

  • Large negative for high quality scans

  • It’s really not THAT big!

Pentax 67 Review-1.jpg

ease of focus

When I first (re)began shooting film, I purchased a Canon 1V 35mm film camera (which is great camera to use your EF lenses on), and a Pentax 645 (original) with the Pentax 645 75mm f/2.8 FA lens. While these were great cameras that got me some great results from shooting film stocks like Fuji 400H, Ektar 100, Portra 400, and Portra 800. I found that the hit to miss rate of focus was pretty poor.

Image taken with Pentax 67 using ISCO 110mm Ultra MC from The Boutique Lens

Image taken with Pentax 67 using ISCO 110mm Ultra MC from The Boutique Lens

I would consistently KNOW that the frame was in focus in the viewfinder, only to be met with frame after frame out of focus. I tried adjusting my diopter and even bought a focus magnifier, only to continue to be met with out of focus shots.

Now, I don’t mean to paint a nasty picture of the Pentax 645 and 1V. They’re actually great cameras, subject to you getting a good copy (which I believe mine may have had some issues).

Lexington Kentucky Wedding Photographers at the Polo Barn at Saxony Farm-99.jpg

In my Pentax 645 review, I will actually tell a redemption story about my Pentax 645nii which I found to be highly accurate, so I’m NOT saying the Pentax 645 is a totally bad choice. But, without the frustrations that several Pentax 645s brought me, I wouldn’t have found the delight that is shooting the Pentax 67.

And worth mentioning, I’ve never had a problem with unexplainable, missed focus on any of the Pentax 67s I’ve owned (which is four).

It was those frustrations with focus from other film cameras, along with a desire for more shallow depth of field for portraits that first led me from 35mm and 645 to the Pentax 67. More on depth of field in the next section!

So, how does the Pentax 67 help with focus? —By the sheer size of the focus screen size. The Pentax 67 focusing is by no means a “bright” screen, but it’s big and makes it pretty easy to see what’s in focus and what’s not.

For more info on the various focusing screens available for Pentax 67 and a discussion about Pentax 67 vs Pentax 67ii focusing screens, view my article on Pentax 67 Focusing Screen Comparison.

Schneider Cinelux (Cine Xenon) 150mm f-2.3 on Pentax 67-384.jpg

Shallow depth of field

As you may know, the larger your negative/sensor, the shallower your depth of field (as long as your focal length and f/stop remains consistent, e.g. a 105mm f/2 lens on Pentax 67 would equal the 35mm/full frame cropped to 4:5 equivalent of about a 45mm f/1.0, or uncropped a 45mm measured horizontally, 52mm vertically, and 50 diagonally f/1.2).

Steeler's Football Player Jordan Berry & Emily Berry Round Barn Wedding-94.jpg

That being said, the Pentax 67 offers the ability to achieve very shallow depth of field. That, coupled with the attractive 5:4 ratio leads your eye and mind to perceive a lot of depth. More on ratio further below!

Varying Lens Selection

The Pentax 67 has a range of native lens options which accommodate f/2.4 (like the 105mm f/2.4). Plus, there are an array of Cinelux lenses that allow you to achieve f/2. Talk about shallow depth of field!

See my review of Cinelux lenses here.

Pentax 67 Review-5.jpg

For wider options, I prefer the highly practical Pentax 67 75mm f/2.8 AL, which I reviewed, and the 45mm and 55mm f/4 lenses.

Check out my Pentax 75mm 2.8 AL review here.

Pentax 67 Aspect Ratio

Aspect ratio is the particular crop of any given photograph; it’s the dimension of the horizontal in relation to the vertical length of your frame.

Particularly for portrait orientation, I am not the biggest fan of a 2:3 ratio, which is the typical aspect ratio of a 35mm or full frame camera. It’s just so long vertically while leading your mind to almost feel like the sides are missing.

I much prefer a 4:3 (like a GFX or 645 film camera) or a 5:4 such as the Pentax 67. They present well both in portrait and landscape orientation by creating a sense of “fullness” and depth that you would typically lose with a 2:3 ratio.

Lexington Kentucky Wedding Photographers at the Polo Barn at Saxony Farm-66.jpg

Also on the side of 5:4 aspect ratio, it fits perfectly with Instagram’s crop, which happens to be 5:4! So, no need to sacrifice part of your frame and compromise your images when posting to Instagram.

All in all, the 5:4 ratio of the Pentax 67 is not only highly versatile but also very pleasant to the viewer.

large negaTives for high quality

This one is pretty self-explanatory—the larger the negative, generally speaking, the better the resolution. So, Pentax 67 frames come packed with a lot of quality. A 6x7 frame is around 4.3 times the surface area of a 35mm frame and about 1.6 times larger than a 645 film negative (with 645 being 2.7 times larger than 35mm film).

Click here for more info on various film negative sizes and comparisons.

A 6x7 negative is going to give you much less noticeable grain, more ability to zoom/crop in, and possibly better represented sharpness. So, if you’re looking for higher quality images and better print quality, then the large 6x7 negative is highly viable.

Pentax 67 Review-3.jpg

it’s really not That big

So, if you’ve read other Pentax 67 reviews, you’ve probably seen it referenced as being “huge”. Let’s put this into perspective—it is huge compared to a Canon G7X, or a point-and-shoot, or even a modern day DSLR.

But, if you’re shooting medium format, at least 645, then a Pentax 67 is really not that much bigger. For perspective, a Pentax 645 weighs 1310g, while the Pentax 67 weighs 1750g. That’s a 440g difference, just shy of a pound difference (15.5 oz.). Is 1 lb. really that big of a difference?

To put things even more into perspective, consider that 4x5 cameras and 8x10 cameras can be significantly more bulky and heavy. In the grand scheme of things, a Pentax 67 is really not THAT big.

Pentax 67 with 150 cine Xenon from The Boutique Lens-1.jpg

Pentax 67 Alternatives | Other 6x7 Film Cameras

The Pentax 67 stands out among other Pentax 67 in that it is very tough, durable, cheap, a versatile in lens choices. However, there are a few other 6x7 cameras which are great for their own reasons.

Mamiya 7 vs Pentax 67

The first on my list is the Mamiya 7. It’s more portable than the Pentax 67. It’s also a rangefinder, which I love. But, it’s also very expensive and doesn’t have any lenses with an aperture wider than f/4. So, it’s great for travel.

Check out my Mamiya 7 Review.

Plaubel Makina vs Pentax 67

Also similar to the Mamiya 7 is the fixed lens Plaubel Makina 6x7 film camera featuring a 80mm f/2.8 lens. This is another great 6x7 option, but it lacks the versatility of having interchangeable lenses.

Mamiya RB67 vs Pentax 67

Another popular option is the Mamiya RB67. This option features a rotating back which allows you to shoot either portrait or landscape orientation, all with only rotating the film back. This is great if you shoot with a waist level finder, or if just want the ease of always being able to hold the camera level instead of switching back and forth to achieve portrait/landscape.

The RB67 is a fairly cheap option with lots of pros. I personally never chose it over the Pentax 67 because I like the rendering of the Pentax lenses better. It also weighs about 2000g vs the 1750g of the Pentax 67.

Pentax 67ii vs Pentax 67

The 67ii is more expensive, and is known to have circuit board issues that can render your entire body dead, indefinitely. The redeeming qualities of the 67ii are the native focusing screen which is miles better than the Pentax 67s and the ability to do double exposures.

If you’re interested in learning more of my thoughts about the Pentax 67 vs Pentax 67ii, be sure to check out my article about Pentax 67 version differences which discusses the Pentax 67 compared to the 67ii.

Film Cameras

The Pentax 67 stands out among other Pentax 67 in that it is very tough, durable, cheap, a versatile in lens choices. However, there are a few other 6x7 cameras which are great for their own reasons.

Mamiya 7 vs Pentax 67

The first on my list is the Mamiya 7. It’s more portable than the Pentax 67. It’s also a rangefinder, which I love. But, it’s also very expensive and doesn’t have any lenses with an aperture wider than f/4. So, it’s great for travel.

Check out my Mamiya 7 Review.

Plaubel Makina vs Pentax 67

Also similar to the Mamiya 7 is the fixed lens Plaubel Makina 6x7 film camera featuring a 80mm f/2.8 lens. This is another great 6x7 option, but it lacks the versatility of having interchangeable lenses.

Mamiya RB67 vs Pentax 67

Another popular option is the Mamiya RB67. This option features a rotating back which allows you to shoot either portrait or landscape orientation, all with only rotating the film back. This is great if you shoot with a waist level finder, or if just want the ease of always being able to hold the camera level instead of switching back and forth to achieve portrait/landscape.

The RB67 is a fairly cheap option with lots of pros. I personally never chose it over the Pentax 67 because I like the rendering of the Pentax lenses better. It also weighs about 2000g vs the 1750g of the Pentax 67.

Pentax 67ii vs Pentax 67

The 67ii is more expensive, and is known to have circuit board issues that can render your entire body dead, indefinitely. The redeeming qualities of the 67ii are the native focusing screen

Pentax 67 Alternatives | Other 6x7 Film Cameras

The Pentax 67 stands out among other Pentax 67 in that it is very tough, durable, cheap, a versatile in lens choices. However, there are a few other 6x7 cameras which are great for their own reasons.

Mamiya 7 vs Pentax 67

The first on my list is the Mamiya 7. It’s more portable than the Pentax 67. It’s also a rangefinder, which I love. But, it’s also very expensive and doesn’t have any lenses with an aperture wider than f/4. So, it’s great for travel.

Check out my Mamiya 7 Review.

Plaubel Makina vs Pentax 67

Also similar to the Mamiya 7 is the fixed lens Plaubel Makina 6x7 film camera featuring a 80mm f/2.8 lens. This is another great 6x7 option, but it lacks the versatility of having interchangeable lenses.

Mamiya RB67 vs Pentax 67

Another popular option is the Mamiya RB67. This option features a rotating back which allows you to shoot either portrait or landscape orientation, all with only rotating the film back. This is great if you shoot with a waist level finder, or if just want the ease of always being able to hold the camera level instead of switching back and forth to achieve portrait/landscape.

The RB67 is a fairly cheap option with lots of pros. I personally never chose it over the Pentax 67 because I like the rendering of the Pentax lenses better. It also weighs about 2000g vs the 1750g of the Pentax 67.

Pentax 67ii vs Pentax 67

The 67ii is more expensive, and is known to have circuit board issues that can render your entire body dead, indefinitely. The redeeming qualities of the 67ii are the native focusing screen which is miles better than the Pentax 67s and the ability to do double exposures.

If you’re interested in learning more of my thoughts about the Pentax 67 vs Pentax 67ii, be sure to check out my article about Pentax 67 version differences which discusses the Pentax 67 compared to the 67ii.

Pentax 67 Review-2.jpg

Where to Buy a Pentax 67

I personally recommend buying Pentax 67s off eBay. It’s always good to make sure that you choose a seller with great reviews and a good return policy.

I bought my first Pentax 6x7 from a person on Facebook. It was described as in excellent working order with a recent CLA. However, within the first few weeks, it developed a film advance issue that caused the first and second frame to overlap.

Had I bought it from eBay, I would have had the option to do a return.

Steeler's Football Player Jordan Berry & Emily Berry Round Barn Wedding-31.jpg

Cost of Pentax 67s + Pentax 67 Accessories

Pentax 67s are pretty cheap with most bodies running around $350-600. 6x7s without MLU (mirror lock-up) tend to be cheaper with 6x7 with MLU being mid-range, and then the Pentax 67 being generally a little higher. To learn more about MLU, other Pentax 67 version differences, and other accessories for the Pentax 67, be sure to check out my article on Pentax 67 version differences.

Pentax 67 Review Conclusion

The Pentax 67 is not one of my favorite cameras by accident. Offering ease of focus, ability to create very shallow depth of field for artistic uses, a highly versatile aspect ration, and large negatives for quality, all in a portable package, the Pentax 67 system simply amazing.

Let us know your thoughts in the comments below!

If you’re considering purchasing a Pentax 67, please consider supporting us by using our eBay link!


Other Articles from Our Blog


4 Comments

6 Comments

Pentax 645 Review

Pentax 645nii with Schneider Cine-Xenon 120mm f/2 Projector Lens from The Boutique Lens

Pentax 645nii with Schneider Cine-Xenon 120mm f/2 Projector Lens from The Boutique Lens


Note: This post is part of our "Learn Blog" for photographers. For workshops, coaching, and other resources designed to help grow your skills as a photographer click here (after you read the article, of course)!  To be transparent, all links are paid advertising, as a portion of any purchase made while using these links is credited to us. Please, consider using our links to help support what we do! Thank you!


Ah, the Pentax 645—one of my all time favorite film cameras, and for good reason! It’s cheaper and generally more reliable than a Contax 645, though its native 75mm 2.8 doesn’t hold much of a candle against the bokeh and creaminess of the Zeiss 80mm f/2.
However, with the use of adapted Cinelux lenses, I have a new found love of the Pentax 645. More on those later in this post!

I’ve owned all three versions of the Pentax 645, and my current favorite is the Nii. I’ll discuss all three versions in this article, so this could be considered a Pentax 645 review, and Pentax 645n review, and a Pentax 645nii review, all in one.

So, let’s dive into my Pentax 645 review!

Pentax 645 review image

Pentax 645 vs Pentax 645n vs Pentax 645nii

Up front, let’s go ahead and get this out of the way—spec-wise, all versions of the Pentax 645 are almost identical. The major differences lies in that the Pentax 645 is manual focus only, while you can both manual and auto-focus (with autofocus lenses, of course) on the two newer versions (n and nii).

Differences between pentax 645 and newer versions

Other upgrades to the original 645 include a meter increased by 2 stops worth, an updated meter pattern, one extra frame on 120mm film (15 vs 16 frames), the ability to imprint data onto the film, exposure memory lock, less shutter speeds (but with the ability to use BULB mode), among a few others. The newer versions also are slightly lighter at 1280g vs 1320g (about 1.4 oz. difference). See a list here of differences in chart form!

differences between the Pentax 645n and nii

The main spec differences between the Pentax 645n and nii are that the nii included mirror lock up, which is nice if you’re trying to avoid any mirror shake while doing longer exposures.

Now, I will say, I’ve owned all three, yet my manual focus hit-rate has been the highest with the Pentax 645nii. This could have been due to other reasons other than just using the newest version, but I’ve also talking with someone else who had almost the same experience.

So, from now on, when I refer to the Pentax 645, it can be accounted for that I’m referring to any version.

What I Love About the Pentax 645 system

Pentax 645 review image-1.jpg

The Size of the Negatives: 645 vs 35mm

Anyone that has used a 35mm camera knows that you only get so much resolution with that size of a negative. So, enter in the beauty of a larger frame such as the 645 format. With an area that’s about 2.7 times the size of a 35mm frame, you get lots more resolution and less grain than you’ll get out of your 35mm while using the exact same film stock.

Price

The price of the Pentax 645 is definitely an attraction. Pentax 645s can range from $130 to $650 normally, with the lower end being the original 645 and the higher end being the newest 645nii and the 645n taking the middle price ground.

Michael & Jessica Engagement Peek-1.jpg
Michael & Jessica Engagement Peek-4.jpg

Ergonomics

The Pentax 645 feels great in hand. It’s easy to hold for just about any adult. The grip is robust and its a charm to operate. The only downside, in my book, is that you must change the shutter speed by using the dial. This obviously isn’t as fast as using a click wheel.

Pentax 645 review image-1-2.jpg

You’ll notice below that I mention that this is one area where the Hasselblad H1/H2 shines in comparison to the Pentax 645.

Ability to Use Lenses that Have Shallow Depth of Field

The native Pentax 645 75mm f/2.8 lens is equivalent to about a 42mm f/1.6 when compared to a full-frame/35mm film camera. That’s pretty shallow, but there are even more impressive options.

My personal favorite lens option is adapted Cinelux lenses which can enable you to reach f/2 and even f/1.7 for a very unique look.

Image taken with Pentax 645nii and Schneider Cine-Xenon 100mm f/2 lens from The Boutique Lens

Image taken with Pentax 645nii and Schneider Cine-Xenon 100mm f/2 lens from The Boutique Lens

One very popular option is the Pentax 67 105mm f/2.4, which can be easily adapted to the Pentax 645 using this adapter. There are a few versions of this lens, so be sure to check out our article on the Pentax 67 105mm f/2.4!

If you’d like a specific guide with links to get the 105mm 2.4 on your Pentax 645, we’ve also written a simple guide on adapting the Pentax 67 105mm to your Pentax 645.

Hunter-&-Payton-Extras  (1 of 1).jpg

Some Potential Problems with the Pentax 645 System

Focusing Issues

As I mentioned, I’ve owned all three versions of the Pentax 645 and had pretty major issues with the Pentax 645 (original) and the Pentax 645n. Now, that could have been from issues with the inserts or even with the mirrors in the cameras.

But, I will say, I am very very happy to now have highly accurate Pentax 645nii.

Backs vs Inserts

The Pentax 645 uses inserts as opposed to film backs. Film insert must have all frames completed before you can switch them out. Backs, on the other hand, can be removed mid-roll, allowing for the use of various film stocks without needing to finish the prior roll.

Due to my shooting style, I never need to change mid-roll, so this was a non-issue.

Pentax 645 Alternatives

Pentax 645 review images (3).jpg

There are a few great 645 cameras that have various strengths compared to the Pentax 645. I won’t go to far into detail, but the following list and discussion will give a good, brief overview! If you’d like a more comprehensive comparison of medium format cameras commonly used by wedding photographers, check out this post!

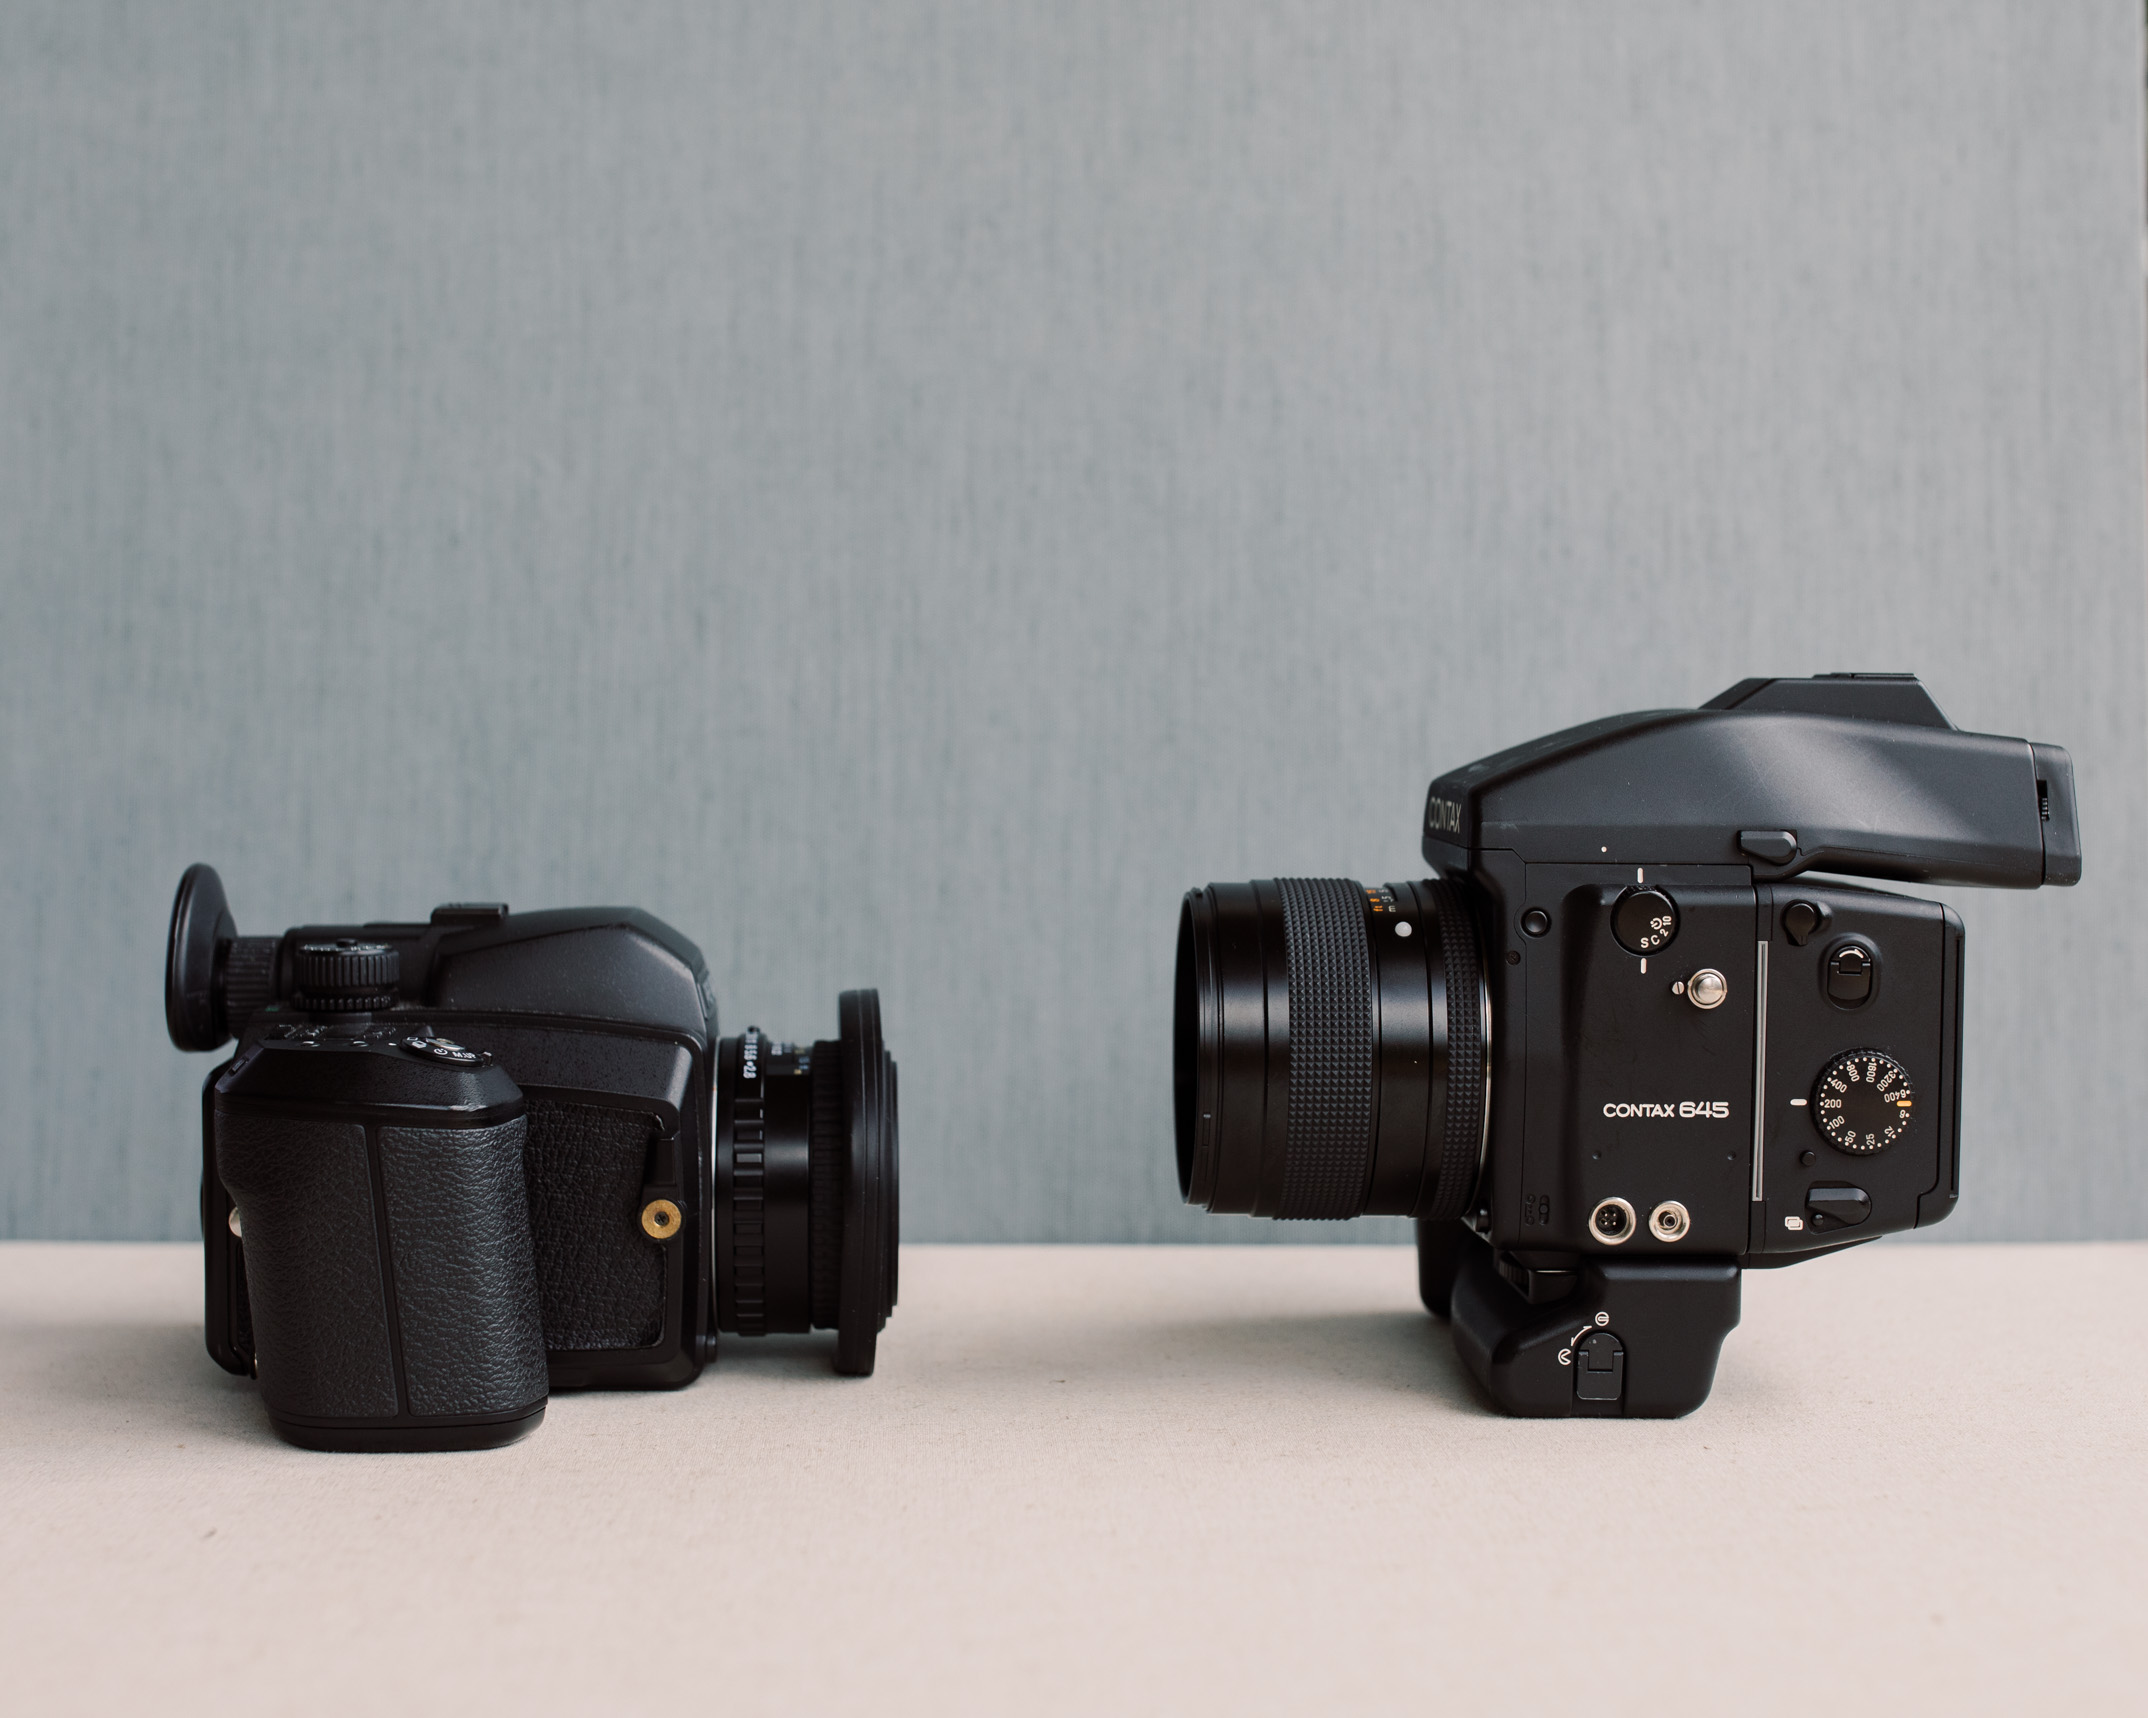
Contax 645 vs Pentax 645

The most popular alternative to the Pentax 645 is the Contax 645. The body itself feels more expensive. The Zeiss 80mm f/2 lens has way more character than the Pentax 645s 75mm f/2.8.

Contax 645 vs Pentax 645nii

Contax 645 vs Pentax 645nii

However, the Contax 645 setup can be rather expensive ($3000USD and up) vs most expensive Pentax 645 kits costing around $1100USD. Contax 645s are known to be a bit more temperamental as well.

To learn more about our thoughts on the Contax 645, check out our Contax 645 review!

Mamiya 645 vs Pentax 645

Mamiya 645s and the various iterations over the years are very good options. The earlier versions supposedly have darker focus screens, making manual focus a bit more difficult.

The claim to fame lens for Mamiya 645 will be the manual focus 80mm f/1.9 lens, which is great, though arguably not as good as the Zeiss 80mm f/2 for the Contax 645.

All in all, the Mamiya 645 system, especially a later AF version, will be comparable to a Pentax 645 in many ways.

Hasselblad H1/H2 vs Pentax 645

Hasselblad H2 vs Pentax 645nii

Hasselblad H2 vs Pentax 645nii

H1 and H2 differ from the Pentax 645s in that their interface is much more digital. They have a lot of customization options in the menu compared to the Pentax 645.

The autofocus in arguably better than the Pentax 645n and nii. The H1 and H2 bodies are also known to be as reliable as Pentax 645s. The special lens for the H1 and H2 is the 100mm f/2.2 lens which is on par with the Zeiss 80mm f/2.

The biggest drawback to an H1 and H2 will be availability and price. With the 100mm f/2.2 lens, they will tend to run similar if not slightly cheaper than the Contax 645/80mm combo. The price can be quite a bit lower if only using the Hasselblad 80mm f/2.8 lens, which is also great, but not quite as magical, in my opinion.

Where to Buy Pentax 645s

Due to your ability to pick a reliable seller with a good return policy, and the buyer protection, I recommend purchasing your Pentax 645 from eBay . I’ve bought all three of mine from there and would do it again!

Pentax 645 Review Conclusion

Pentax 645 review images (7).jpg

All in all, the Pentax 645 is a very good medium format film camera option. It is quite possibly the best beginning medium format film camera due to its price-point, simple layout, and ease of use.

Let us know in comments below what your thoughts about the Pentax 645 are!


Check out other articles from our blog


6 Comments

Comment

Mavic 2 Zoom Initial Thoughts

Super Res capture from Mavic 2 Zoom above Carolina Beach Boardwalk in North Carolina

Super Res capture from Mavic 2 Zoom above Carolina Beach Boardwalk in North Carolina


Note: This post is part of our "Learn Blog" for photographers. For workshops, coaching, and other resources designed to help grow your skills as a photographer click here (after you read the article, of course)! To be transparent, all links are paid advertising, as a portion of any purchase made while using these links is credited to us. Please, consider using our links to help support what we do! Thank you!


Here’s a little preview video of our brand new Mavic 2 Zoom! We are absolutely loving this thing! It’s very smooth flying, has a ton of cool and intuitive funtions, and has excellent video quality.

We’re planning a full review soon! Stay tuned!

If you’re interested in purchasing this drone, please click here to use our link as we’ll get sent small a portion of your purchase! Thanks for supporting us!

Comment

Comment

Best Rolling Backpack for Wedding Photographers


Note: This post is part of our "Learn Blog" for photographers. For workshops, coaching, and other resources designed to help grow your skills as a photographer click here (after you read the article, of course)!  To be transparent, all links are paid advertising, as a portion of any purchase made while using these links is credited to us. Please, consider using our links to help support what we do! Thank you!


Looking for an amazing backpack that rolls to help ease your load and make carrying your camera gear more enjoyable?

Please allow us to introduce you to a bag that you may not have considered as a top contended, but which has won our solid commendation—Amazon Basic Rolling Backpack.

For transparency sake, we should state the obvious—we have not tried every single rolling backpack out there. We can honestly only say that, for the price, features, and reviews, the Amazon Basics Rolling Backpack is a true knock-out!

Why We Fell In Love with This Rolling Backpack

Wen we first began wedding photography, we would use the straps that came with our Canon cameras. Then, as we decided that we wanted to hold a couple cameras at once, while also looking stylish, we decided to use Holdfast Moneymakers.

Though it was convenient to have a stylish method of carry two cameras at once for certain parts of the day, we soon found this approach to be a little inconvenient for moving from location to location because of the weight that it placed on our backs amd the problem of banging the cameras up against doorways due to them hanging freely from our sides.

Plus, we very often found that we'd want to have some other bag on our person, so the strap just seemed to get in the way and cause too much strain without enough features. So, the search for the best method to carry our cameras continued.

Soon after, another photographer recommended we give the Amazon Basic Rolling Backpack a try. We were very pleasantly surpised.

With other backpacks of comparable ratings costing 50 to 100% more, we were originally skeptical. But, once in our possession, we quickly noticed that it has excellent build quality, padding, pockets, zippers, bearings, and overall build.

Build Quality of the Amazon Basics Rolling Backpack

We bought our bag on September 26, 2017 and it is currently May 5th, 2019. About two years later, our bag has been with us to 50 weddings. We have not been gentle with it. Yet, it's still holding up wonderfull!

The zippers all seem very good and strong. The material on the outside of the bag is also tough and holds up well.

Features that Make the Amazon Basics Rolling Backpack the Best Rolling Backpack for Wedding Photographers

The large interior features removable/customizable barriers so that you can change it all up to fit the specific gear that you’re carrying. There are ample pockets everywhere. You can also mobilize the straps, so, if you need to wear it like a normal backpack, you can.

The handle/grip feels good in hand and the wheels roll incredibly smooth! The bag also comes with a rain cover, in case you get caught in the rain. Finally, it has a slot which I believe is for a laptop, that we use for various thinks as a sort of drop and go pouch for when we’re in a hurry!

Conclusion to Our Best Rolling Backpack for Photographers Review

At it’s price point and with all it’s quality and features, we believe that the Amazon Basic Rolling Backpack is an incredible choice for wedding photographers.

If you’re considering purchasing this or another rolling backpack, please use our link as we get a portion of the purchase price which helps support us in writing other helpful articles!


Other Articles from The Blog


Comment

Comment

FujiFilm GFX 100 Review


Note: This post is part of our "Learn Blog" for photographers. For workshops, coaching, and other resources designed to help grow your skills as a photographer click here (after you read the article, of course)!  To be transparent, all links are paid advertising, as a portion of any purchase made while using these links is credited to us. Please, consider using our links to help support what we do! Thank you!


So, we recently posted our review of the GFX 50S and now, shortly thereafter, the pre-order for the new GFX 100 has been announced!

If you’re considering buying one or maybe just wondering if the GFX 100 vs GFX 50 debate is worth it, then we’d love to get that conversation going in the comments!

I should probably qualify this—we’ve been following and researching the GFX 100, looking at example images and developing thoughts, so this is probably more of a “pre-review”. Though we have yet to purchase one, we’d like to make a few comments on why we’re actually tempted, despite owning a GFX 50!

So, have a moment to interact with our GFX 100 pre-review!

Why Buy a GFX 100 Instead of the GFX 50?

As we mentioned in our GFX 50S review, we’re not THAT concerned about megapixels. Cropping is a useful thing in some circumstances, but the need for high megapixels is vastly overrated in our current climate with very few photographers actually making good use of 50mp much less 100mp.

So, in contrast to the megapixels, for us the biggest temptation with the GFX 100 comes from some of the other key differences between the GFX 100 and the GFX 50, namely:

  • 5-Axis, 5.5 stop in-body image stabilization which can lead to amazingly easy, low shutter speed photography compared to the GFX 50 which has no such stabilization

  • vastly improved video capabilities over the GFX 50

  • phase-detection autofocus which would provide much snappier autofocusing capabilities, especially with moving objects, such as in the case with sports, children, or other moving objects (e.g., a bride and groom during the recessional)

  • An improved sensor with 16 bit color, providing better tonal transitions for even better color than the GFX 50

  • Improved battery life touting 800 shots per charge vs the 400 shots with the GFX 50

What Doesn’t Excite Us About the GFX 100 vs the GFX 50 as Wedding Photographers

Photographers in various niche markets will find different aspects of the GFX 100 as more or even less valuable depending on their needs. For us, as primarily wedding photographers, the pros of IBIS, phase detection, and an improved sensor are great. However, there are a few things that we’re not that pumped about…

  • Having 100mp, since we really don’t want to deal with thousands of huge files from each wedding day

  • The higher price-point

That said, there are ways of downsizing images, so having more megapixels isn’t a deal-breaker. So, the biggest and possibly only real drawback of the GFX 100 is its price-point.

So the question arises: “is the $9,999 price tag worth it vs the GFX 50?” With all the improvements of the GFX 100 vs the GFX 50, it has us thinking it is worth it! At least it is if you’re a pro trying to get your tax liabilities down and need something to blow cash on! ; )

Where to Buy the GFX 100

Amazon is selling the GFX 100 and you can support us at no cost to you by using our link!

Conclusion

The GFX 100, or it least its rumors have been stimulating the photo community for some time; it’s a real technological advancement that brings even note amazing features to medium format than the GFX 50 did.

All things considered, the price isn’t that high for having things like IBIS, 16 bits of color, great video, and battery life, among other improvements over the GFX 50.

If you’d like to learn more about the GFX 100 or even place your order, please visit this link to check it out on B&H!

What are your thoughts on the new GFX 100? Why are you excited or even underwhelmed? Do you think the GFX 100 will replace the GFX 50 for many current GFX users?

Please share in the comments below! We’d love to hear from you!


Other Articles from the Blog


Comment

8 Comments

GFX 50S Review

Image of FUJIFILM GFX 50S with Schneider Cinelux Lens from The Boutique Lens

Image of FUJIFILM GFX 50S with Schneider Cinelux Lens from The Boutique Lens


Note: This post is part of our "Learn Blog" for photographers. For workshops, coaching, and other resources designed to help grow your skills as a photographer click here (after you read the article, of course)!  To be transparent, all links are paid advertising, as a portion of any purchase made while using these links is credited to us. Please, consider using our links to help support what we do! Thank you!


Want gorgeous images using a digital camera that pair well with medium format film stocks like Fuji 400H and/or Portra 400? That’s what we (my wife and I) wanted! And now, I’m here to tell you that it’s definitely and absolutely more possible than ever thanks to the Fuji GFX.

In this post we’ll cover:

  • Why we didn’t buy a GFX

  • Why we (finally) bought a GFX

  • Why we bought a 50S

  • GFX 50S vs 50R

  • Review of the GFX 50S features

  • Using the GFX for Wedding Photography

  • Using Canon lenses on the GFX

  • Best lenses to use with a GFX to get a classic film look

  • Where to purchase a GFX

Image taken with GFX 50S using Schneider Super Cinelux Lens from The Boutique Lens

Image taken with GFX 50S using Schneider Super Cinelux Lens from The Boutique Lens

Per the usual for my posts I’ll state the following: there are plenty of “technical” data reviews and documents that can give you all the “specs”. I won’t attempt to recreate that here.

Instead, my review with be highly based on my user-experience and preference, which I think many will find helpful in their practical decision making when it comes to purchasing a GFX (or not).

So, let’s dive right in!

Why We Didn’t Buy a GFX (at First)

Taken using 150mm Cine-Xenon and GFX 50S

Taken using 150mm Cine-Xenon and GFX 50S

I tire of the “megapixel race”—this constant drive for more and more megapixels. Megapixels, much less any gear, is not in and of itself capable of making amazing photographs. Honestly, many of the images I saw when the GFX first came out were basic images without much “oohhh” and “ahhhh”.

That story changed as I began seeing some more classic lenses utilized by talented photographers. More on that in the paragraphs below!

Why We Bought a GFX

Image taken with GFX 50S using Schneider Super Cinelux Lens from The Boutique Lens

Image taken with GFX 50S using Schneider Super Cinelux Lens from The Boutique Lens

As a devoted medium format film lover, I’ve never seriously considered any digital options as having much competition against our film cameras for portrait photos with our brides and grooms. The look of our 645 and 67 cameras has almost always been indispensable for photos we’re proud of sharing.

That said, we’re always keeping an eye out for what tools we can introduce that help us both create the images we love, while also improving our business and workflow—enter the Fujifilm GFX! I love the look of medium format film—the sharpness, the depth, the ratios—when you see it, you know it.

Benny & Sarah Engagement Session at Bernheim Arboretum (Web Use Only)-33.jpg

As the GFX gained popularity among film photographers, I noticed that I was seeing almost everything I loved about film, only the images were taken with the GFX. So, that coupled with my desire to try Cinelux lenses on a GFX pretty much convinced me to give it a go!

I purchased my GFX used from eBay. If you’re thinking of buying a GFX and don’t care to pay full price, I don’t think it’s a bad option as long as you verify that the camera is working once you get it! If you’re considering that option, please also consider using our link as eBay will give us a portion of sale price (which is super helpful for us to keep writing these articles!).

GFX 50S vs GFX 50R


I’d love to tell you that I handled both cameras and used them extensively for a good degree of time. However, that’s not my story, and I believe that’s completely fine. Why? I knew what I wanted.

I’ve owned rangefinder film cameras and have owned a rangefinder-esque digital camera (Fujifilm’s X-Pro 2) and have loved them all. However, I have always preferred the more SLR feel of cameras like the Pentax 645. After looking at online photos of the GFX 50S and GFX 50R, I came to the conclusion that I would much prefer the SLR feel and grip of the GFX 50S.

Review of the GFX 50S Features

Image of bride and groom taken using ISCO Cinelux Xenon 115mm f/1.7 from The Boutique Lens on a GFX 50S

Image of bride and groom taken using ISCO Cinelux Xenon 115mm f/1.7 from The Boutique Lens on a GFX 50S

Feel

The GFX feels great in hand. I compare the weight and feel to something like my Canon 5DIV, while it feels very much like a Pentax 645 in the hand.

USABILITY

I want to preface some of the negativity I’m about to share with this—the GFX is HIGHLY useable. It just takes time, effort, and knowledge to get it setup the way I wanted it to be set up (fully manual mode with focus peaking).

The GFX, for me, really took some time to set up correctly so that I could shoot it the way I wanted. To shoot in a manual mode like I normally would with my Canon and film cameras, I needed to set my top dials to their respective manual modes. That’s no biggie, honestly, though it took a little time to get these things all figured out via the manual.

Setting ISO took a whole other foray into the user manual. I really don’t remember how I got it set to the correct dial. I’m purposefully displaying my ignorance on the process and remembering it because I think it says a lot about how unituitive it is.

Lastly, I wanted to set up focus peaking because I intended to use mostly manual focus. This was fairly simple to access by going in the menu and then navigating to the AF/MF settings and selecting the focus assist options. No biggie.

However, after I set it, there was no focus peaking. After lots of perusing, I finally figured out that I needed to set the focus selection knob to “M” for focus peaking to appear.

public.jpeg

Lastly, after mounting my Canon 85Lii f/1.2, I noticed that it was only showing me a 35mm frame. Again, after a safari into the manual and menus, I discovered that I needed to turn off the “auto lens detection” option which automatically detected the lens as a full-frame/35mm lens.

Again, not a big deal (sort of), but this was another step that could have been way simpler to encourage less technical users to get the most out of the camera.

All in all, the toil required to set up the GFX how I wanted it was well worth it, though such a tiresome experience is by far the biggest downside to the GFX.

Patric & Katie Richwood on the River Wedding-11.jpg

Build Quality of the Fuji GFX 50S

The GFX has outstanding build quality. I love the way it looks and feels. The magnesium alloy body looks sharp. The overall weight feels minimal. The camera does not feel cheap in any way.

Image Quality of the Fuji GFX 50S

Image quality of the 50mp GFX is outstanding. Again, I’m mostly comparing it from experience while shooting hundreds and thousands of images from weddings. I’ll zoom in here and there, but I’m really no pixel-peeper.

For those that are pixel-peeping, that’s awesome. Image quality is definitely valuable and totally present in the GFX files. I just find tons of value in my ability to comfortably crop and see something magical when comparing my Canon 5DIV files. I’m highly practical and most concerned with comfortably producing images that impact my clients, and I do believe the GFX adds to this effect for me.

Patrick & Carrie Spindletop Wedding Peek-3.jpg

Other GFX Features

There are a number of other features that the GFX sports that are highly valuable in meet in my practical shooting needs:

  • Short flange allowing for adapting of various lenses

  • Large sensor for shallow depth of field with smaller aperture lenses

  • Tilt Screen (which allows me to achieve angles much more easily)

  • Touchscreen (this is nice when trying to zoom in to check focus in a particular area)

  • Various crop options

  • Compressed lossless file option (allows the files to be compressed without any loss in quality. This saves TONS of space!)

Image taken with GFX 50S using Schneider Cine-Xenon Cinelux Lens from The Boutique Lens

Image taken with GFX 50S using Schneider Cine-Xenon Cinelux Lens from The Boutique Lens

GFX for Wedding Photography

We’ve used Canon dslrs (6d, 5diii, & 5div) and have been very used to the fairly quick operation and autofocus during weddings. However, we’ve also been very familiar with shooting with our film cameras like the Pentax 67, Contax 645, Pentax 645, and Hassleblad H2.

I had heard from other GFX users that it’s more of a slow-down experience like shooting film. Now, I will to a degree agree with that; shooting the GFX feels similar to shooting my Pentax 645, except for the fact that I have focus-peaking, see what my image is going to look like before I even take the image (with exposure/wb preview), and can view my images immediately after taking them (even in the EVF). Honestly, I’ve found myself now almost forgetting to even pick up my Canon 5Div.

public.jpeg

One of the reasons that I find the GFX to actually be quicker than using my 5Div is because of how easy it is to manual focus. With my 5Div, I need to either focus and recompose or move around my focus point and then autofocus. But, with manual focusing being so easy thanks to focus peaking, I can just see the image I want to take, throw focus, and bam.

For getting ready and ceremonies, I love using the GFX. It’s fantastic in low light. In tighter spaces, I’ve fallen in love with using the Canon 35mm f/1.4L lens which equates to about a 28mm f/1 when mounted on the GFX via the Steelsring adapter.

For portraits, though the sensor is only 44x33, I find that the size and ratio is enough to give me the depth that looks very similar to using a 645 or 6x7 film camera. The dynamic range and colors are just fantastic. Plus, you can crop in like crazy while retaining totally usable resolution.

public.jpeg

For receptions, I’ve been using the speedlights for my Canon cameras. ETTL will not work since the flashes aren’t native to Fujifilm, but I have been well-used to using manual mode in order to achieve the look I want, often preferring to ETTL, even for simple things like bounce flash.

I do plan to eventually invest in Fuji dedicated Flashpoint r2 flashes as I’ve had the Godox v860ii flash (made by the same company that makes the Flashpoint r2) and have been very pleasantly surprised by it’s amazing lithium battery life and quick recycle time.

During dark times like receptions, I often turn off the exposure/wb preview so that the room doesn’t appear dark on the EVF/Screen of the GFX. Then, I just use it as I would my Canon cameras. I find myself loving the white balance and overall colors I get out of my reception shots way more than I do from my Canons.

Patrick & Carrie Spindletop Wedding Peek.jpg

Using Canon Lenses with GFX

Third party lenses will always be a gamble with the GFX in terms of overall usability. That said, I’ve found that the 35Lii, 85Lii, and 135Lii work fantastic! You’ll still get some correctable vignetting, but honestly, I even get a decent amount of vignetting with those lenses on my Canon cameras.

The 50L does have a significant amount of vignetting, but it does look dang good. Again, you’ll have to give them a try to know for sure which lenses will work .

To mount my Canon EF lenses to the GFX, I purchased a Steelsring EF-GF adapter and have been happy with it. The autofocus seems to work really well though I don’t use autofocus often.

GFX with 80mm Super Cinelux-1.jpg

Matching GFX to Film

I find it fairly easy to match our Fuji files to film. Currently, we have a custom preset that we use, from which we make tweaks. The files have plenty of dynamic range and beautiful colors. As always, if you’d like more info on our processes for editing, you can learn more about our film and digital photography education options here!

Besides the editing, your lens choices are the most critical when it comes to producing a “classic” film look.

It’s NOT All About The Camera—Best Lenses to Pair with the GFX to Get the Classic Film Look

We share several great lenses to use in our article on “Best Digital Alternatives to Shooting Medium Format Film”. Be sure to have a look at it!

Where to Purchase a GFX 50S

If you’re buying new, it’s easy to buy from Amazon . If you’re buying used, which will save you a ton, I’m big on eBay. I buy tons of gear and have had very few disappointments, never without resolution. So, just make sure the seller has good ratings and offers a decent return policy (usually at least 14 days returns).

GFX 50S Review Conclusion

All in all, the GFX 50S has been a hit with us. From image quality, functionality, and features, it’s a grand slam.

We want to here from you! Do you have any thoughts, experiences, or further questions about the GFX? Let us know in the comments below!

And don’t forget!

If you're ready to jump into the world of GFX, please consider using our Ebay and/or Amazon links to make your purchase! A portion of your order will go towards enabling us to make more articles like this one to help others!


Ready for more Posts?


8 Comments

2 Comments

Best Men's Dress Shoe for Wedding Photographers


Note: This post is part of our "Learn Blog" for photographers. For workshops, coaching, and other resources designed to help grow your skills as a photographer click here (after you read the article, of course)!  To be transparent, all links are paid advertising, as a portion of any purchase made while using these links is credited to us. Please, consider using our links to help support what we do! Thank you!


So, you’ve gotten to the point where you realize that, if you’re going to do weddings for any length of time, you’re going to need an amazing shoe or boot that will prevent you from being a cripple, while also allowing you to sport the style that both you and your clients will appreciate.

After a long search for the best men’s dress shoe for wedding photographers, I honestly believe I’ve arrived...

That most comfortable men's shoe for wedding photographers is the Zerogrand by Cole Haan.

Why the Zerogrands are a Lifesaver for Me

In addition to the the typical back pain I would experience during wedding days, during 2018 I developed plantar fasciitis and became concerned that, if that wasn’t treated, I wouldn’t physically be able to stand for the full day of a wedding.

I began treating my plantar with compression socks and insoles. I also began looking for a dress shoe that looked stylish and dressy, while also being supportive and comfy for long days on my feet. At the time, I had been wearing Johnston & Murphy’s to weddings, mainly because I thought they felt fairly comfortable and I like their style.

After visiting my local 6pm store, I stumbled upon a pair of Zerogrands. I put them on and I instantly fell in love and knew these were “the ones”. Upon wearing them for my first full wedding day, I knew that the game had changed—I could now endure a full wedding day with basically no foot pain and improved back pain.

But, I noticed that, during the week when I wasn’t wearing my Zerogrands I would develop foot pain and eventually began experiencing intense heel pain. So, I decided to exclusively wear my Zerogrands. The results? My feet feel amazing. Now, I’m going to be ordering more to hopefully keep them on my feet during every occasion!

What Makes the Cole Haan Zerogrand the Best Men’s Shoes for Weddings?

Cole Haan calls their sole design “Grand.ØS Technology”. It’s essentially a lightweight, flexible, and responsive foam sole that is the “soul” of the comfort that supports the Cole Haan style. These shoes fit the drive for aesthetics while also providing lasting support and comfort.

For that reason, I don’t only consider them the most comfortable men’s shoes for wedding photography, but also the most stylish men’s dress shoe for wedding photographers.

Do You Rotate Your Foot?

My foot and back pain largely stemmed, if not completely originated from one foot pronating and the other supinating. If you’re not familiar with these terms, you can find more info on foot rotation here. Simply put, pronation is when your foot turns inward when you take a step, while supination is when it rotates outward.

Certain shoes are designed to correct either pronation or supination, while other provide a stable neutral support that helps to prevent either rotation. Since I had one foot pronating and the other supinating, I really needed a strong supporting neutral shoe.

Here’s where the Zerogrand really shines. The Grand.ØS Technology provides that neutral support that doesn’t only give you great impact cushion, but also the stability that helps keep the rest of your body in line!

Zerogrand Versions

You’ll currently find (at the time of writing) several versions of Cole Haan’s work/lifestyle shoes which utilize Grand.ØS Technology.

  • Original Grand

  • Lunargrand

  • Zerogrand

  • 2.Zerogrand

  • 3.Zerogrand

  • GrandMotion

Original Grand Vs Lunar Grand vs Zerogrand

The Zerogrand was an improved design over the Grand and Lunar Grand in that Cole Haan aimed to produce a more flexible, lighter weight, and better cushioned shoe.

Nike owned Cole Haan, but sold it in 2012, after which Grand.ØS Technology was introduced as an improved design to Nike’s Lunarlon cushioning which featured in the Lunargrands.

Zerogrand vs 2.Zerogrand

The 2.Zerogrand was designed to update the style and improve things such as gravel getting stuck in the grooves of the bottom of the Zerogrand.

3.Zerogrand vs Zerogrand and 2.Zerogrand

The 3.Zerogrand introduces an even slicker look with improved support, particularly in the heel. It also features a more luxurious feeling leather as an improvement to the almost PU feeling leather of the earlier versions.

The GrandMotion

The GrandMotion appears to be a shoe gear more towards those looking for a traditional, breathable tennis shoe. It is not a successor to any of the Zerogrands.

The Cole Haan Zerogrand Fit

I’ve found that the Zerogrand runs a bit large. I could wear around a 10.5 in a Nike, but only need a 10 in my Zerogrand. The 2.Zerogrands have a similar fit, while the 3.Zerogrand run about another half size big, and can be a bit narrow. So, if you wear a 10 in something like a Nike, you’d want to consider a 9 Wide in a 3.Zerogrand, in my opinion.

Style

These shoes look amazing. I get complements all the time. Enough said! There a tons of different options when it comes to colors and material, so be sure to peruse around Zappos listing and see what your options are!

Conclusion

Cole Haan has done the wedding world a favor with their Grand.ØS Technology. They’ve given us a classy, stylish, and yet unbelievable comfortable plethora of shoe/boot options that help us do our job better and longer.

We want to hear from you! Did you find this post helpful? What shoes have you found to be the most comfortable? Please share!


More Articles from Our Blog


2 Comments

4 Comments

FujiFilm Announces 30% Price Increase on Film

fuji-30%-increase.jpg

The News

According to the FujiFilm website on February 25th, 2019, FujiFilm Corporation President Kenji Sukeno came out with a public statement that FujiFilm would be enacting a minimum of a 30% price increase on film and photographic paper beginning April 1st, 2019.

With Fuji Prices set to skyrocket at least 30%, one can only wonder what the future holds for film stocks such as Fuji 400H.

Over the past several years, Fujifilm has faced the rising cost of raw materials and logistics. In the past Fujifilm has absorbed some of the costs by undertaking intensive structural reforms and communalization of production facilities, but as a responsible manufacturing company and to provide the high-quality products our customers expect, the company will institute a price increase.
— FujiFilm President, Kenji Sukeno

Thinking Like a Pro

As professional wedding photographers, we always like to have moment to survey our cost of doing business so we can sustainably keep doing what we love. So, let's talk a best case scenario of only a 30% increase. Fuji 400H in 120 is currently around $35 for a box of five rolls (depending on where it is bought, how many you buy at a time, etc.). A 30% increase would mean that same $35 box would end up being $45.50.

With lab rates ranging from $10 to $20 ($15 average) per roll for development and scanning, this could mean that a photographer shooting 10 rolls per wedding at 30 weddings per years (300 rolls shot, developed, and scanned, not counting shipping), would go from spending $6,600 per year to $7,230 per year on shooting film. That's a $630 increase, on average.

Now, $630 might not sound like much, but with our example cost already being over $6k, we believe this could be a sort of “writing on the wall” in regards to the future of film.

Ahead of the Game

This would lead the prudent professional film/hybrid photographer to a few serious considerations:

1. Stock up on Fuji 400H at the best price now, while you can.

2. Consider just how good digital cameras and film presets/profiles are getting, and perhaps consider positioning yourself to have a good transition if film prices go whack, “just in case”. Consider checking out some great alternatives to shooting medium format film.

There's no doubt that we love shooting film for wedding photography. But, we also consider it a priority to ultimately serve the client, while retaining our individual creativity. If film, or rather the cost of film, one day stands between that priority, we’ll have to seriously ask ourselves, “is this film worth the cost?”

Hopefully the market doesn’t force us to ask that question, but perhaps it already is.

In the End

Who knows, maybe FujiFilm will redact their plan to increase prices. But, history has taught us this: prices inevitably increase, but the professionals who know how to adapt and manage their business to best serve their clients will rise to the top.

If you’re interested in growing your business skills as a professional wedding photographer, consider letting us come along side together with you for some coaching! Click here to learn more!

Be sure to voice your thoughts in the comments below! We love hearing from Readers!


More Articles from our Blog


4 Comments